OIL PAN AND OIL STRAINER
EM-35
< REMOVAL AND INSTALLATION >
[VQ40DE]
C
D
E
F
G
H
I
J
K
L
M
A
EM
N
P
O
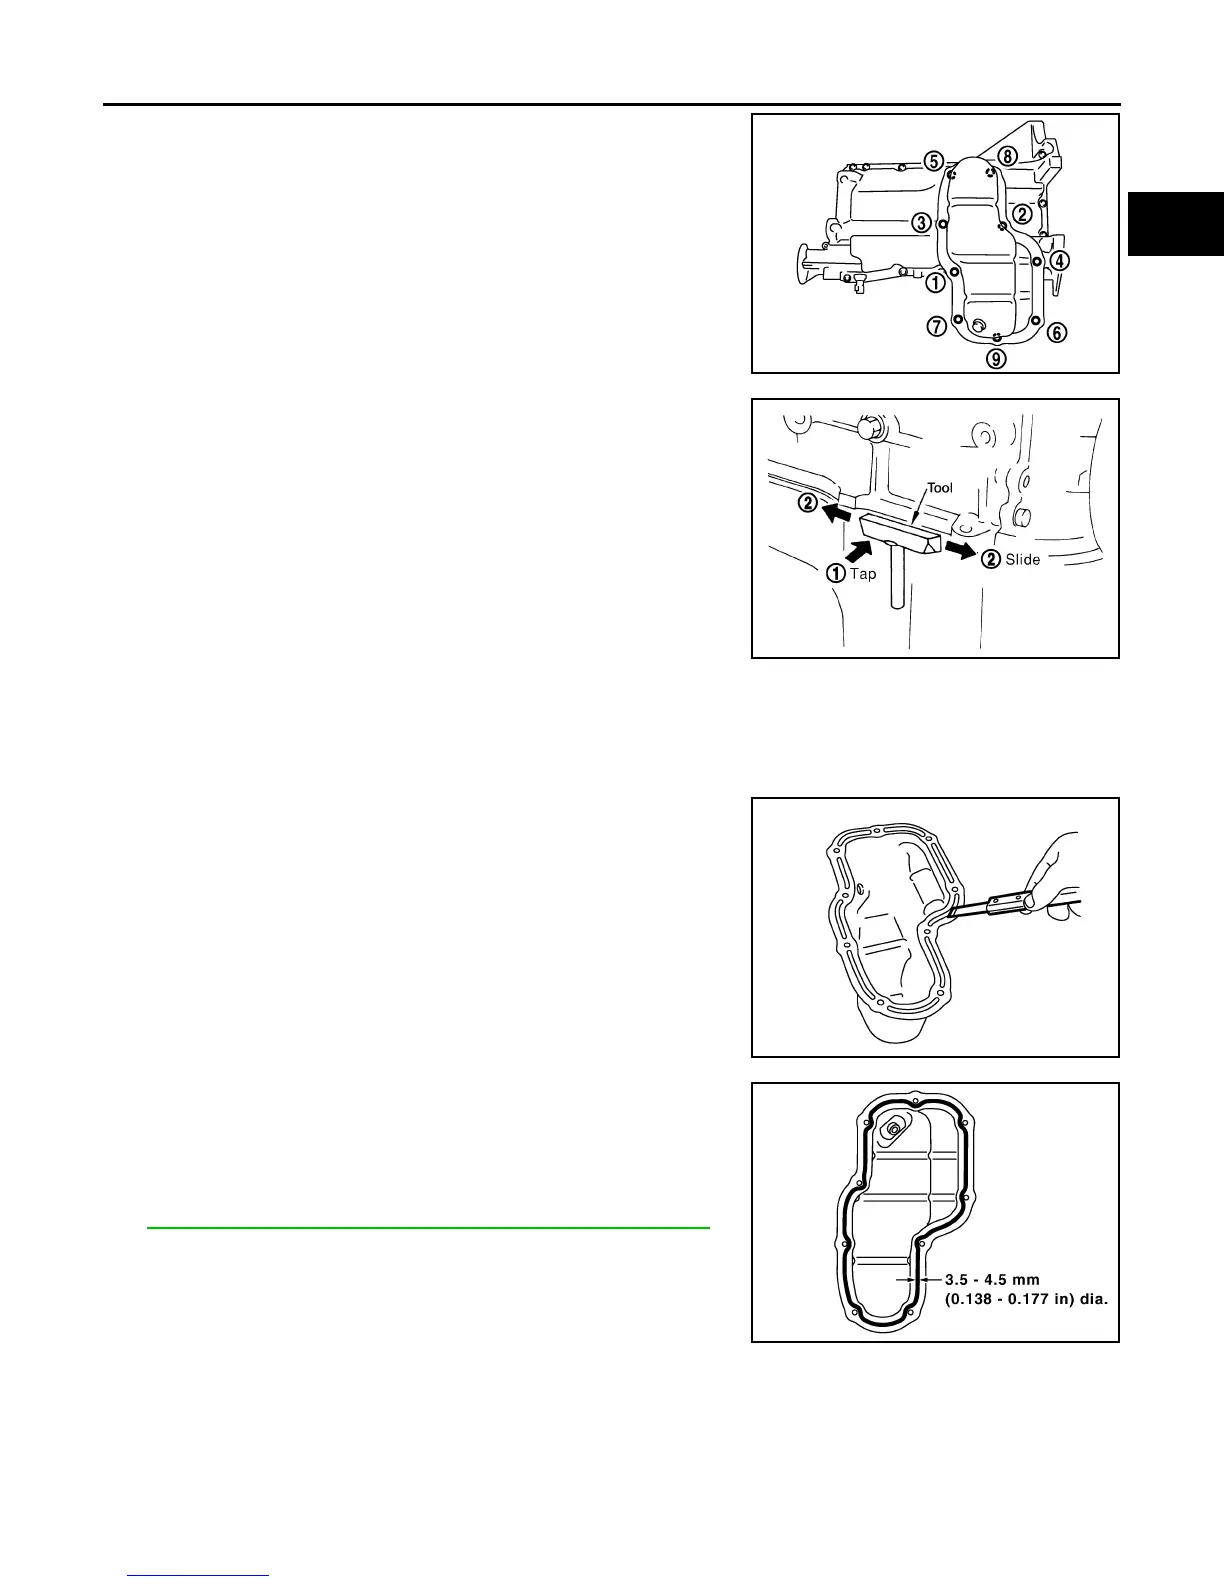
a. Remove the oil pan (lower) bolts using power tool in reverse
order as shown.
b. Insert Tool between the oil pan (lower) and the oil pan (upper).
CAUTION:
• Be careful not to damage the mating surfaces.
• Do not insert screwdriver, this will damage the mating
surfaces.
NOTE:
Tap (1) Tool to insert it and then slide (2) it by tapping on the side
of the Tool as shown.
INSPECTION AFTER REMOVAL
Clean oil strainer if any object attached.
INSTALLATION (LOWER)
1. Install oil pan (lower) as follows:
a. Use scraper to remove old liquid gasket from mating surfaces.
• Also remove old liquid gasket from mating surface of oil pan
(upper).
• Remove old liquid gasket from the bolt holes and thread.
CAUTION:
Do not scratch or damage the mating surfaces when clean-
ing off old liquid gasket.
b. Apply a continuous bead of liquid gasket using Tool to the oil
pan (lower) as shown.
Use Genuine RTV Silicone Sealant or equivalent. Refer to
GI-17, "Recommended Chemical Products and Sealants"
.
CAUTION:
Installation should be done within 5 minutes after coating.
c. Install oil pan (lower).
PBIC2890E
Tool number : KV10111100 (J-37228)
WBIA0566E
PBIC2888E
Tool number : WS39930000 ( — )
PBIC2889E
Revision: January 2013 2013 Xterra