ROCKER COVER
EM-43
< REMOVAL AND INSTALLATION >
[VQ40DE]
C
D
E
F
G
H
I
J
K
L
M
A
EM
N
P
O
3. Remove harness bracket from cylinder head (RH). Refer to EM-88, "Removal and Installation".
4. Disconnect the intake valve timing control solenoid valve (RH bank). Refer to EM-51, "Exploded View"
.
5. Remove ignition coils. Refer to EM-40, "Removal and Installation"
.
6. Remove PCV hoses from rocker cover.
7. Remove PCV valve and O-ring from rocker cover (RH), if necessary.
CAUTION:
Do not reuse O-ring.
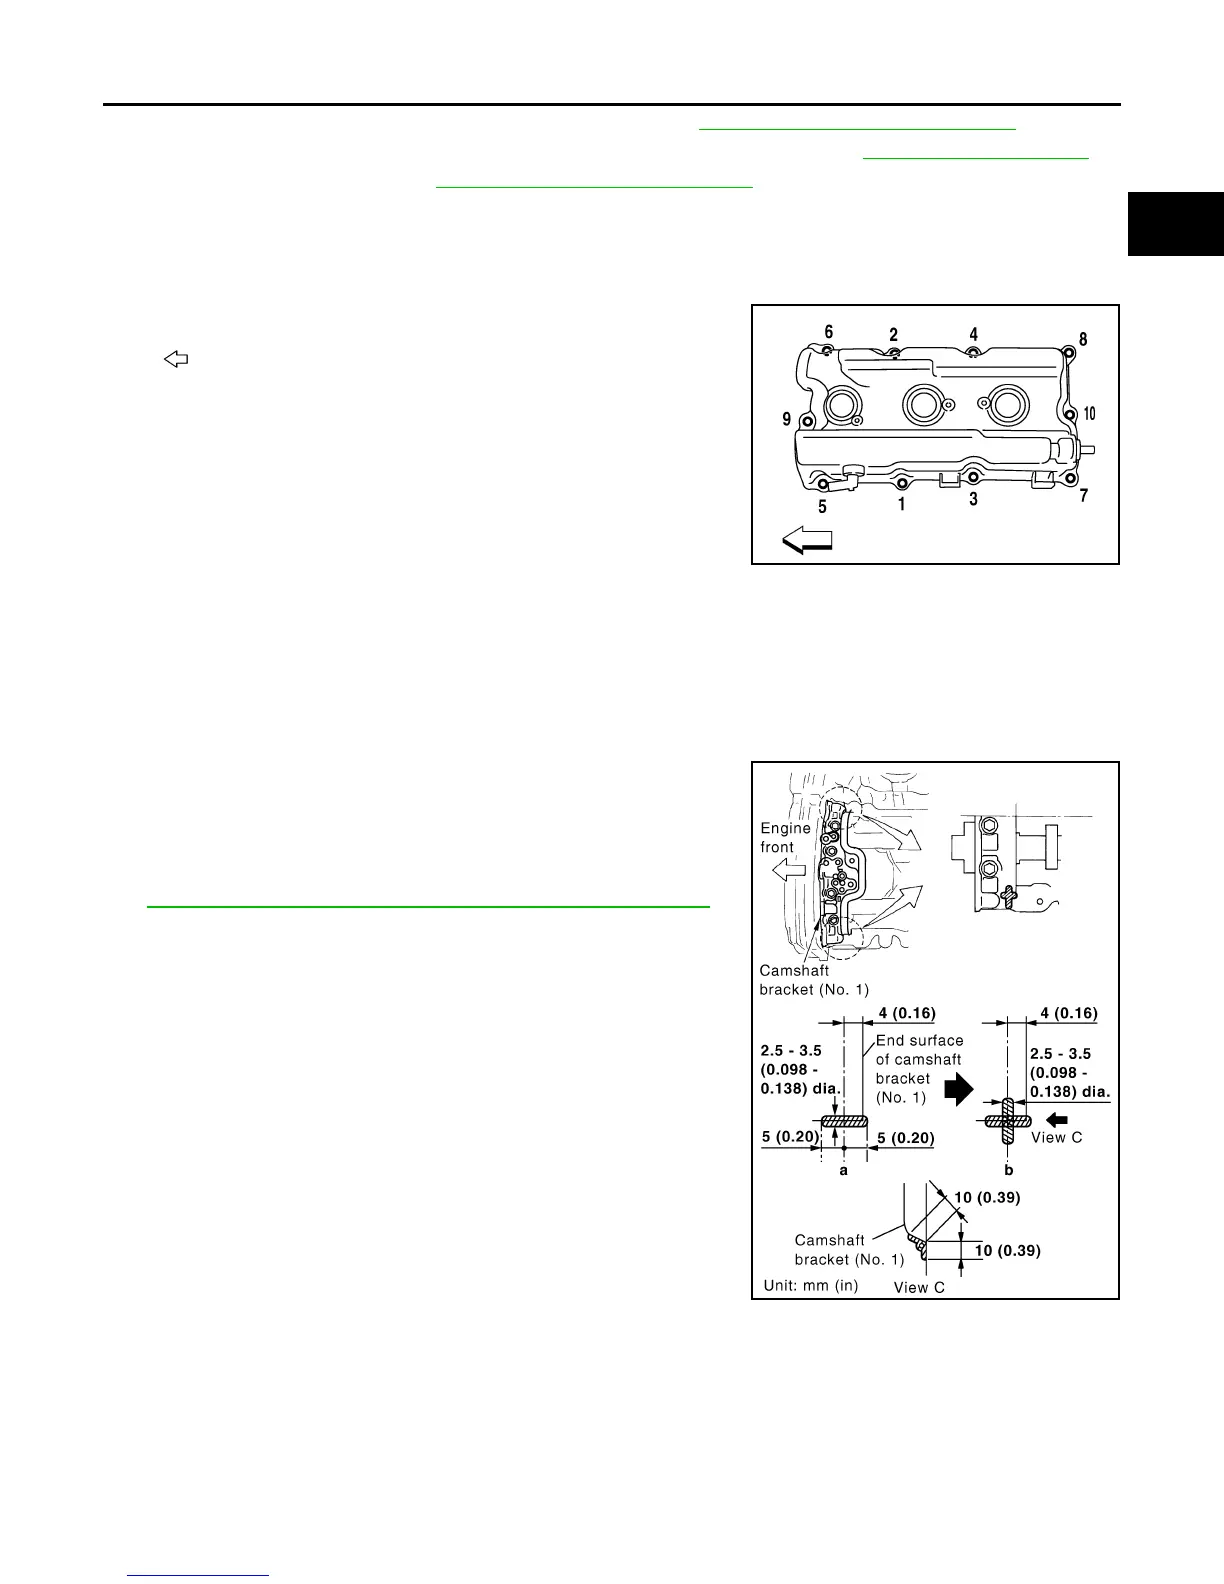
8. Remove the rocker cover bolts using power tool in reverse order
as shown.
• : Front
9. Remove rocker cover.
10. Remove rocker cover gaskets from rocker covers.
11. Use scraper to remove all traces of liquid gasket from cylinder head and camshaft bracket (No. 1).
CAUTION:
Do not scratch or damage the mating surface when cleaning off old liquid gasket.
INSTALLATION (RH)
1. Apply liquid gasket using Tool to joint part among rocker cover,
cylinder head and camshaft bracket (No. 1) as follows:
Use Genuine RTV Silicone Sealant or equivalent. Refer to
GI-17, "Recommended Chemical Products and Sealants"
.
NOTE:
The figure shows an example of LH side [zoomed in shows
camshaft bracket (No. 1)].
a. Apply liquid gasket to joint part of camshaft bracket (a) (No. 1)
and cylinder head.
b. Apply liquid gasket (b) 90° to figure (a).
2. Install new rocker cover gasket to rocker cover.
3. Install rocker cover.
• Check to be sure rocker cover gasket is not dropped from installation groove of rocker cover.
AWBIA0730ZZ
Tool number : WS39930000 ( — )
PBIC2474E
Revision: January 2013 2013 Xterra