FUEL INJECTOR AND FUEL TUBE
EM-49
< REMOVAL AND INSTALLATION >
[VQ40DE]
C
D
E
F
G
H
I
J
K
L
M
A
EM
N
P
O
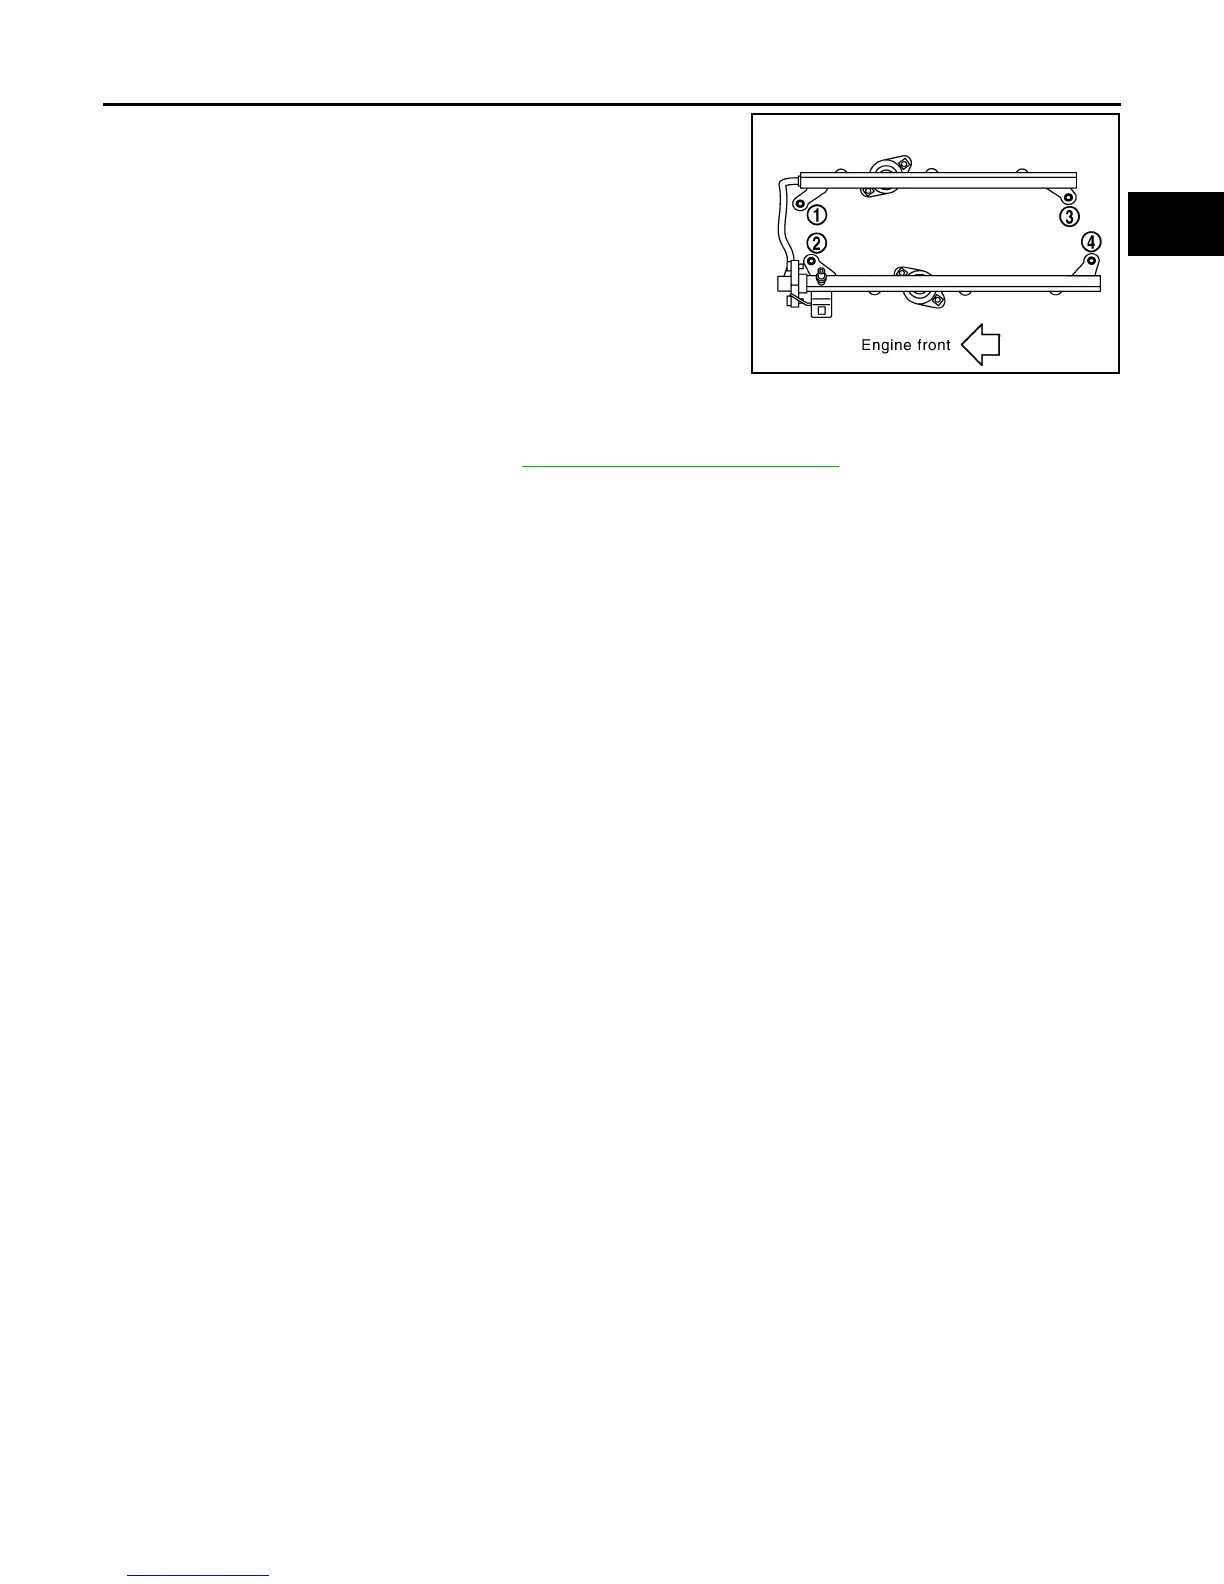
• Tighten bolts in two steps in numerical order as shown.
6. Tighten bolts which connect fuel tube (RH) and fuel tube (LH) to the specified torque.
7. Connect fuel injector harness connector.
8. Install intake manifold collector. Refer to EM-25, "Removal and Installation"
.
9. Installation of the remaining components is in the reverse order of removal.
INSPECTION AFTER INSTALLATION
Check on Fuel Leakage
1. Apply fuel pressure to the fuel lines by turning ignition switch ON (with engine stopped). Then check for
fuel leaks at the connections.
2. Start the engine and rev it up and check for fuel leaks at the connections.
WARNING:
Do not touch engine immediately after stopping, as engine becomes extremely hot.
NOTE:
Use mirrors for checking at points out of clear sight.
Fuel injector tube assembly bolts
1st step : 10.1 N·m (1.0 kg-m, 7 ft-lb)
2nd step : 22.0 N·m (2.2 kg-m, 16 ft-lb)
PBIC2902E
Revision: January 2013 2013 Xterra