FRONT TIMING CHAIN CASE
EM-55
< REMOVAL AND INSTALLATION >
[VQ40DE]
C
D
E
F
G
H
I
J
K
L
M
A
EM
N
P
O
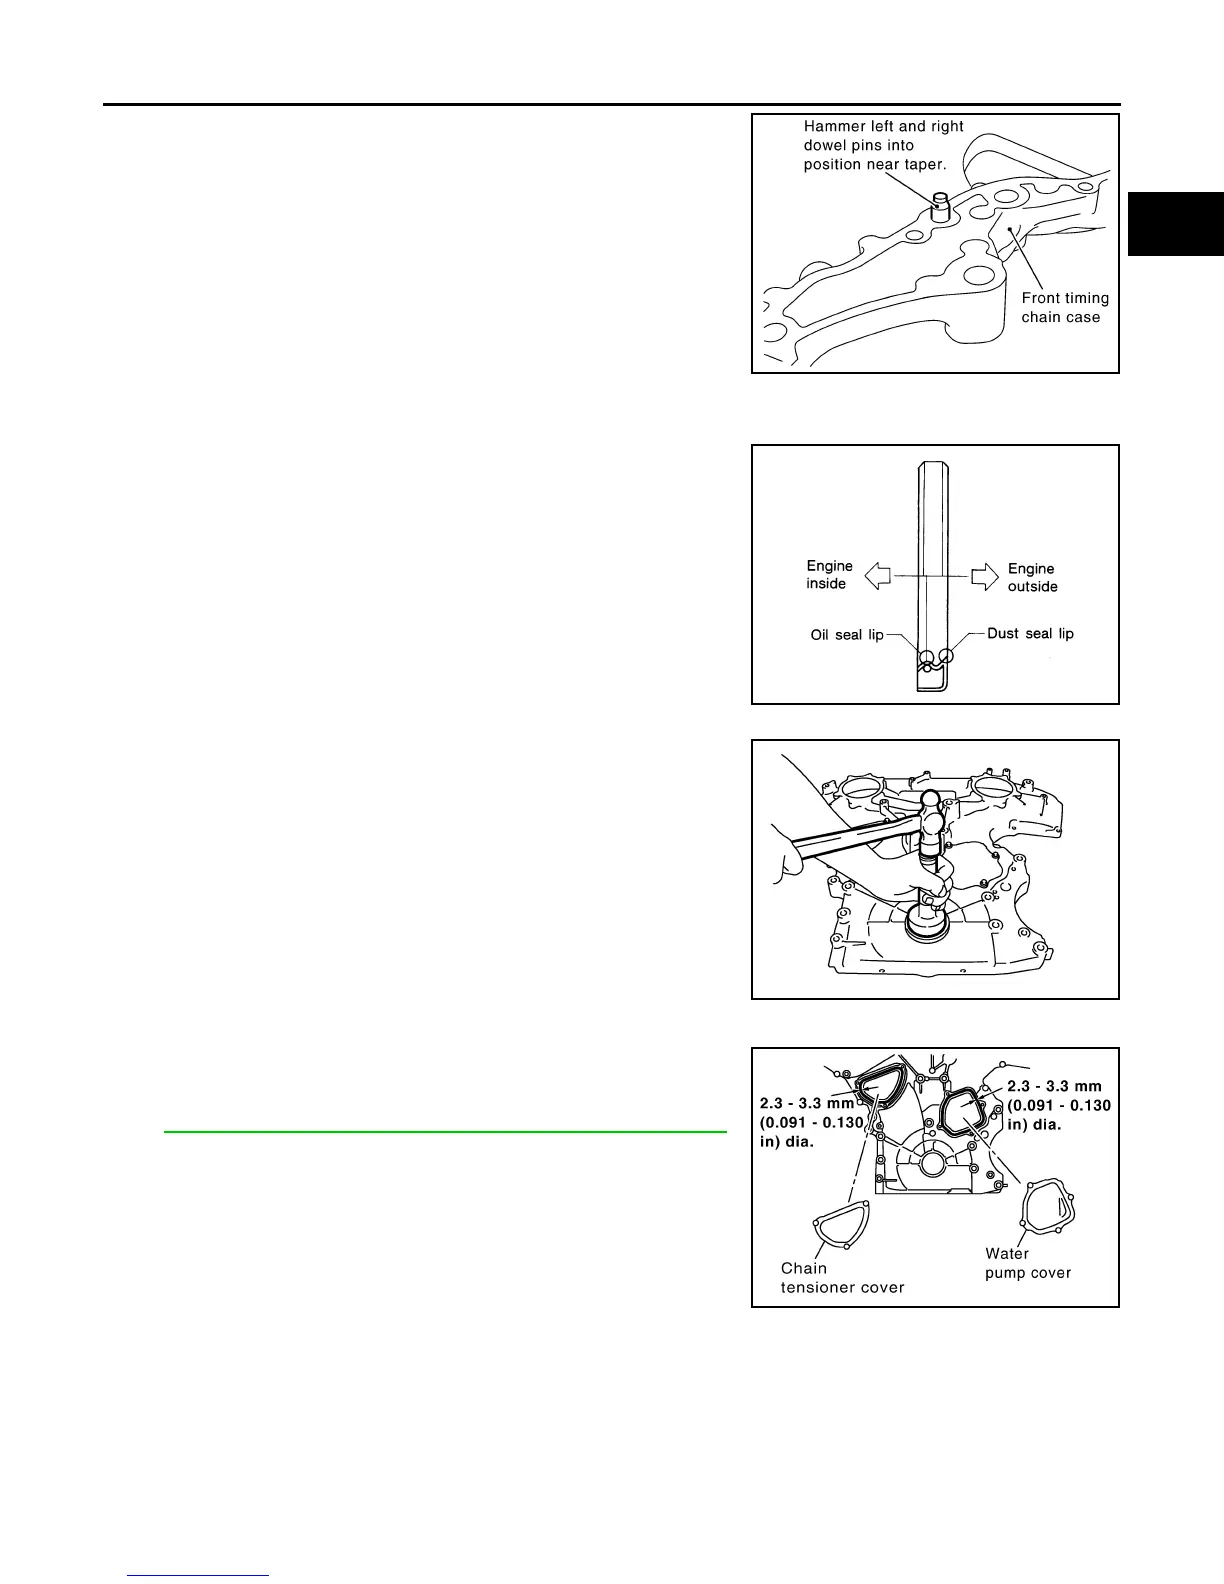
1. Hammer dowel pins (right and left) into front timing chain case
up to a point close to taper in order to shorten protrusion length.
NOTE:
Be sure to place dowel pins in the original holes in front timing
chain case.
2. Install new front oil seal on the front timing chain case.
• Apply new engine oil to both oil seal lip and dust seal lip.
• Install it so that each seal lip is oriented as shown.
• Press-fit oil seal until it becomes flush with front timing chain
case end face using suitable drift [outer diameter: 60 mm (2.36
in)].
• Make sure the garter spring is in position and seal lip is not
inverted.
CAUTION:
• Be careful not to damage front timing chain case and
crankshaft.
• Press-fit straight and avoid causing burrs or tilting oil
seal.
3. Install water pump cover and chain tensioner cover to front timing chain case, if removed.
• Apply a continuous bead of liquid gasket using Tool to front
timing chain case as shown.
Use Genuine RTV Silicone Sealant or equivalent. Refer to
GI-17, "Recommended Chemical Products and Sealants"
.
4. Install idler pulley, if removed.
5. Install front timing chain case as follows:
PBIC2615E
SEM715A
PBIC2911E
Tool number : WS39930000 ( — )
PBIC2912E
Revision: January 2013 2013 Xterra