FRONT TIMING CHAIN CASE
EM-57
< REMOVAL AND INSTALLATION >
[VQ40DE]
C
D
E
F
G
H
I
J
K
L
M
A
EM
N
P
O
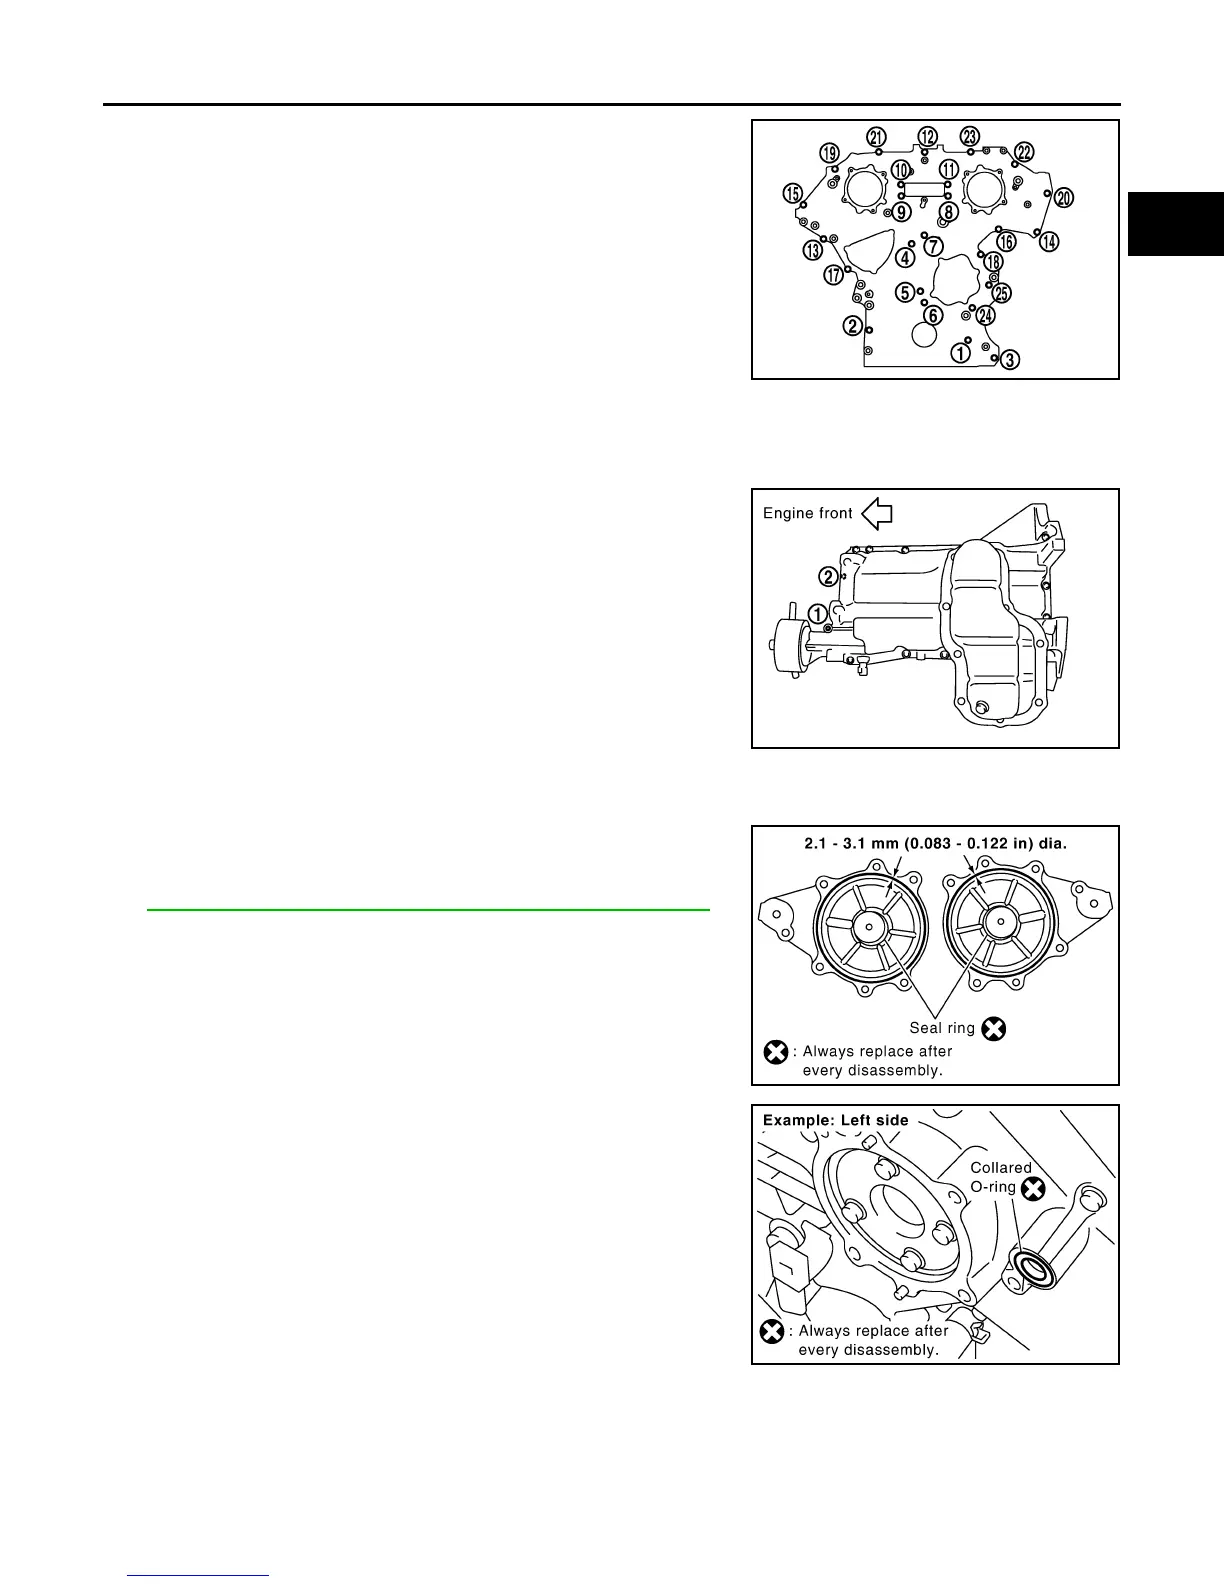
d. Tighten bolts to the specified torque in numerical order as
shown.
e. After all bolts are tightened, retighten them to the specified
torque in numerical order as shown.
• There are two types of bolts.
6. Install two bolts in front of oil pan (upper) in numerical order as
shown.
7. Install right and left intake valve timing control covers as follows:
a. Install new seal rings in shaft grooves.
b. Apply a continuous bead of liquid gasket using Tool to intake
valve timing control covers as shown.
Use Genuine RTV Silicone Sealant or equivalent. Refer to
GI-17, "Recommended Chemical Products and Sealants"
.
c. Install new collared O-rings in front timing chain case oil hole
(left and right sides).
CAUTION:
Do not reuse O-rings.
d. Being careful not to move seal ring from the installation groove, align dowel pins on front timing chain
case with the holes to install intake valve timing control covers.
Bolt position Bolt diameter
1 - 5 : 10 mm (0.39 in)
6 – 25 : 6 mm (0.24 in)
Bolt position Tightening specification
1 - 5 : 55.0 N·m (5.6 kg-m, 41 ft-lb)
6 – 25 : 12.7 N·m (1.3 kg-m, 9 ft-lb)
Front oil pan bolt : 22.0 N·m (2.2 kg-m, 16 ft-lb)
PBIC2908E
PBIC2907E
Tool number : WS39930000 ( — )
SBIA0492E
PBIC2631E
Revision: January 2013 2013 Xterra