EM-68
< REMOVAL AND INSTALLATION >
[VQ40DE]
TIMING CHAIN TENSIONER
11. Remove drive belt auto-tensioner. Refer to EM-14, "Drive Belt Auto-Tensioner and Idler Pulley".
12. Remove chain tensioner cover.
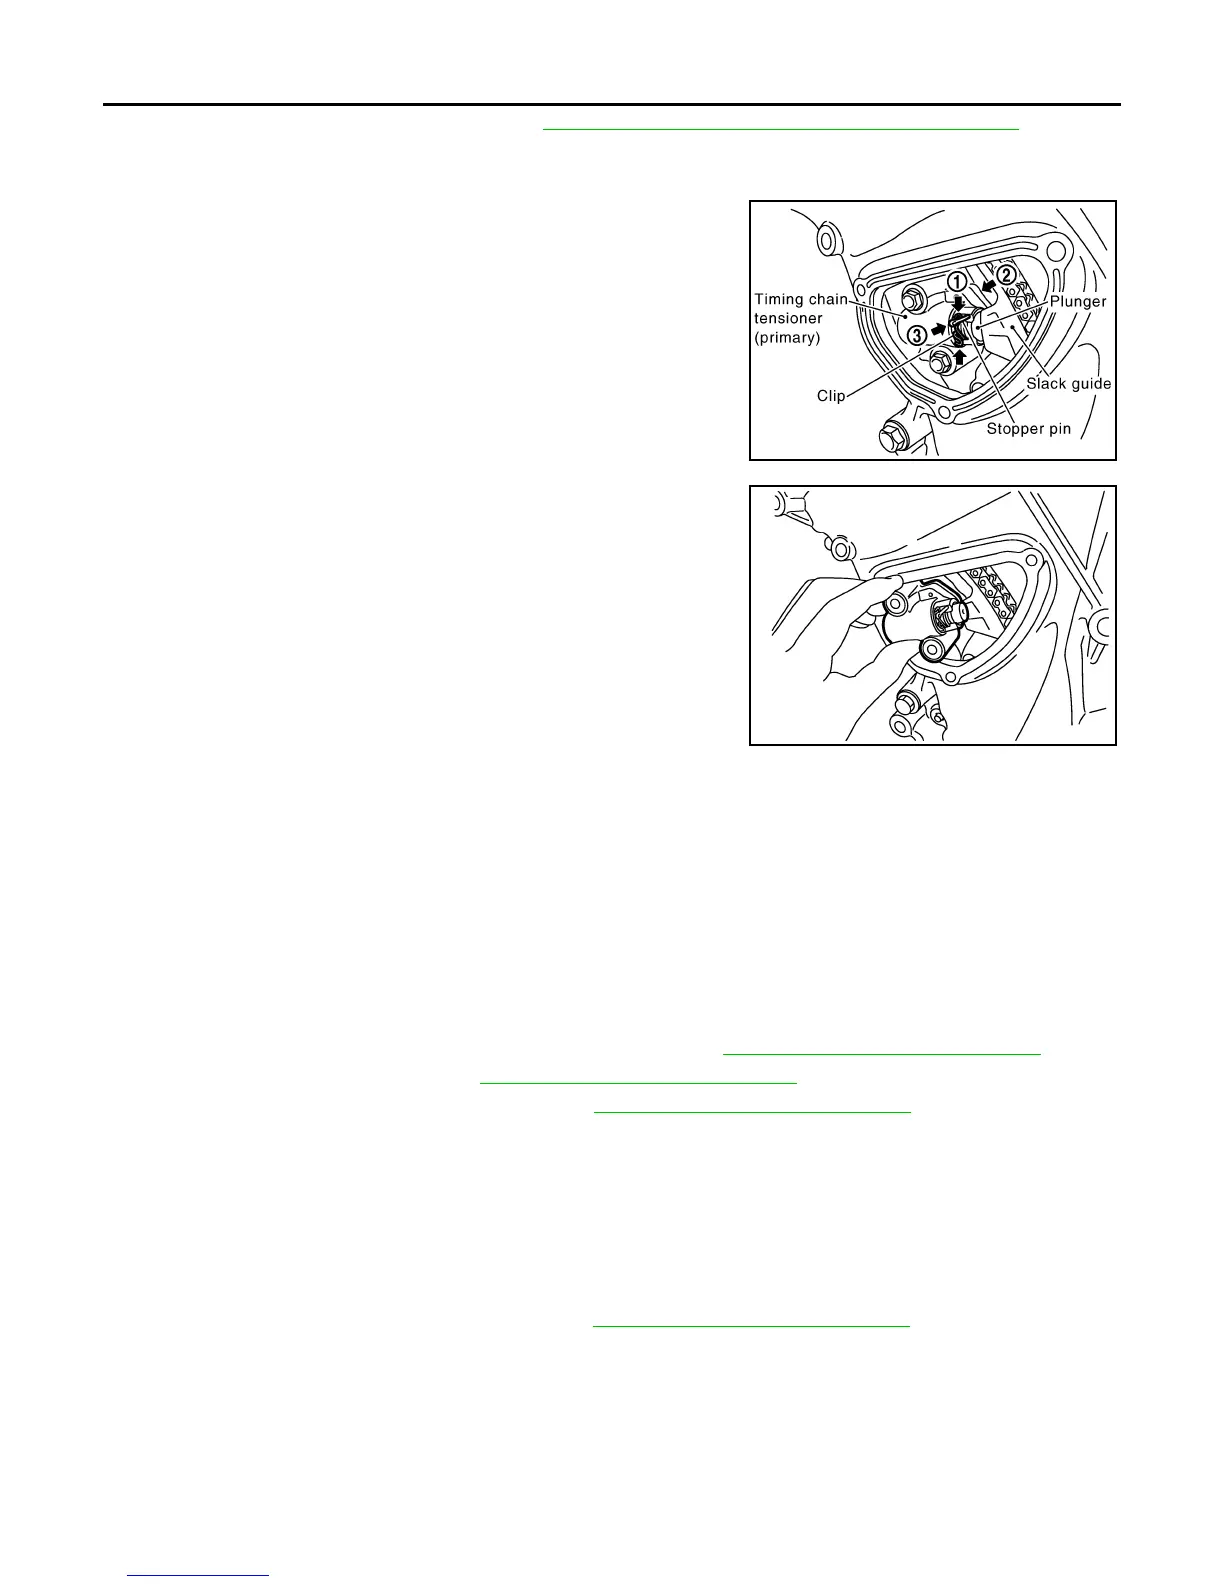
13. Remove timing chain tensioner (primary) as follows:
a. Loosen clip of timing chain tensioner (primary), and release
plunger stopper (1).
b. Depress plunger into tensioner body by pressing slack guide (2).
c. Keep slack guide pressed and insert stopper pin through the
tensioner body hole and plunger groove (3) to hold plunger in.
• Use stopper pin included with Tool J-50246.
d. Remove timing chain tensioner bolts and remove timing chain
tensioner (primary).
CAUTION:
Be careful not to drop timing chain tensioner bolts inside
timing chain case.
INSTALLATION
Installation is in the reverse order of removal.
• When installing timing chain tensioner (primary), push in plunger and keep it pressed in with stopper pin.
• Remove any dirt and foreign materials completely from the back and the mounting surfaces of primary tim-
ing chain tensioner.
• After installation, pull out stopper pin.
Removal and Installation (Secondary Timing Chain Tensioner) INFOID:0000000008798987
REMOVAL
1. Remove the timing chains (primary) and (secondary). Refer to EM-59, "Removal and Installation".
2. Remove the rocker covers. Refer to EM-41, "Removal and Installation"
.
3. Remove the camshaft brackets (No. 1). Refer to EM-76, "Removal and Installation"
.
4. Remove the secondary timing chain tensioners.
INSTALLATION
Installation is in the reverse order of removal.
Removal and Installation (Secondary Timing Chain Tensioner Shoe) INFOID:0000000008798988
REMOVAL
1. Remove the timing chains (secondary). Refer to EM-59, "Removal and Installation".
PBIC2835E
PBIC2836E
Revision: January 2013 2013 Xterra