CAMSHAFT
EM-77
< REMOVAL AND INSTALLATION >
[VQ40DE]
C
D
E
F
G
H
I
J
K
L
M
A
EM
N
P
O
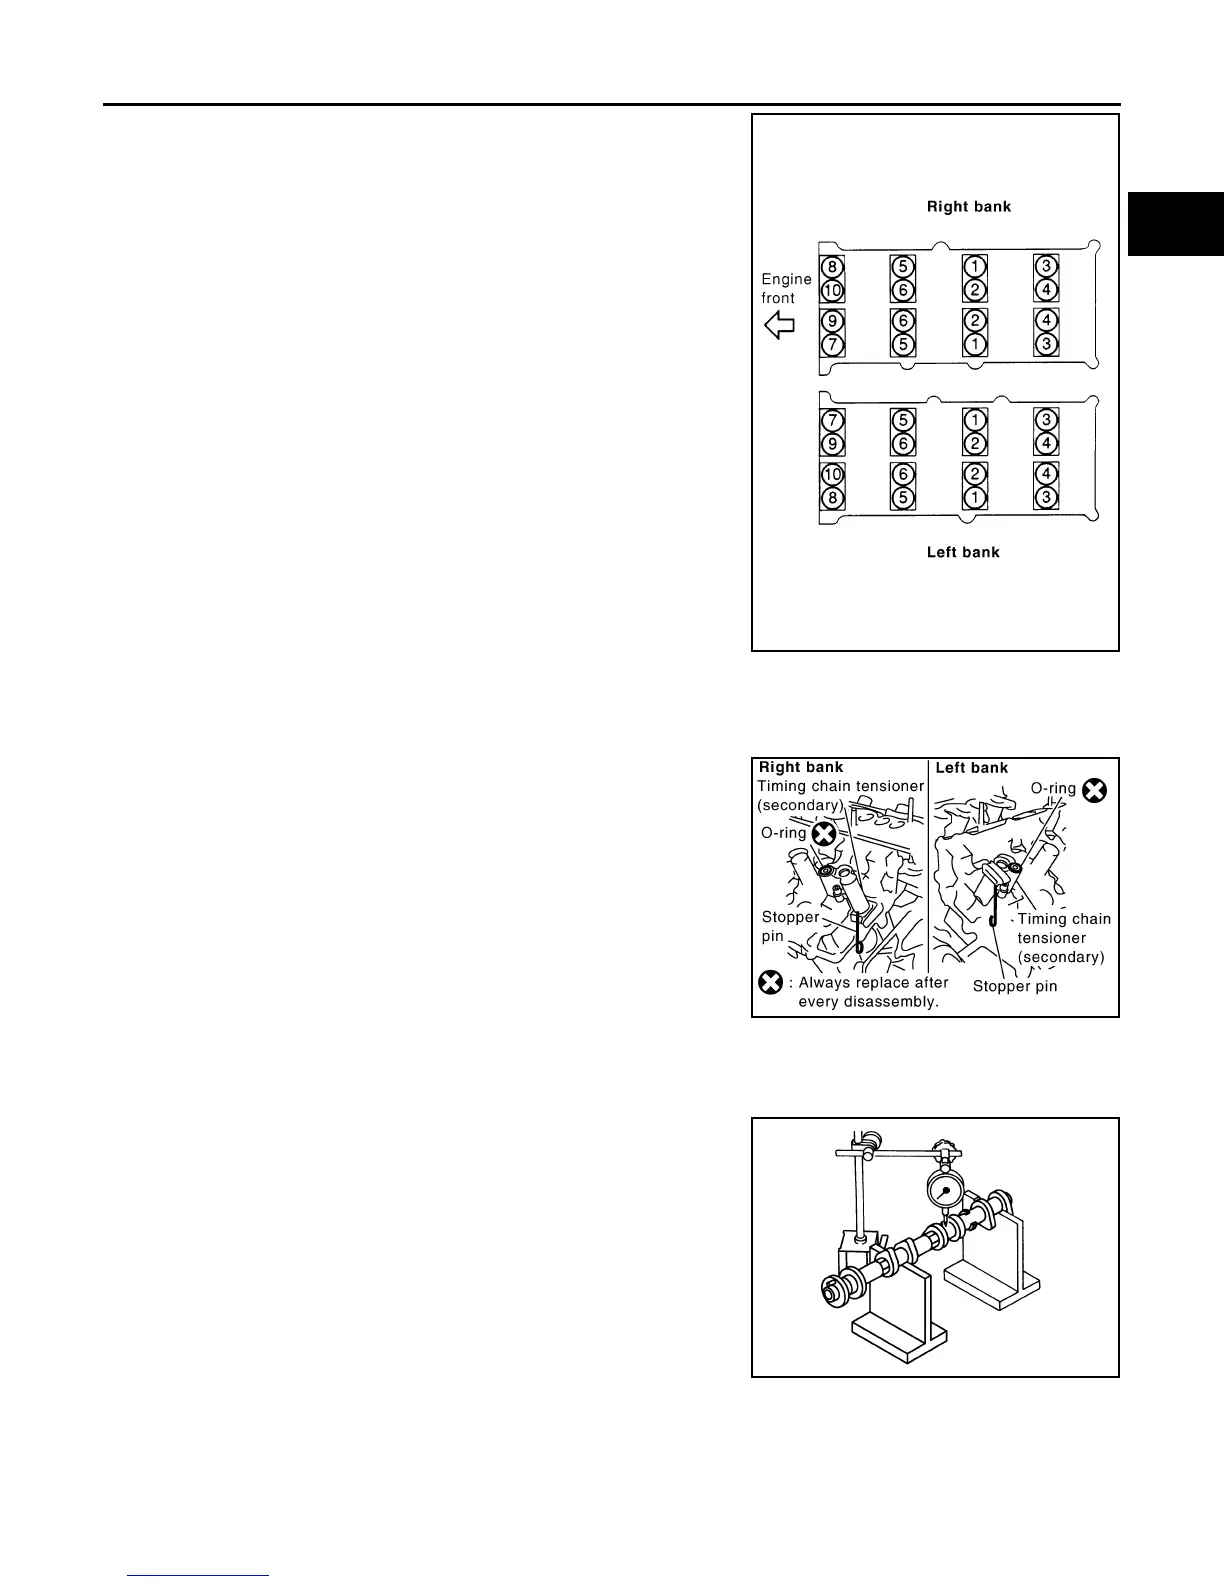
• Equally loosen camshaft bracket bolts in several steps in
reverse order as shown.
11. Remove camshafts.
12. Remove valve lifters, if necessary.
• Identify installation positions, and store them without mixing them up.
13. Remove timing chain tensioner (secondary) from cylinder head.
• Remove timing chain tensioner (secondary) with its stopper
pin attached.
NOTE:
Stopper pin was attached when timing chain (secondary) was
removed.
INSPECTION AFTER REMOVAL
Camshaft Runout
1. Put V-block on precise flat table, and support No. 2 and 4 journal
of camshaft.
CAUTION:
Do not support journal No. 1 (on the side of camshaft
sprocket) because it has a different diameter from the other
three locations.
2. Set dial indicator vertically to No. 3 journal.
3. Turn camshaft to one direction with hands, and measure the
camshaft runout on dial indicator. (Total indicator reading)
4. If it exceeds the limit, replace camshaft.
Camshaft Cam Height
PBIC2050E
PBIC2111E
Standard : Less than 0.02 mm (0.0008 in)
Limit : 0.05 mm (0.0020 in)
PBIC0929E
Revision: January 2013 2013 Xterra