EM-76
< REMOVAL AND INSTALLATION >
[VQ40DE]
CAMSHAFT
Removal and Installation
INFOID:0000000008798992
REMOVAL
1. Release the fuel pressure. Refer to EC-491, "Fuel Pressure Check".
2. Disconnect the battery negative terminal. Refer to PG-72, "Removal and Installation"
.
3. Remove front wheels and tires. Refer to WT-47, "Adjustment"
.
4. Remove front fender protectors. Refer to EXT-22, "Removal and Installation"
.
5. Remove intake manifold collector. Refer to EM-25, "Removal and Installation"
.
6. Remove rocker covers. Refer to EM-41, "Removal and Installation"
.
7. Remove front timing chain case, camshaft sprockets, timing chains and rear timing chain case. Refer to
EM-51, "Removal and Installation"
and EM-76, "Removal and Installation" and EM-59, "Removal and
Installation" andEM-70, "Removal and Installation"
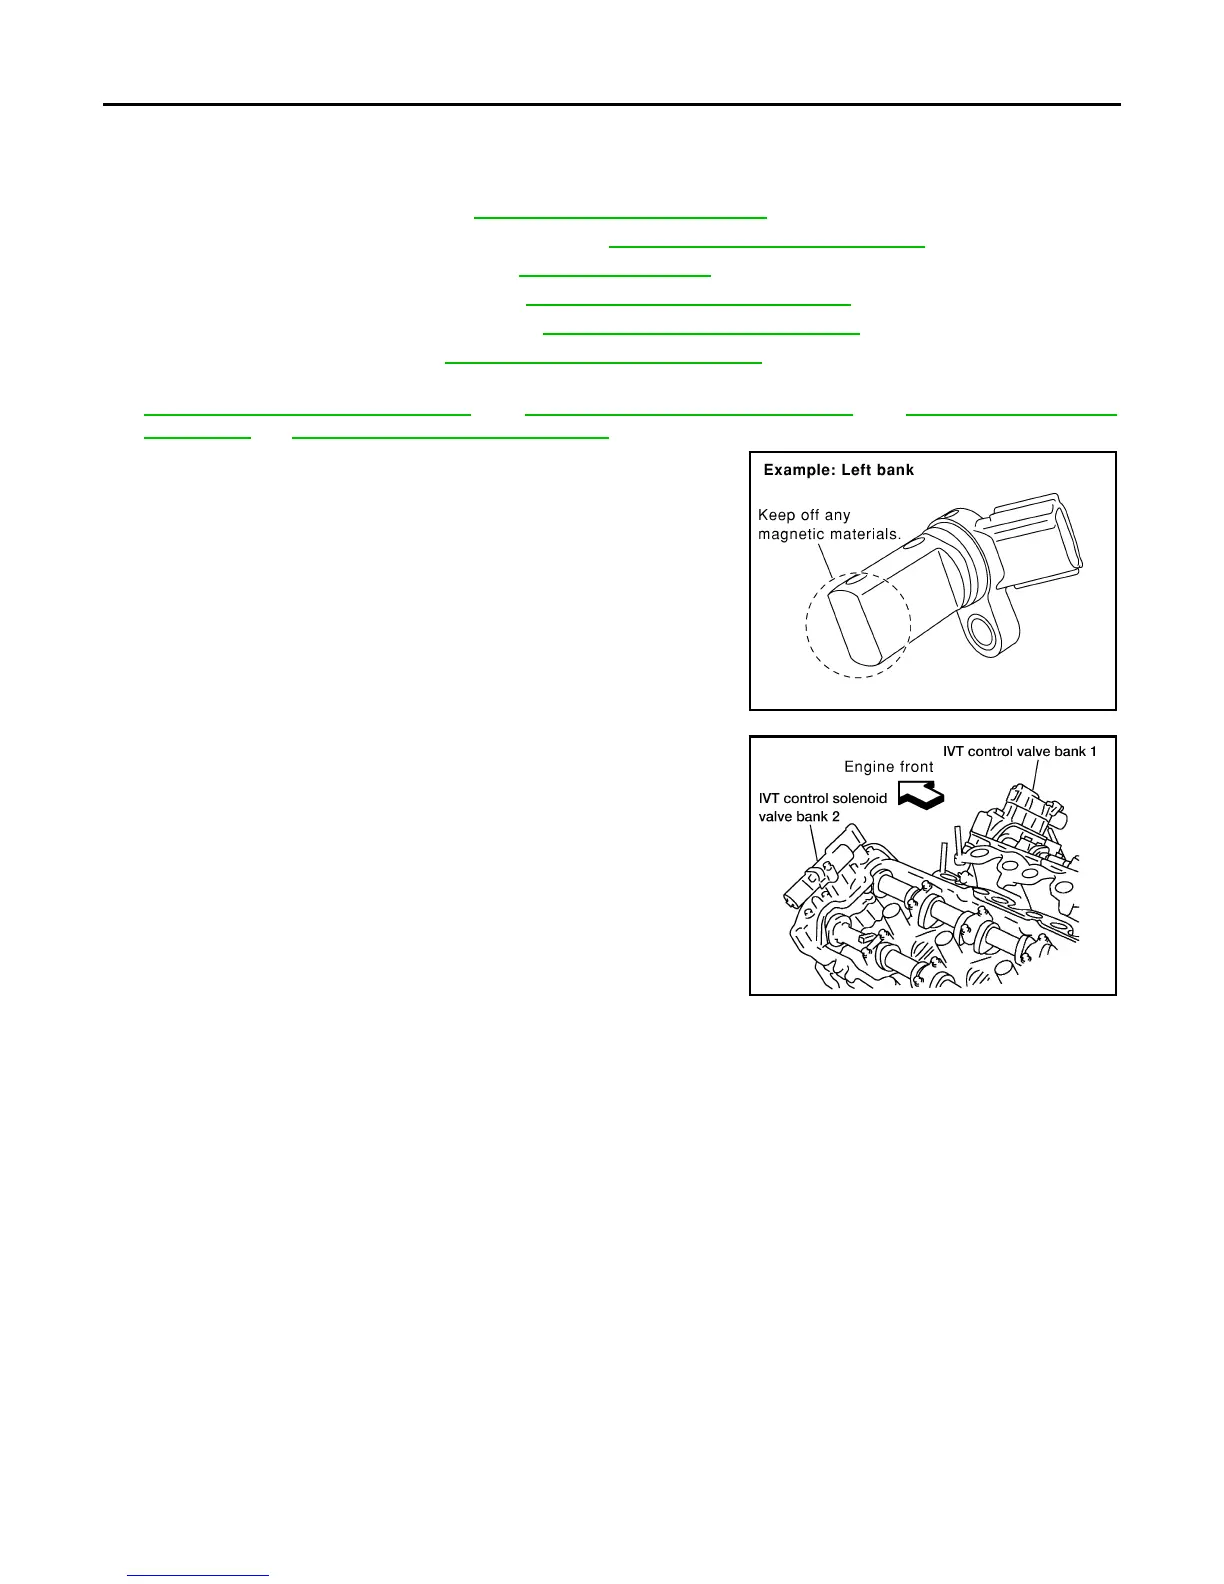
8. Remove camshaft position sensor (PHASE) (right and left
banks) from cylinder head back side.
CAUTION:
• Handle carefully to avoid dropping and shocks.
• Do not disassemble.
• Do not allow metal powder to adhere to magnetic part at
sensor tip.
• Do not place sensors in a location where they are
exposed to magnetism.
9. Remove intake valve timing control solenoid valves.
• Discard intake valve timing control solenoid valve gaskets and
use new gaskets for installation.
10. Remove camshaft brackets.
• Mark camshafts, camshaft brackets and bolts so they are placed in the same position and direction for
installation.
KBIA1046E
WBIA0169E
Revision: January 2013 2013 Xterra