[ Edit: 2012/ 4/ 9 Model: E26-A ]
6-8 In case of emergency
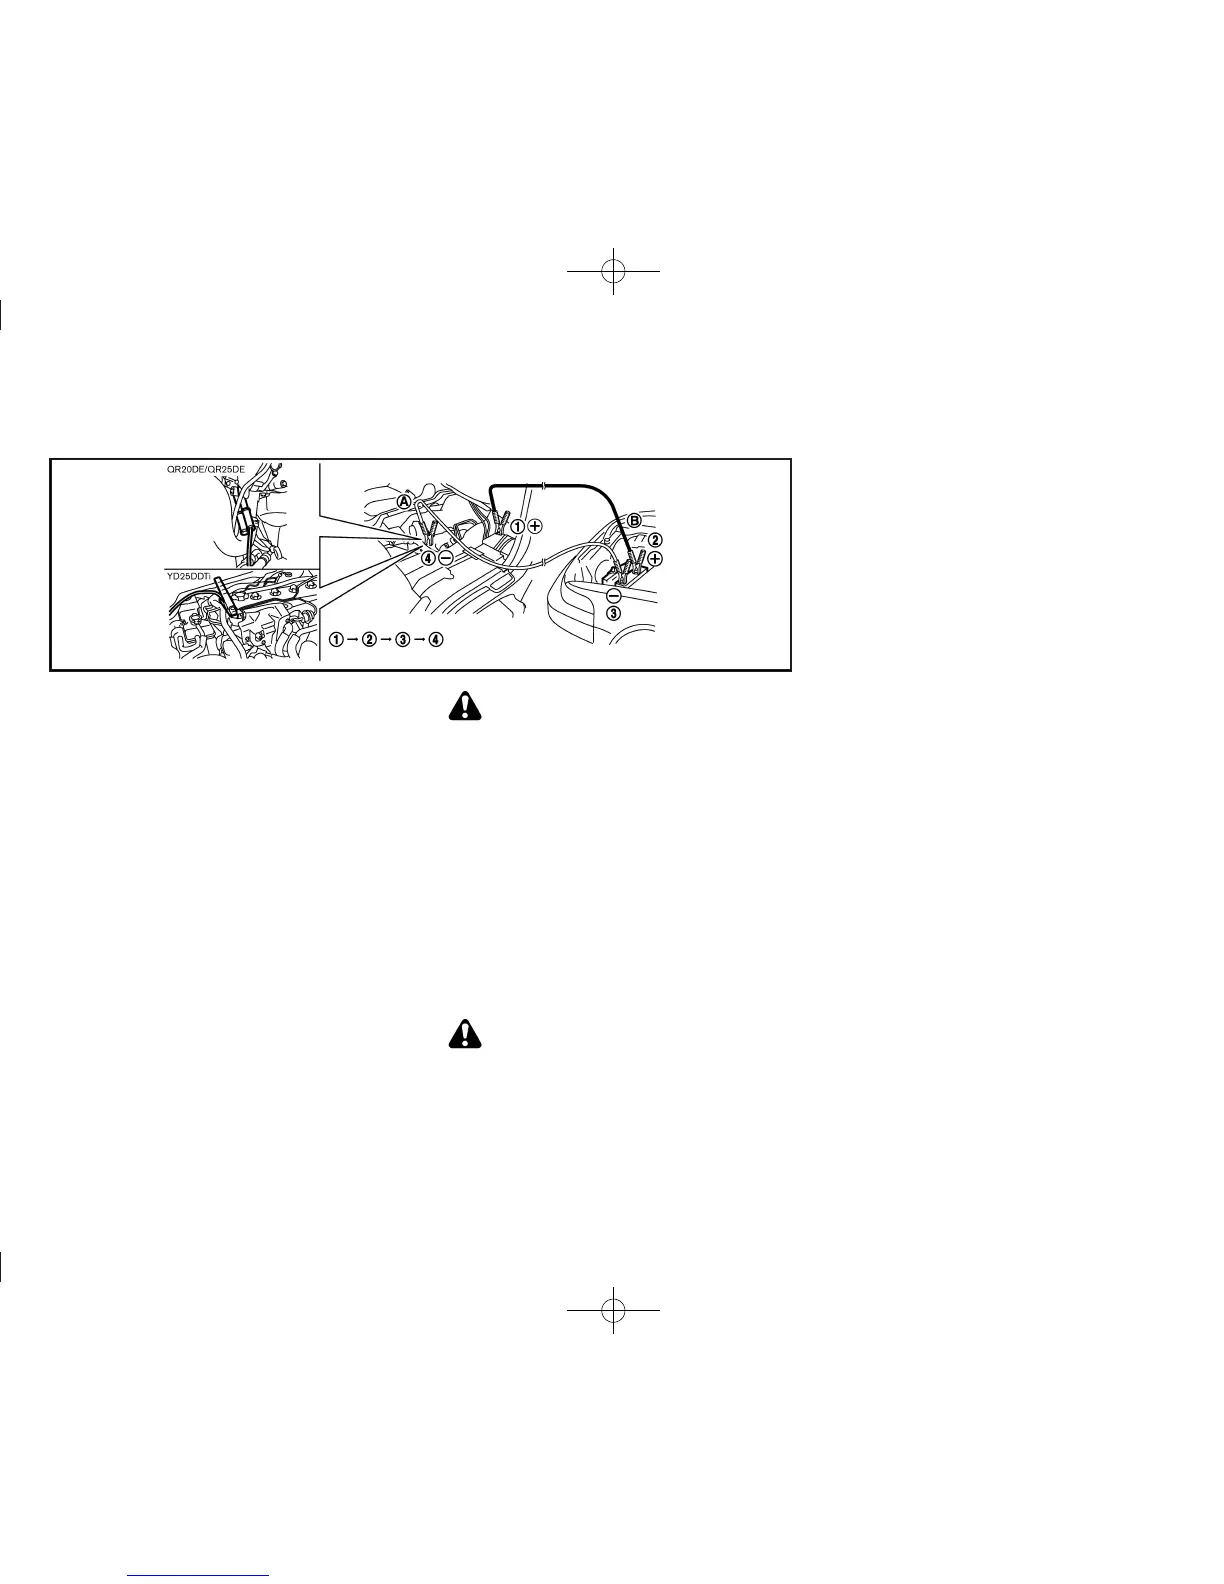
JVE0046X
Your vehicle battery is located under the front left-side
seat. Open the engine room inspection cover and
approach the battery. For more details of opening the
engine room inspection cover, see “Engine room
inspection cover” (P.8-5).
1. If the booster battery is in another vehicle
*
B
,
position the two vehicles
*
A
and
*
B
to bring the
batteries into close proximity to each other.
2. Apply the parking brake.
3. Automatic Transmission (AT) model: Move the
selector lever to the “P” (Park) position.
Manual Transmission (MT) model: Move the shift
lever to the “N” (Neutral) position.
4. Switch off all unnecessary electrical systems
(headlights, heater, air conditioner, etc.).
5. Turn the ignition switch to the “LOCK” position.
6. Remove the vent caps, if equipped, on the battery.
7. Cover the battery with a firmly wrung out moist
cloth to reduce the hazard of an explosion.
8. Connect the jumper cables in the sequence as
illustrated (
*
1
,
*
2
,
*
3
,
*
4
).
CAUTION:
. Always connect positive + to positive + and
negative 7 to body ground, NOT to the
battery’s negative 7.
. Be sure that the jumper cables do not touch
moving parts in the engine compartment.
. Be sure that the jumper cable’s clamps do
not contact any other metal.
9. Start the engine of the booster vehicle
*
B
and let
it run for a few minutes.
10. Depress the accelerator pedal of the booster
vehicle
*
B
at about 2,000 rpm.
11. Start the engine of the jumped vehicle
*
A
in the
normal manner.
CAUTION:
Never keep the starter motor engaged for more
than 10 seconds. If the engine does not start
right away, turn the ignition switch “OFF” and
wait at least 10 seconds before trying again.
12. After the engine is started, carefully disconnect
the jumper cables in the opposite sequence from
that illustrated (
*
4
,
*
3
,
*
2
,
*
1
).
13. Remove and dispose of the cloth as it may be
contaminated with corrosive acid.
14. Replace the vent caps, if removed.
 Loading...