This document is an installation, operation, and service manual for Noble Glasswasher Dishmachines, specifically the CG-1200 and CG-115 models.
Function Description:
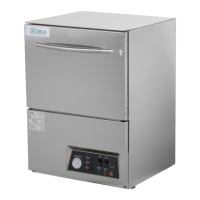
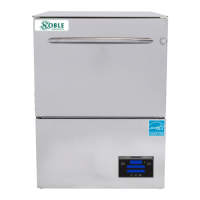
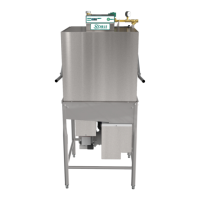
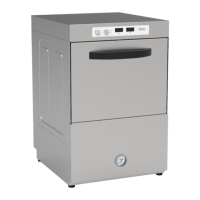
The Noble CG-1200 and CG-115 are commercial glasswasher dishmachines designed for warewashing. They utilize a carousel-type system with electric tank heat, detergent, rinse-aid, and sanitizer chemical feeder pumps to clean and sanitize glasses. The CG-1200 operates on 208V or 230V, while the CG-115 operates on 115V. Both models are designed to provide efficient and effective cleaning and sanitization of glassware in commercial settings.
Important Technical Specifications:
- Operating Capacity (Glasses per Hour):
- CG-1200: 1200
- CG-115: 1200
- Operating Cycle (Seconds):
- Total Cycle Time: 120 seconds for both models.
- Tank Capacity (Gallons):
- 3.0 gallons for both models.
- Wash Pump Capacity (GPM):
- Water Temperatures (°F):
- Minimum Wash Temperature: 130°F for both models.
- Minimum Rinse Temperature: 75°F for both models.
- Other Water Requirements:
- Cold Water Flow Pressure (PSI): 20 ± 5 for both models.
- Hot Water Flow Pressure (PSI): 20 ± 5 for both models.
- Gallons per Hour: 10.0 for both models.
- Water Line Size (NPT): 1/2" for both models.
- Drain Line Size (NPT): 1 1/2" for both models.
- Minimum Chlorine Required (PPM): 50 for both models.
- Minimum Iodophor Required (PPM): 12.5 for both models.
- Electrical Loads (as applicable):
- CG-1200 (208V/230V):
- Wash Motor (HP): 0.1
- Wash Heater (kW): 2.7 (208V)/3.3 (230V)
- Total Load (Amps): 13.5A (208V)/14.8A (230V)
- CG-115 (115V):
- Wash Motor (HP): 0.1
- Wash Heater (kW): 1.3
- Total Load (Amps): 14.4A
- Dimensions:
- Top View (approximate): 25 1/4" [641 mm] width, 25" [635 mm] depth.
- Side View (approximate): 27 5/8" [703 mm] height, 19 1/2" [495 mm] depth.
- Front View (approximate): 25 1/4" [641 mm] width, 27 5/8" [703 mm] height.
- Dish Clearance: 12" [305 mm].
- Adjustable feet can increase all dimensions from the floor by 1 1/4".
- Drain Connection: 1 1/2".
- Water Inlet (Hot/Cold): 1/2".
- Electrical Connection.
Usage Features:
- Installation: Requires proper inspection upon delivery, careful unpacking, and leveling using adjustable bullet feet. All plumbing and electrical connections must comply with local, state, territorial, and national codes. Incoming water lines must be flushed of debris before connection.
- Cold water supply: minimum 75°F, 180 GPH at 8-12 PSI.
- Hot water supply: minimum 120°F (CG-1200) / 130°F (CG-115), 10 GPH at 20 ± 5 PSI.
- Gravity drain (2" NPT connection) with a minimum 2" NPT pipe size and an air-gap to the floor sink or drain. A grease trap, if required, should have a flow capacity of 5 GPM.
- Electrical connections require a 3/4" conduit from the underside to the electrical box, with power wires connected to the power block and grounding lug. "DE-OX" or similar anti-oxidation agent is recommended for power connections.
- Voltage check is crucial to ensure incoming power matches the data plate.
- The dishmachine generates higher temperatures, so surrounding countertops, cabinets, flooring, and subfloor materials must be designed for these conditions.
- Operation:
- Preparation: Ensure wash strainer is clean, rinse strainer is clean, drain stopper is installed, and chemical levels in containers are correct.
- Filling the Wash Tub: Turn the power switch to "FILL" position; the unit will automatically begin to fill. Verify temperatures before operating.
- Ware Preparation: Remove scraps from ware, pre-rinse, and pre-soak. Place cups and glasses upside-down on the carousel to prevent water retention.
- Washing a Rack of Ware: Turn the power switch to "ON" to start carousel rotation. Place glasses upside-down on the carousel. The paddle switch activates to turn off water and carousel when the cycle is complete. Remove clean glasses. The carousel will rotate again.
- Operational Inspection: Regularly inspect strainers for clogs and clean as needed to maintain washing capability.
- Shutdown & Cleaning:
- Turn power switch to "OFF".
- Remove and clean drain boards, rack cylinder, wash strainer, wash arm, bottom stop cap, rinse arm, end-caps, separator, and upper rinse strainer.
- Clean all components with a brush and flush with fresh water.
- Wipe out the interior of the machine.
- Replace all components, ensuring the top stop cap opening aligns with the guide tab on the manifold for easy arm installation.
- Use stainless steel polish to clean and protect the exterior.
- Detergent Control: Water hardness and detergent usage significantly impact efficiency. A water treatment specialist can help optimize detergent use. Treated water can reduce spotting. Operators should be trained on proper detergent usage and to monitor water temperatures, reporting any deviations from minimum requirements.
- Deliming: Regular deliming is necessary to remove lime and corrosion deposits. This involves disconnecting the detergent pump, draining and refilling the wash tank, adding deliming solution, running the machine, inspecting, and then running two cycles to remove residual solution.
Maintenance Features:
- Preventative Maintenance:
- Ensure water temperatures match data plate.
- Clean all strainers regularly.
- Ensure all wash and rinse arms are secure.
- Ensure drain stopper is installed correctly.
- Remove soil from glasses before loading.
- Do not overfill the carousel.
- Ensure glasses are placed upside-down.
- Verify chemical injection.
- Clean the machine at the end of every workday.
- Follow all safety procedures and codes.
- Troubleshooting: The manual provides a comprehensive troubleshooting guide for common problems such as:
- Dishmachine not running (no voltage).
- Machine cycling continuously.
- Machine not filling (other functions work).
- Machine filling continuously (even with no power).
- Wash motor not running.
- Wash motor running continuously.
- Low water pressure.
- No indication of pressure.
- Low wash water pressure at wash arm spray nozzles.
- Machine keeps tripping service breaker.
- Machine not holding water.
- Sanitizer pump running continuously.
- Sanitizer pump not running during cycle but runs when primed.
- Prime switch not activating sanitizer pump.
- Sanitizer pump not running during cycle or through prime switch.
- Detergent not feeding (rinse-aid feeds okay).
- Rinse-aid pump not feeding (detergent feeds okay).
- Wash heater not working.
- Service Procedures (for authorized personnel only):
- Chemical Feeder Pump Motor Replacement: Involves securing power and water, draining the unit, accessing the motor, disconnecting wires, removing the pump cover, roller, and mounting screws, then replacing the motor and reassembling.
- Wash Tank Heater Replacement: Requires securing power and water, draining the unit, removing the front door, heater box cover, lower strainer, thermostat, thermostat bracket, upper strainer, heater wires, mounting nuts, and then replacing the heater and gasket, followed by reassembly.
- Thermostat Replacement: Similar to heater replacement, involves securing power and water, draining the unit, removing the front door, heater box cover, disconnecting thermostat terminals and wires, removing the thermostat and bracket, loosening brass fitting, replacing the probe and fitting, and reassembling.
- Wash Motor Replacement: Requires accessing the rear of the unit (potentially disconnecting water, drain, and power lines), loosening clamps on the suction hose and dischage hose, removing motor mounting nuts, and replacing the motor.
Safety Precautions:
The manual emphasizes several safety warnings, including:
- Risk of injury to personnel.
- Risk of damage to equipment.
- Risk of electrical shock.
- Reference data plate for information.
- Caustic chemicals warning.
- Ground wire warning.
- Lockout electrical power warning.
- Important notes.
- WARNING: Inspection, testing, and repair of electrical equipment should only be performed by qualified service personnel. Always disconnect and tag-out electrical power at the breaker or disconnect switch before performing service.
- CAUTION: Do NOT beat strainers to remove debris. Ensure all components are clean before replacing them. Work performed by unauthorized personnel may void the warranty. Contact a qualified service agency for warranty-related maintenance.