EasyManua.ls Logo

Noctua NF-A6x25 5V - User Manual

Noctua NF-A6x25 5V
2 pages
Print Icon
To Next Page IconTo Next Page
Loading...
After you’ve identified the individual leads, please proceed
with the following steps to install the OmniJoin adaptor:
Installation
If you replace an existing 60mm fan with the NF-A6x25 in devices
such as storage or network solutions, it is usually best to use the
screws (or other mounting mechanism) used for the original fan.
When installing the NF-A6x25 as a case fan, you can either use
the supplied mounting screws or silicone anti-vibration mounts. In
order to install the fan using the silicone mounts, please first pull the
silicone mounts through the mounting holes of the case. Then put the
fan onto the silicone mounts and pull them through the mounting
holes of the fan:
Connection
The NF-A6x25 5V features a standard 3-pin fan connector. However,
please note that the fan can also be connected to standard 4-pin fan
headers. If you would like to connect the fan to a 2-pin fan header,
please use the supplied OmniJoin adaptor set as described below.
Note that the NF-A6x25 5V features an integrated polarity protection
so there’s no risk of damaging the fan due to reversed polarity.
However, the fan will not work when it is connected the wrong way
around, so please make sure that it is connected correctly when using
2-pin connections.
The NF-A6x25 features a short 20cm primary cable in order to help
you minimise cable clutter in typical applications. If you need a longer
cable, please add the supplied 30cm extension (NA-EC2).
NF-A6x25 5V
|
User Manual
Cleaning and Maintenance
Fans inside computer cases tend to accumulate dust over longer
periods of usage. In order to maintain maximum performance,
please clean your fans regularly using a duster, slightly moist tissue
or canned air. Please be careful not to use too much force in order to
prevent any damage to the fan. Please don’t use a vacuum cleaner as
this may apply excessive force to the fan. In order to ensure flawless
operation over many years of usage, the NF-A6x25’s premium
grade SSO2 bearing is fully sealed to prevent the entering of fine
dust particles. Please note that the fan is not designed to be taken
apart by the user. Removing the impeller from the frame will break
the sealing of the bearing and results in a loss of warranty.
Using the OmniJoin adaptor set
The supplied OmniJoin adaptor set allows you to easily connect the
NF-A6x25 to proprietary fan headers if you want to replace a 60mm
fan in devices such as network or storage solutions.
Please first identify the individual leads of the OmniJoin adaptor and
the original fan. The OmniJoin adaptor uses black for ground (GND)
and red for +5V. The black lead of the adaptor has to be matched
with the original GND lead and the red adaptor cable with the original
+5V lead. Many fan cables use the same colours as the OmniJoin
adaptor, but please note that there is no guarantee for this, so make
sure to correctly identify the GND and +5V leads of the original fan.
Please refer to the manual that came with the device or contact the
device manufacturer if in doubt.
Step 1
Cut off the connector of the fan that was originally used in the device.
Make sure not to cut the cable directly at the connector, there should
be at least 2-3 centimetres of cable left:
Note that it is not necessary to remove the insulation from the cables.
Step 2
Then take one of the supplied 3M Scotchlok™ connectors and insert
the GND lead of the original cable and the black lead of the OminJoin
adaptor into the two holes of the Scotchlok™ connector. Make sure
that both leads are fully inserted and pushed all the way back.
Step 3
Then use flat nose pliers to push down the white button of the
Scotchlok™ connector. Make sure that the button is not jammed and
pushed all the way down. If the button is jammed, push it down from
both sides of the Scotchlok™ connector using the flat nose pliers.
After you’ve fixed the original fan’s cable to the OmniJoin adaptor
using the Scotchlok™ connectors, simply connect the NF-A6x25 to
the adaptor in order to use it in your device.
OmniJoin Adaptor
3M Scotchlok
TM
connectors
Connector of the original fan
+5V
GND
Make sure to correctly
identify the GND and
+5V leads of the
original fan!
2-3cm minimum!
Repeat Step 2 and 3 for the +5V lead.
Caution: Being a 5V fan, the NF-A6x25 5V can not be run at 12V and
will be damaged when used with typical 12V power sources such as
PC mainboard fan headers.
Question and Answer IconNeed help?

Do you have a question about the Noctua NF-A6x25 5V and is the answer not in the manual?

Overview

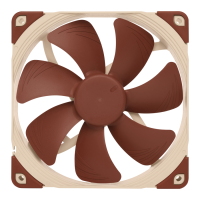
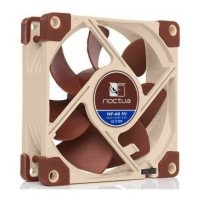
The Noctua NF-A6x25 5V is a high-performance, sound-optimized premium cooling fan designed for various applications, particularly in devices such as storage or network solutions where a 60mm fan is required. This user manual provides comprehensive instructions for its installation, connection, and maintenance, ensuring optimal performance and longevity.

Function Description

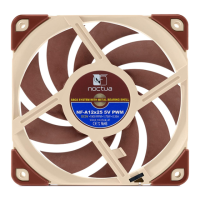
The primary function of the NF-A6x25 5V is to provide efficient and quiet cooling. As a 5V fan, it is specifically designed to operate with 5V power sources and should not be connected to 12V PC mainboard fan headers, as this will cause damage. The fan is engineered with advanced aerodynamic design measures, making it a thoroughly optimized 60mm fan on the market. It features a premium grade SSO2 bearing, which is fully sealed to prevent the ingress of fine dust particles, contributing to its long-term reliability and flawless operation. The integrated polarity protection ensures that there is no risk of damaging the fan due to reversed polarity, although the fan will not operate if connected incorrectly.

Usage Features

Installation:

When replacing an existing 60mm fan, it is generally recommended to use the original screws or mounting mechanisms from the device. For case fan installations, the NF-A6x25 5V can be mounted using either the supplied screws or silicone anti-vibration mounts. To use the silicone mounts, first pull them through the mounting holes of the case, then place the fan onto the mounts and pull them through the fan's mounting holes. This method helps to reduce vibration and noise.

Connection:

The NF-A6x25 5V comes with a standard 3-pin fan connector. It can also be connected to standard 4-pin fan headers. For devices requiring a 2-pin fan header, the supplied OmniJoin adaptor set is used. The fan includes a short 20cm primary cable to minimize cable clutter in typical applications. If a longer cable is needed, the supplied 30cm extension (NA-EC2) can be added.

OmniJoin Adaptor Set:

The OmniJoin adaptor set is a crucial feature for connecting the NF-A6x25 to proprietary fan headers, especially when replacing a 60mm fan in network or storage solutions. The adaptor uses black for ground (GND) and red for +5V. Users must correctly identify the GND and +5V leads of the original fan, referring to the device's manual or manufacturer if unsure, as cable colors may vary.

The process for using the OmniJoin adaptor involves several steps:

  1. Cut the original fan connector: Cut off the connector of the fan that was originally used in the device, ensuring at least 2-3 centimeters of cable remain. It is not necessary to remove insulation from the cables.
  2. Connect GND lead: Take one of the supplied 3M Scotchlok™ connectors. Insert the GND lead of the original cable and the black lead of the OmniJoin adaptor into the two holes of the Scotchlok™ connector, ensuring both leads are fully inserted.
  3. Secure connection: Use flat nose pliers to push down the white button of the Scotchlok™ connector until it is fully depressed. If the button jams, push it down from both sides.
  4. Connect +5V lead: Repeat steps 2 and 3 for the +5V lead, connecting it to the red lead of the OmniJoin adaptor.
  5. Final connection: Once the original fan's cable is fixed to the OmniJoin adaptor, simply connect the NF-A6x25 to the adaptor to integrate it into the device.

Maintenance Features

Cleaning:

To maintain maximum performance, it is recommended to regularly clean the fan from accumulated dust. This can be done using a duster, a slightly moist tissue, or canned air. Care should be taken not to apply excessive force to prevent damage. Vacuum cleaners are not recommended as they can apply too much force.

Durability and Sealing:

The NF-A6x25's premium grade SSO2 bearing is fully sealed to prevent fine dust particles from entering, which is critical for ensuring flawless operation over many years. Users should note that the fan is not designed to be taken apart. Removing the impeller from the frame will break the sealing of the bearing and void the warranty.

Warranty and Support:

Noctua provides a 6-year warranty period and direct, fast, and straightforward RMA service. Should any problems arise with the NF-A6x25, users are encouraged to contact Noctua's support team for assistance. This commitment to quality and customer support ensures peace of mind for users.

Noctua NF-A6x25 5V Specifications

General IconGeneral
ModelNF-A6x25 5V
Size60 x 60 x 25 mm
Voltage5V
Connector3-Pin
BearingSSO2
Input Power0.6 W
MTBF150, 000 hours

Related product manuals