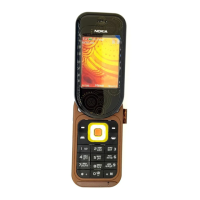
5 Show and tell.
4 Make the call.
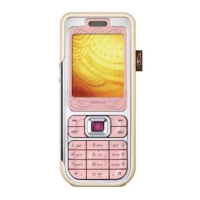
7 Define your style.
Copyright © 2005 Nokia. All rights reserved. Nokia, Nokia Connecting People, Navi, and Nokia 7380 are trademarks or
registered trademarks of Nokia Corporation. Other company and product names mentioned herein may be trademarks
or trade names of their respective owners. Many features are network dependent and require network support. Some
networks have limitations that affect how you can use phone features. Contact your service provider about feature
support and availability. All screen images are simulated. N2773
The interface of your Nokia 7380 phone makes calling your friends and family fun.
Using voice tags and the Navi spinner, dialing from the phone book is smooth and easy.
Make a call
From the standby screen:
1. Press and hold the middle selection key for 2 seconds (fig. 4.1). ( )
2. Rotate the Navi spinner to highlight the first number and press Select. ( ) ( )
3. Repeat step 2 until the number is complete (fig. 4.2).
4. Press the Call key. ( )
Speaker independent name dialer
1. Press and hold Names. ( )
2. After the tone, speak the contact name as it appears in the phonebook (fig. 4.3).
3. A list of matching contacts is displayed.
4. Highlight the desired contact and press Select. ( ) ( )
TIP! Without interaction, the first match will dial automatically in 3 seconds. Names should
be spoken as they were entered into the phonebook. You can check on how each name is
“trained” by navigating to the contact name details and selecting Options > Play voice tag.
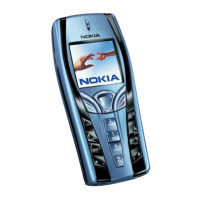
Add a new dimension to going out—use the small, yet amazing 2 megapixel camera
(208 x 104) with flash and 8x zoom to capture planned and impromptu moments. Show
your absent friends what they are missing out on and send pictures instantly to their
phone or email address via MMS. You can save your photos to your PC using Nokia PC Suite,
or to your Mac using Nokia Collector. You can also synchronize your contacts and
calendar—and it all happens wirelessly with infrared or Bluetooth technology!
Take and send a picture
1. Press Menu. ( )
2. Rotate the Navi spinner to highlight Media and press Select (fig. 5.1). ( ) ( )
3. With Camera highlighted, press Select. ( )
4. The display becomes the viewfinder. Press Capture to take a picture (fig. 5.2). ( )
5. Press Send. ( )
“The Object added” screen displays.
6. Rotate the Navi spinner ( ) and press Select ( ) to spell out the message you want
to attach to the photo (fig. 5.3).
7. Press Options. ( )
8. With Send highlighted, press Select. ( )
9. With To phone number higlighted, press Select. ( )
10. Rotate the Navi spinner ( ) and press Select ( ) to enter the phone number of the
desired recipient.
11. Press Options. ( )
12. With Accept highlighted, press Select. ( )
13. The message is saved to the outbox. You will be notified once the message is
successfully sent.
Note: Multimedia messaging service (MMS) is a network-dependent feature. Contact your
service provider for details.
Themes, screensavers, and ringing tones are just some of the ways you can customize your
Nokia 7380 phone. With its jaw dropping looks and amazing features, your Nokia 7380
phone speaks volumes about your sense of style and fashion. Even when idle, the subtle
toned mirror will create intrigue.
Change themes, screensavers, and wallpaper
1. Press Menu. ( )
2. Rotate the Navi spinner to highlight Settings and press Select. ( ) ( )
3. Rotate the Navi spinner to highlight and select:
Themes: Lets you personalize the appearance and sounds of your phone.
From this screen, you can also download new themes designed specifically
for your Nokia 7380 phone.
Display settings: Personalize your phone’s wallpaper, screensaver, and color scheme.
fig. 4.1
fig. 6.1
fig. 6.2
fig. 6.3
fig. 4.2
fig. 4.3
fig. 5.1
fig. 5.2
fig. 5.3
The Nokia 7380 phone also comes with a built-in Music Player compatible with MP3 and
AAC file formats. Listen to your favorite songs or tune in to the FM radio (requires headset
to be attached).
Play your music
1. Press Menu. ( )
2. Rotate the Navi spinner to highlight Media and press Select. ( ) ( )
3. Scroll to and select Music player. ( ) ( )
4. Press Options. ( )
5. Scroll to and select Track list. ( ) ( )
6. Scroll to highlight the track you want to listen to and select Play (fig. 6.1). ( ) ( )
7. Use the graphical keys ( ), ( ), ( ), and ( ) to control the music by using the
Navi spinner. ( )
Set your digital music as your ringtone
1. Press Menu. ( )
2. Rotate the Navi spinner to highlight Settings and press Select (fig. 6.2). ( ) ( )
3. Scroll to and select Tone settings. ( ) ( )
4. Scroll to and select Ringing tone (fig. 6.3). ( ) ( )
5. Select Open Gallery to choose a downloaded digital music file, or rotate the
Navi spinner to highlight and select Tone downloads to download new ringtones.
6. Press Options. ( )
7. With Set as ring tone highlighted, press Select. ( )
6 Redefine portable music.
 Loading...