© Nokia Networks | Filename: A032QG_AP_as_wireless_bridge.doc | Date: 18.08.00 | Author: P Barnes
INTERNET
3/4
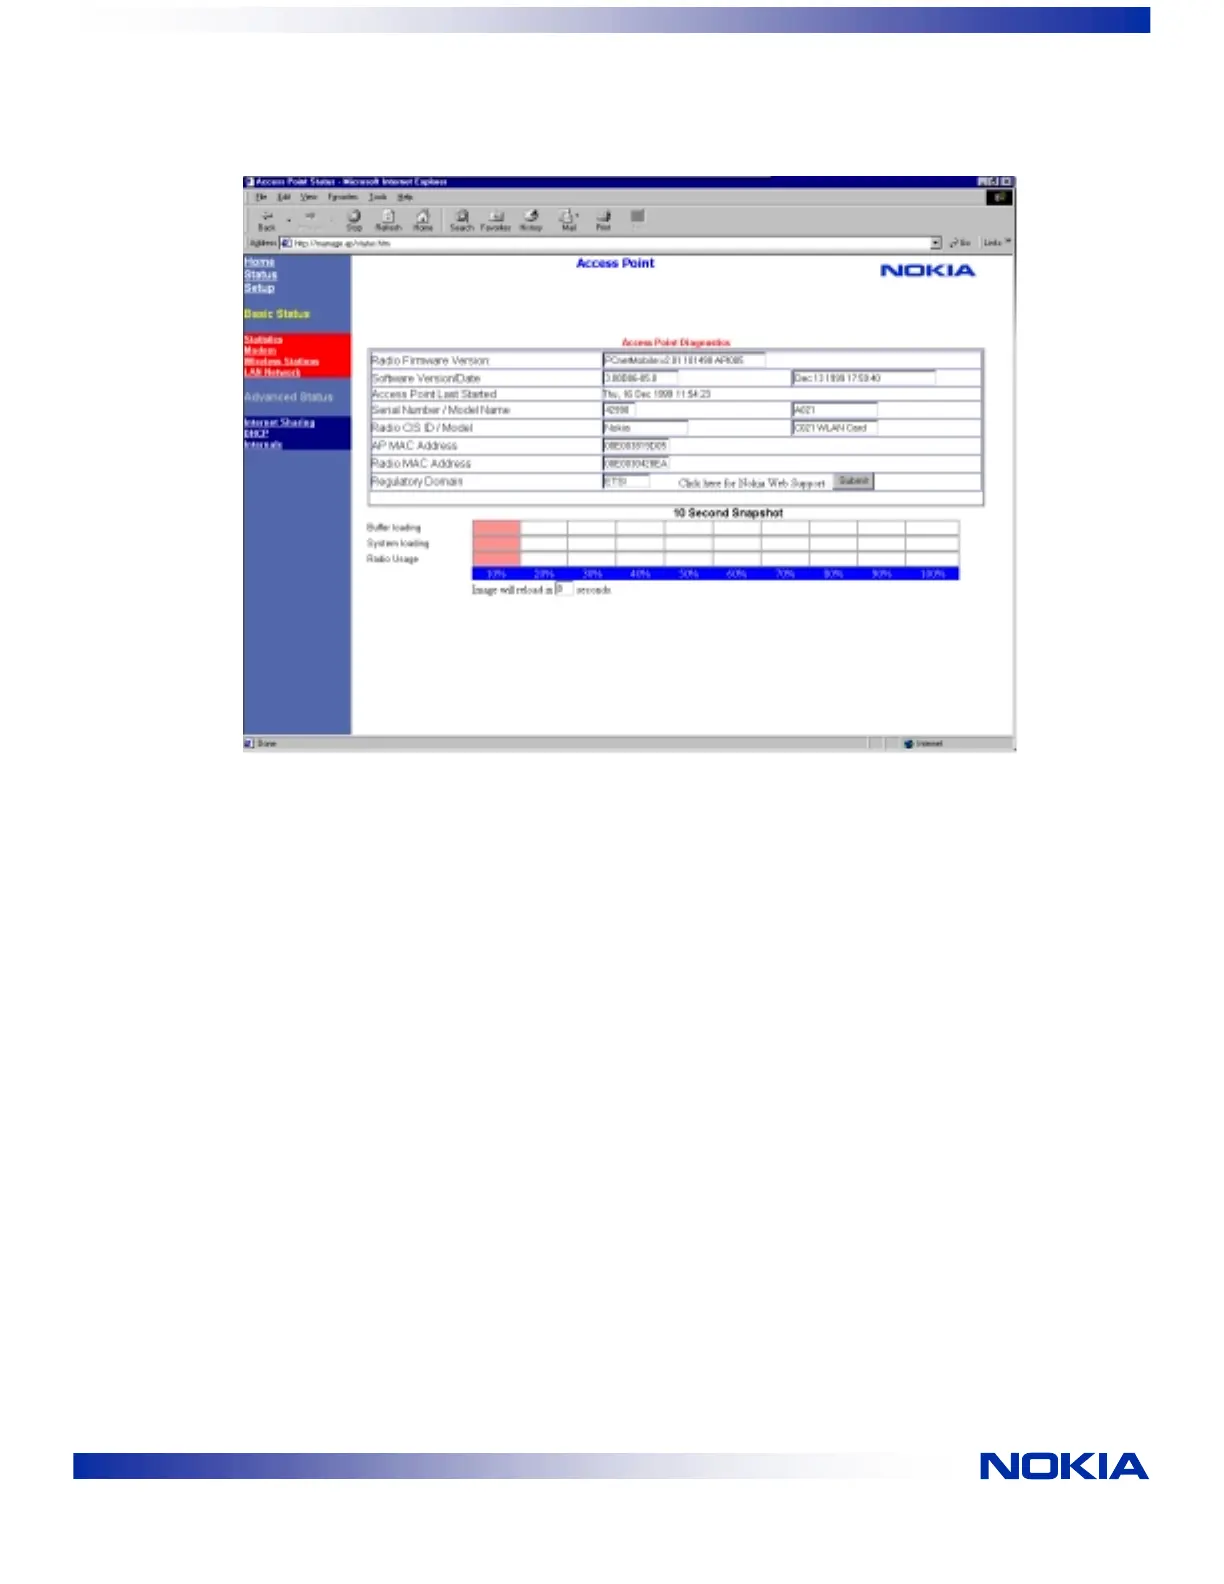
Figure 2: Diagnostics Web screen showing Radio MAC Address
2.1.2 Setting up the Nokia A032s
Each Nokia A032 must be separately programmed to identify its bridge partner(s). This can
only be done using the serial port / Telnet interface.
Power up the Nokia A032 and log into the serial port / Telnet interface program. The
information is entered using the bridge command, which has the format:
Bridge add {MAC(NID)} {Name}
Where {MAC(NID)} is the MAC address of a bridge partner and {Name} is a user-friendly
name up to 9 characters which you may choose.
In the example of Figure 1 the following set-ups would be used:
Nokia A032 (A):
Bridge add 00e003008192 bridgeB
Nokia A032 (B):
Bridge add 00e003001234 bridgeA
Bridge add 00e003004771 bridgeC
Nokia A032(C):
Bridge add 00e003008192 bridgeB
Bridge add 00e003007512 bridgeD