18 19
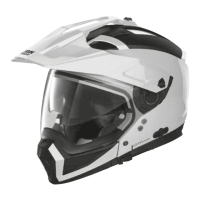
REMOVABLE INNER COMFORT PADDING
To remove the inner comfort padding, lift the VPS, open the visor completely and
remove the chin guard from the helmet (see instructions above).
9. Cheek Pad disassembly
9.1 Remove the wind protector (see instructions above) and open the chin strap
(see related instructions). Pull the front part of the left cheek padding towards
the inside of the helmet to release the three snap fasteners placed on the back
(Fig. 10).
9.2 Remove the rear ap of the comfort padding on the left side from the cavity
between the rear seal and the inner polystyrene shell; then completely remove
the cheek padding from the helmet (Fig.11).
9.3 Repeat the same process on the right side of the helmet.
10. Disassembly of inner expanded foam cheek padding
To make it even easier to wash the parts of the inner comfort padding, the cheek
pads on the helmet come with internal padding in expanded foam that can be re-
moved from the fabric lining cover. To remove this padding, proceed as follows after
removing the cheek pads from the helmet (see instructions above).
10.1 Unhook the three eyelets “A” of the rear frame on the left cheek pad at the three
press studs (top, front and rear) on the back (Fig. 12).
10.2 Remove the upper ap “B” and lower ap “C” of the frame from the respective
loops on the back of the frame itself (Fig. 12).
10.3 Gently remove the inner expanded foam padding from the fabric lining cover of
the cheek pad (Fig. 13).
10.4 Repeat the same process with the right cheek padding.
11. Liner disassembly
11.1 Release the rear left ap of the liner from the rear edge of the shell by gently
pulling the comfort padding towards the inside (Fig.14). Then repeat the pro-
cess also with the rear right ap.
11.2 Grasp the front left area of the liner and pull it upwards to remove the relative
ap from the support xed to the inner polystyrene shell (Fig.15). Then repeat
this process also for the centre and right forehead aps. (Fig. 9).
11.3 Completely remove the liner from the helmet.
12. Liner assembly
12.1 Correctly insert the liner into the helmet, lying it carefully on the bottom.
12.2 Insert the front left ap of the liner into the corresponding housing in the sup-
port xed to the polystyrene inner shell and push it downwards until it locks
completely. Then repeat this process also for the centre ap and the right ap
(Fig. 15).
N. B. check that the front area of the liner is assembled correctly by raising and
lowering the VPS, which should move freely. If not, repeat steps 11.2 and 12.2.
12.3 Insert the right and left rear aps of the liner in their respective housing on the
edge of the shell (Fig. 14). Push the aps until they are completely hooked to
the support.