This document provides installation, operation, and maintenance instructions for Bottom Mount Refrigerators & Freezers.
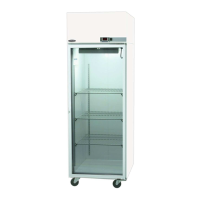
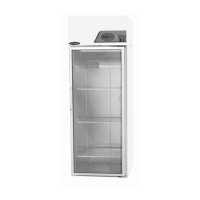
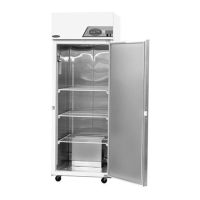
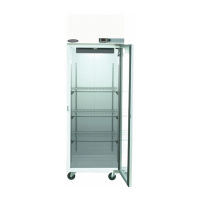
Function Description
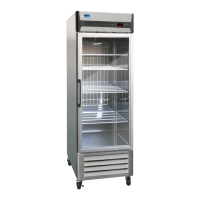
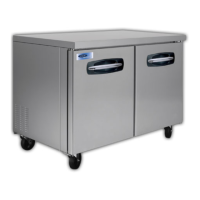
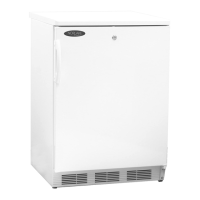
These units are designed to provide reliable refrigeration and freezing capabilities for commercial use. They utilize a refrigeration system located at the bottom of the unit, requiring adequate air access for proper operation. The units are equipped with an electronic control system that manages temperature settings, defrost cycles, and provides alarm functions to ensure optimal performance and alert users to potential issues. A pressure relief valve is incorporated to equalize internal vacuum, making doors easier to open after closing.
Usage Features
Upon receipt, it is crucial to inspect all crates and cartons against the Bill of Lading and uncrate immediately to check for any damage, including concealed damage. Any damage found must be reported to the carrier and a claim filed. The units are secured to a shipping base with four bolts that need to be removed to separate the unit. Casters or legs, found inside the unit, should be attached to the unit base using the provided wrench, with the casters with brakes installed on the front. For proper condensate drainage, the unit must be level in its permanent location; leveling shims are included for this purpose.
Before installation, the protective plastic covering on the exterior of the cabinet and doors should be peeled off. After removal, the interior and exterior surfaces should be cleaned with soap and water, avoiding chlorinated cleaners which can cause corrosion. If doors are misaligned due to shipping, they can be adjusted by loosening the screws on both the top and bottom hinges, realigning the door, and then tightening the screws. Shelves and shelf clips are packaged inside the unit and can be installed on the pilasters, with shelves adjustable in 12.7mm (1/2 inch) increments.
For proper operation, a minimum of 180mm (7 inches) clearance is required between the back of the cabinet and the wall. The unit should not be located near heat-generating equipment or in direct sunlight. The electrical outlet must match the unit's voltage, frequency, and current requirements, as noted on the data plate inside the left wall. The unit should be on an isolated circuit, and extension cords should not be used.
Once connected to power, the display panel will light up for two seconds, followed by a beep, and the cabinet temperature will be displayed. The compressor will start, indicated by 'COMP' on the display. If the cabinet temperature is above +68°F (+15°C) for refrigerators or +14°F (-5°C) for freezers, the display will show ''. If it's below +14°F (-2°C) for refrigerators or -50°F (-40°C) for freezers, it will show ''. If the unit doesn't start immediately, check the power switch on the bottom of the top grill. A three-minute delay occurs before the compressor starts if the cabinet temperature is below +14°F (-10°C) for freezers or +50°F (+10°C) for refrigerators when plugged in.
The interior light comes on when a door is opened (for half-door cabinets, only top doors activate it; glass door models have lights always on). The light can be turned off using the switch on the top grill. Opening a door also illuminates the 'door open' light on the display and stops the evaporator fans, which restart three seconds after closing. A door open alarm will beep three times after 30 seconds, five times after 60 seconds, and continuously after five minutes. This feature is activated by the top doors on half-door cabinets.
The electronic control allows for temperature adjustment. The set point ranges from -22°F (-30°C) to +8°F (-10°C) for freezers and +25°F (+2°C) to +50°F (+10°C) for refrigerators. Default settings are -5°F (-20°C) for freezers, +36°F (+4°C) for solid door refrigerators, and +35°F (+4°C) for glass door refrigerators. To adjust, press 'Mode/Set', navigate to '' using 'Up'/'Down', press 'Mode/Set' again to see the current setting, adjust with 'Up'/'Down', press 'Mode/Set' to confirm, navigate to '| ', and press 'Verify' to return to the display. |
The temperature differential, or swing, can also be set. This determines when the compressor starts and stops relative to the set point. The default is +8°F (+4°C), with a range of +4°F (+2°C) to +16°F (+10°C). To adjust, follow a similar process: press 'Mode/Set', navigate to '', press 'Mode/Set' to view the current setting, adjust, confirm with 'Mode/Set', navigate to '| ', and press 'Verify'. |
Freezers have a Rapid Freeze Mode, which runs the compressor continuously for 120 minutes before returning to normal operation. To activate, press 'Mode/Set', navigate to '', and press 'Mode/Set' for two seconds. To stop, press 'Mode/Set' for two seconds during rapid freeze.
Defrost frequency is preset to every 6 hours for freezers and 12 hours for refrigerators, adjustable from 4 to 12 hours in two-hour intervals. During defrost, '' is displayed. To set, press 'Mode/Set', navigate to '', press 'Mode/Set' to see the current setting, adjust, confirm, navigate to '| ', and press 'Verify'. A forced defrost can be initiated by pressing 'Mode/Set', navigating to '', and pressing 'Manual DF' for two seconds. To stop, press 'Manual DF' for two seconds during forced defrost. |
The temperature unit (°F↔°C) can also be changed. Press 'Mode/Set', navigate to '', press 'Mode/Set' (the current unit will flash), adjust with 'Up'/'Down', confirm with 'Mode/Set', navigate to '| ', and press 'Verify'. |
Maintenance Features
All service should be performed by factory-authorized personnel, with component parts replaced with like components to minimize ignition risk from incorrect parts or improper service.
Regular cleaning is essential. The interior surfaces should be periodically cleaned with a warm water and baking soda solution to remove odors and spills. The exterior should be frequently cleaned with a commercial stainless steel cleaner, glass cleaner, or mild soap solution. Chlorinated cleaners should be avoided on stainless steel surfaces. Importantly, stainless steel cleaner or other solvent-based chemicals should not be used on plastic parts (door handles or façade parts) as they can cause failure; use mild soap and warm water for these parts. Door gaskets should be cleaned in place with a mild soap solution to extend their life. Shelving can be cleaned in a sink with mild soap solution and a soft-bristled brush.
The electronic control includes an alarm function to remind the operator to clean the condenser coil every 6 months, or more frequently depending on conditions. The display will blink "CL" and the buzzer will sound. After one hour, the buzzer stops, but "CL" continues to blink. To reset, press 'Mode/Set' and 'Verify' simultaneously for five seconds.
To clean the condenser coil, first disconnect the unit from power. Remove the lower front grill. The condenser coil is located behind the grill. Use a soft-bristled brush to remove dirt particles from the fins, then use a vacuum cleaner or compressed air to remove loosened particles. Replace the grill and reconnect power. Failure to clean the condenser coil can lead to performance loss and compressor failure.