Do you have a question about the Norsonic nor145 and is the answer not in the manual?
Essential safety guidelines, precautions, and warnings for instrument operation.
Important notices and care instructions to prevent damage and ensure proper function.
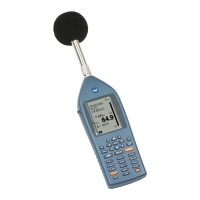
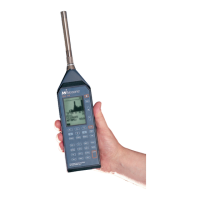
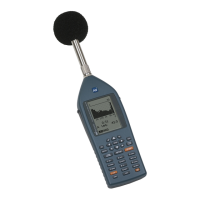
How to power the instrument and use its keyboard controls for basic operations.
Details on operating the instrument via its capacitive touch display.
Description of the instrument's various sockets for connecting peripherals.
Tips and settings to optimize battery life and reduce power consumption.
How to update the instrument's firmware and manage software versions.
Step-by-step guide to powering on the instrument and initial setup.
How to choose and configure the microphone and preamplifier for measurement.
Procedure for initiating, conducting, and concluding a measurement.
How to store measurement results and setup information for later retrieval.
Explanation of how functions are formed by combining data types, time constants, and spectral weighting.
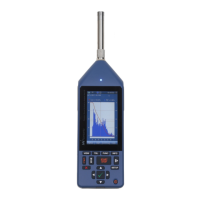
Overview of the instrument's display layout, including status bar and measurement areas.
Detailed explanation of the icons and information presented in the status bar.
Description of the functions accessible via the soft keys on the display.
How to access and use context-sensitive menus for parameter adjustments.
How to manage multiple display windows and select the active view.
Method for navigating and analyzing data using cursors on graphical displays.
Navigation structure of the instrument's main menu system.
Overview of the different graphical display options for measurement results.
How to choose and configure the specific parameters to be displayed in views.
Configuration options for sensors, including corrections and calibration.
Procedures for adding, editing, and managing transducers like microphones and preamplifiers.
Guidelines on when to perform calibration to ensure measurement accuracy.
Step-by-step instructions for performing calibration using a sound calibrator.
Method for checking the functionality of the measurement chain without an external calibrator.
Setting the overall measurement duration and time resolution for different reports.
Configuration of filters, frequency ranges, and FFT parameters.
Information on the input filter used to reduce wind and other noise.
Steps to enable and configure FFT analysis within the instrument's menus.
Procedure for performing an FFT measurement and viewing results.
Setting the conditions for starting the overall measurement session.
Configuring triggers to start actions based on specific sound level events.
How to insert and configure markers to identify events during measurements.
Editing, moving, or deleting markers after a measurement has been completed.
Procedures for starting audio recordings manually or via triggers.
How to play back recorded audio files through the instrument's headphone socket.
Using a smartphone camera for event-triggered picture capture.
Setting up and using IP cameras for continuous or semi-permanent monitoring.
How to add textual or spoken comments to measurements.
Utilizing pause and continue functions to manage measurements and exclude unwanted data.
Selecting and creating folders for organizing measurement projects.
Options for setting up automatic and manual file naming conventions.
Procedures for storing, managing, exporting, and importing measurement setups.
How to prevent unauthorized changes to measurement setups.
Steps to save custom measurement configurations for future use.
Configuring the built-in signal generator for sound insulation and reverberation tests.
Overview of the instrument's capabilities for building acoustics measurements.
Entering and operating the instrument in the dedicated Building Acoustic mode.
Accessing context-sensitive menus for adjusting Building Acoustic parameters.
Configuring various settings specific to Building Acoustic measurements.
Setting duration, filters, and source position for level measurements.
Configuring parameters for reverberation time measurements like excitation type and decay analysis.
Defining standards, room properties, and test specimen details for sound insulation calculations.
Step-by-step guide to performing sound level measurements in Building Acoustic mode.
Detailed instructions for conducting reverberation time measurements.
Viewing and organizing accepted measurements and calculated results within a project structure.
Different views for presenting sound insulation results and single number indices.
Configuration of digital and analog signal outputs for control and data transfer.
Settings for LAN, Cellular (LTE), WiFi, and USB interfaces.
Setting up passwords and access controls for instrument security.
Adjusting screen timeout, brightness, and GPS settings for power management.
Setting the instrument's internal clock and synchronizing with GPS or other devices.
Remote control of the Nor145 via a web browser interface.
Instructions on how to initiate a connection and use the NorRemote program.
Customizing the appearance and content of measurement windows in NorRemote.
Adding, customizing, and managing markers within the NorRemote interface.
Setting measurement conditions, functions, audio recording, and filters in NorRemote.
Setting up trigger conditions for events like audio recording or picture capture.
Integrating smartphone or IP cameras with the Nor145 for visual context.
Setting up SMS alerts for threshold-triggered events.
Information on software versions and compatibility.
Instrument classification and compliance with relevant standards.
Details of the physical connectors for microphones and other inputs.
Specifications for the standard microphone and optional windscreen.
Technical data for the Nor1209 preamplifier.
Correction values for instrument verification and standard conformance.
Graphical data on horizontal directional sensitivity at various angles.
Graphical data on vertical directional sensitivity at various angles.
Methods and data for verifying the instrument's free-field response accuracy.
Information on the A, C, and Z weighting networks used in measurements.
Technical specifications of the instrument's filter circuits.
Technical specifications for the Fast Fourier Transform analysis capabilities.
Detailed measurement ranges for different levels and frequency weightings.
Specifications for the internal battery and charging system.
Information on the instrument's power usage and external power requirements.
Operating and storage conditions for the instrument.
Physical dimensions and weight of the instrument.
| Brand | Norsonic |
|---|---|
| Model | nor145 |
| Category | Measuring Instruments |
| Language | English |