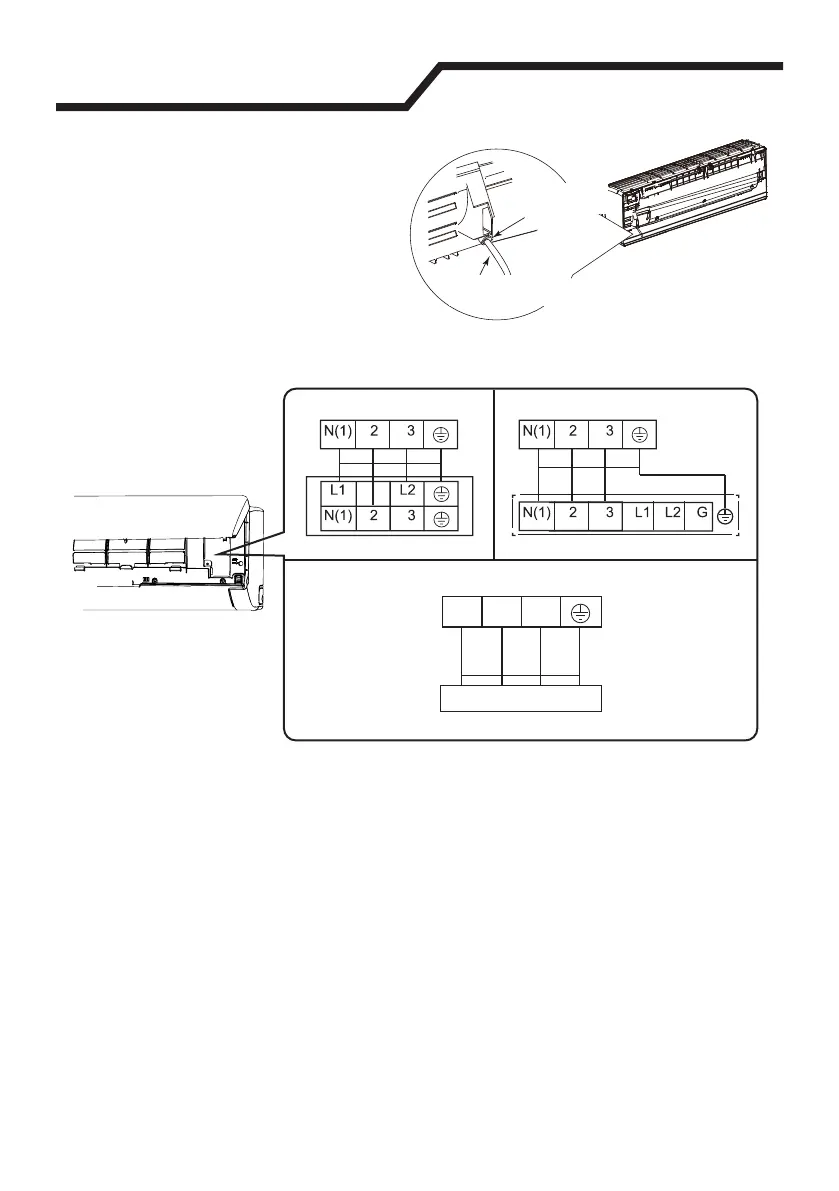
N(1)
2
3
Outdoor unit connection
white
(blue)
black red
(brown)
JUHHQ
\HOORZJUHHQ
3DJH
Indoor Unit Installation
4. 5HSODFHZLULQJFRYHUDQGWLJKWHQWKHVFUHZ
5. Close the panel.
Note:
• All wires of indoor unit and outdoor unit should be connected by a professional.
• 2QO\VLQJOHXQEURNHQHOHFWULFDOZLUHVVKRXOGEHXVHG6SOLFHGZLUHVDUHQRW
allowed.
• )RUKHDWSXPSPRGHOVZLWKHOHFWULFDOSOXJWKHRXWOHWPXVWEHUHDFKDEOHDIWHU
¿QLVKLQJLQVWDOODWLRQ
• )RUKHDWSXPSPRGHOVZLWKRXWSOXJDFLUFXLWEUHDNHUPXVWEHLQVWDOOHGLQWKH
OLQH7KHFLUFXLWEUHDNHUVKRXOGEHDOOSROHSDUWLQJDQGWKHFRQWDFWSDUWLQJ
GLVWDQFHVKRXOGEHPRUHWKDQPPLQ
2. /HDGWKHSRZHUZLUHWKURXJKWKH
cable-cross hole at the back of
indoor unit and then pull it out from
the front side.
3. 5HPRYHWKHZLUHFOLSFRQQHFWWKH
SRZHUFRQQHFWLRQZLUHWRWKHZLULQJ
WHUPLQDODFFRUGLQJWRWKHFRORU
7LJKWHQWKHVFUHZDQGVHFXUHWKH
power cable with the wire clip.
Cable-cross
Hole
Power
Connection Cord
Outdoor Unit Connection
Outdoor Unit Connection Outdoor Unit Connection
6L]HV. 6L]HV.
6L]HV.VRPHPRGHOV