HOBART – PH 1300 731 615 | LAUNCESTON – PH 03 6343 1904 | DEVONPORT – PH 03 6423 2745
www.healthdynamics.com.au
Fax: 03 4206 7880
Email: info@healthdynamics.com.au
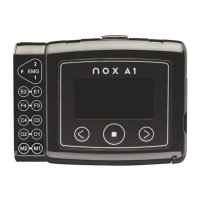
Step 2. Attaching the white effort bands
A. Chest: Place a white belt around your
chest (above the breasts and under your
arms) and snap each end to the back
panel of the device.
B. Abdomen: Place a second white belt
around your waist at the level of your
belly button and snap it onto the
connector. NB: Ensure the white belts
aren’t twisted.
Step 3. Skin preparation
Gently abrade all the electrode sites (see below) with the abrasive tape provided,
then rub your skin with the alcohol wipe provided and allow skin to completely
dry.
NB: Be careful using the alcohol wipe around the eyes.
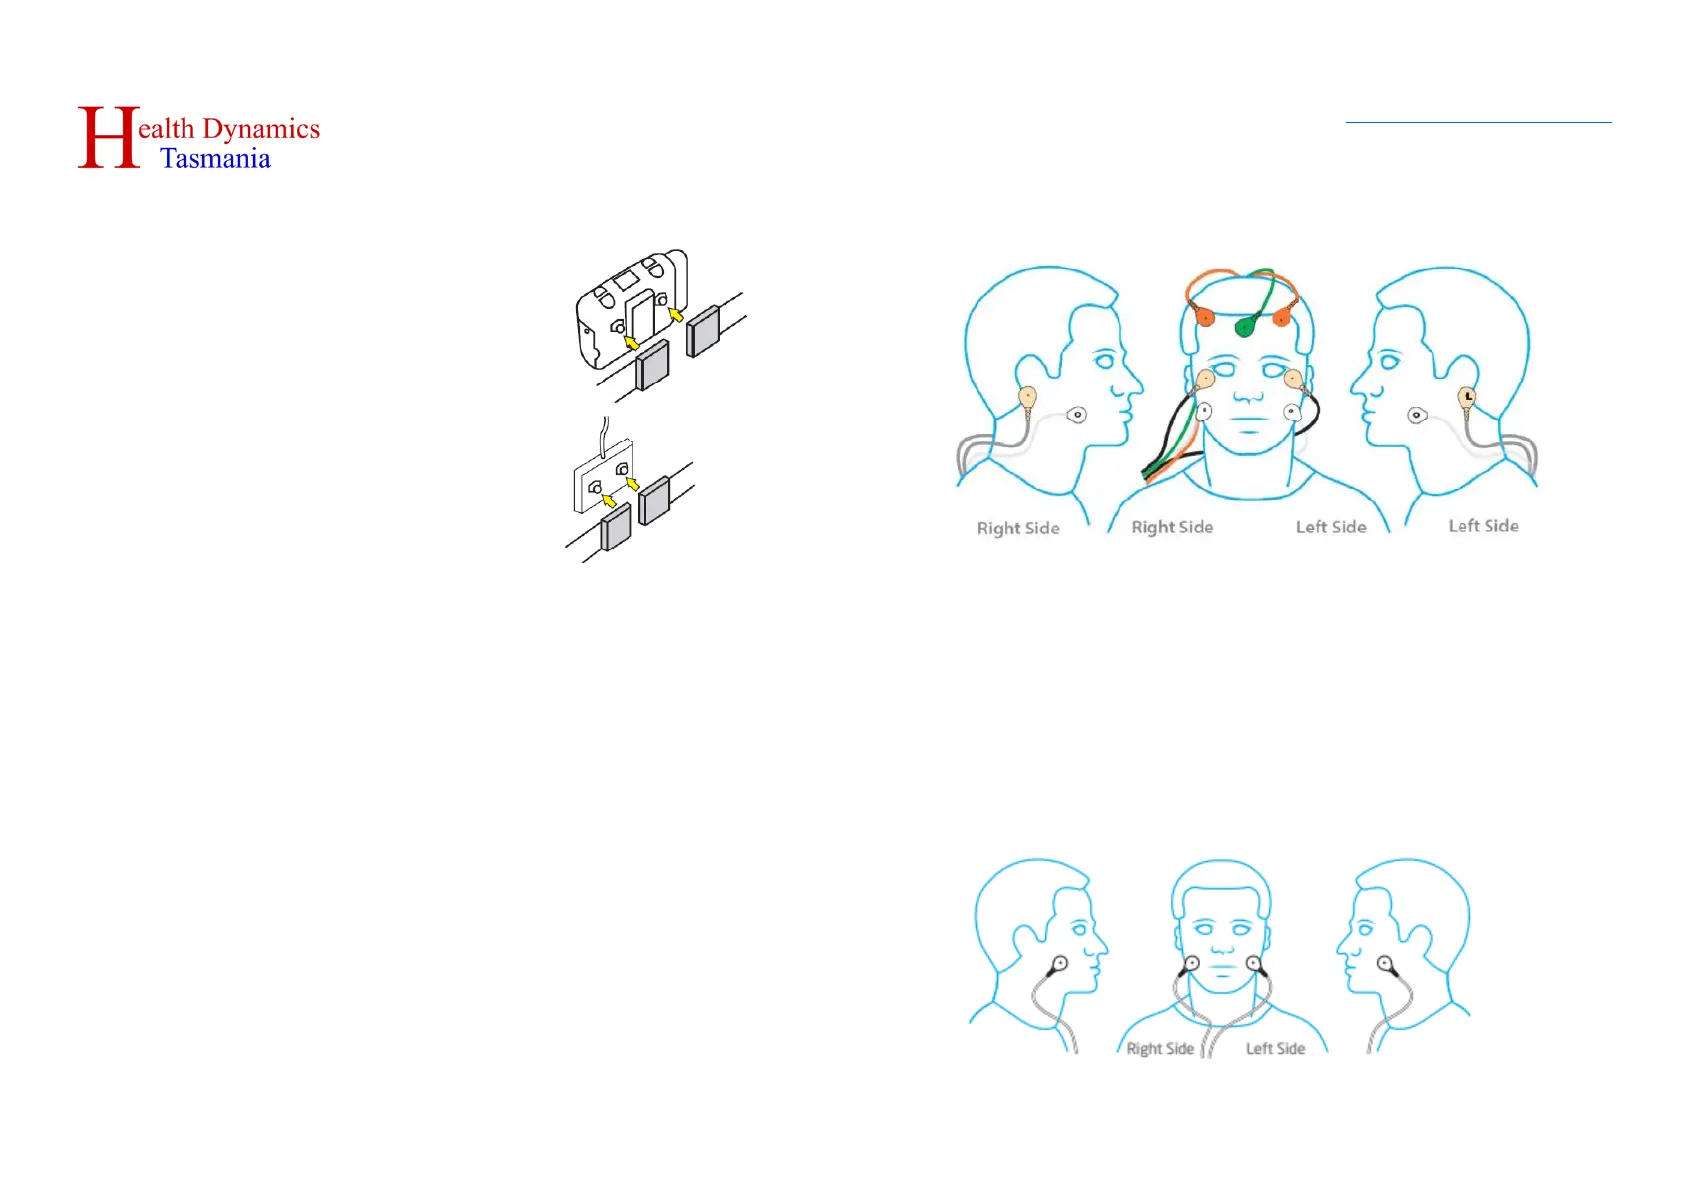
Step 4. Placing the EEG (sleep staging) sensors (Plaited Cable)
A. Use the sticky dots provided to attach the electrodes as instructed below
and illustrated on the right. It’s easiest if you start with the bundled
cables running over your shoulder and behind your head.
B. Attach the GREEN electrode to centre of forehead.
C. Attach the ORANGE electrodes as close to your hairline as possible on the
right-hand and left-hand sides of the forehead as labelled.
D. Attach the two BLACK leads (with the beige snap-on clips), near the
corner of each eye. It doesn’t matter which of the black leads goes to
each eye.
E. Attach the GREY electrodes (with the beige snap-on clips) to the bony
prominence behind each ear as per labels.
NB: It is important that they are behind the correct ears.
Step 5. Placing the EMG (Cheek) sensors
A. Attach two more small sticky electrode pads high on the side of your
cheeks as illustrated.
B. Find the two white cables with white connectors and place one on each
cheek electrode. It doesn’t matter which of these goes on which side.
 Loading...