EasyManua.ls Logo

Nuaire Group DRIMASTER - User Manual

Nuaire Group DRIMASTER
8 pages
Print Icon
To Next Page IconTo Next Page
Loading...
Nuaire Limited Western Industrial Estate Caerphilly United Kingdom CF83 1NA
T: 029 2088 5911 F: 029 2088 7033 E: info@nuaire.co.uk W: www.nuaire.co.uk
DRIMASTER and
DRIMASTER-3S
Anti-Condensation & Whole House Ventilation Unit
Installation and Maintenance
Important notes to installers
The Nuaire Drimaster range has been curing severe
condensation problems for over 20 years in some of the worst
affected properties throughout the world.
Its successful operation depends entirely upon the unit being
installed strictly in accordance with these instructions.
We would, therefore, respectfully suggest that you read through
this guide in its entirety before commencing installation and then
go through this guide step by step to ensure a satisfactory
completion.
Whilst the installation of the Drimaster unit may be achieved by
a suitable craftsman, the provision of the electrical supply and the
connection of the unit to the mains must be carried out by a
qualified electrician.
The unit has a 5 year warranty starting from the day of delivery and
includes parts and labour for the first year. The remaining 4 years
covers parts only. This warranty is conditional on the following:-
a) That the unit is installed strictly in accordance
with this guide.
b) That the unit filters are removed and cleaned or replaced
at the recommended intervals.
c) If a floor is higher than 4.5m the requirements in sections
3.2 and 8.1 must be followed.
The unit represents a significant financial outlay on the part of the
user/specifier and the unique 5 year guarantee is important to them.
We make a point of advising them that the installer is provided with
detailed instructions regarding installation/guarantee registration
and therefore has the responsibility of ensuring that the unit is
guaranteed for the user/specifier.
Operation
The Drimaster provides whole home ventilation using the Positive
Input Ventilation principle. Essentially the concept is to introduce
fresh, filtered air into the dwelling at a continuous rate, encouraging
movement of air from inside to outside.
To achieve this, the unit is mounted in the loft space, drawing air
through the filters and inputting it, at ceiling level, into the property.
The Drimaster units are fitted with an internal temperature sensor.
This sensor continuously monitor the temperature in the loft,
boosting the air volume when the loft temperature is above a set
level (heat recovery mode).
If the loft temperature becomes excessive the unit will switch to
standby mode (no airflow).
Once installed, the airflow can be set to suit the house size and, if
required, the way it responds to the temperature changes within.
1.0 Loft Inspection
Check to ensure that the loft has adequate ventilation. Look for
ridge vents, tile vents, eaves vents and continuous air gaps etc.
making sure none are blocked. In older properties these vents may
not be provided. However, there should be enough ‘leakage’ to
accommodate the requirements of the Drimaster unit. A useful way
of checking such lofts is to close the hatch, switch off the lights
and look for any daylight penetration. If you can see daylight it is
reasonable to assume that the loft has ventilation.
There may be occasions where a loft is so well sealed that additional
ventilation may have to be provided by the owner/occupier. This will
not only assist the operation of the Drimaster, but will help prevent
possible expensive structural damage caused by inadequate air
movement in the loft itself. It should be noted that there cannot be
too much ventilation into the loft.
Ensure that all water tanks are covered and sealed.
Check that all water pipes are lagged.
Ensure that any extract fans are discharging to outside and
not into the loft.
Check that the loft hatch is tightly sealed.
Ensure that all holes in the ceilings are sealed i.e. ceiling light
fittings etc.
A visual inspection of any flues or chimneys for leakage in the
loft should be carried out by the installer.
If any leakage points are found, or if there is any doubt at all,
then the installer should advise the house owner/provider as
soon as possible and seek instruction from them before
proceeding with the installation.
2.0 Siting the Diffuser position
The diffuser has a unique air throw pattern and it is essential that it
is located correctly in the central hallway in single storey properties
or in the ceiling of the top floor landing on 2 or more storey dwellings.
As can be seen in figure 2 the diffuser discharges air evenly from all
four sides along the underside of the ceiling.
Figure 2. Diffuser (viewed from below).
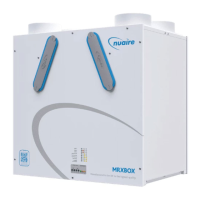
Figure 1.
1
Leaflet Number 671104 November 2011
The EMC Directive
2
014/30/EU
The Low Voltage
directive
2
014/35/EU
Airflow from four sides
Speed Setting Minimum distance of diffuser from wall
1 100mm
2 155mm
3 400mm
4 625mm
5 850mm
6 1000mm
Note: The positioning of
the diffuser should be in
strict accordance with the
table shown below to
ensure correct operation:-
Question and Answer IconNeed help?

Do you have a question about the Nuaire Group DRIMASTER and is the answer not in the manual?

Overview

The Nuaire Drimaster and Drimaster-3S are anti-condensation and whole-house ventilation units designed to address severe condensation problems. These units operate on the Positive Input Ventilation (PIV) principle, introducing fresh, filtered air into a dwelling at a continuous rate to encourage air movement from inside to outside.

Function Description:

The Drimaster unit is mounted in the loft space, where it draws in outside air. This air is then filtered and gently tempered by the free heat in the loft (from solar radiation and heat loss from the property) before being inputted into the property at ceiling level, typically in a central hallway or stairwell. This tempered, fresh, and clean air continuously dilutes, displaces, and replaces the existing air within the home, creating an environment free from severe condensation dampness and associated issues like mould growth and musty smells. The unit is fully automatic, switching between 'normal,' 'boost,' and 'off' modes as required to optimize energy usage.

The units are equipped with an internal temperature sensor that continuously monitors the loft temperature. When the loft temperature rises above a set level, the unit boosts the air volume (heat recovery mode). If the loft temperature becomes excessive, the unit switches to standby mode, ceasing airflow.

Important Technical Specifications:

  • Voltage: 240V 1ph 50Hz
  • Consumption: 1.6W (min) to 15.3W (max)
  • Fuse Size: 1 Amp
  • Unit Weight: 3.2 kg (for standard installation)
  • Warranty: 5 years (parts and labour for the first year, parts only for the remaining 4 years). The warranty is conditional on strict adherence to installation guidelines and recommended filter maintenance.
  • Diffuser Siting: The diffuser has a unique air throw pattern and must be correctly located in the central hallway (single-storey properties) or the top floor landing ceiling (multi-storey dwellings). It discharges air evenly from all four sides along the underside of the ceiling. Specific minimum distances from walls are provided based on the speed setting (e.g., 100mm for Speed Setting 1, 1000mm for Speed Setting 6).
  • Diffuser Types:
    • Plastic Type: Requires a 225mm diameter circular hole in the ceiling. The diffuser frame is secured to the ceiling underside with screws and plugs, and the diffuser plate attaches to the frame with press-on clips. Foam strips are supplied to guide airflow away from smoke detectors or obstructions.
    • Painted Aluminium Type c/w Intumescent Fireblock: Requires a 200mm hole in the ceiling. This type involves a top portion (A) above the ceiling, a central ceiling plate (B) fixed to (A) with screws, and a bottom part (C) screwed to (B) through plastic spacers. Due to the higher air resistance of the fireblock, the unit's speed should be increased by one increment.
  • Electrical Connection: The unit is supplied with a pre-wired power supply unit with a metal bracket for mounting to a suitable surface (e.g., a wooden joist). A fused spur is also provided. The two-core mains cable from the power supply must be connected to a fixed wiring installation via an isolator and spur, in accordance with current IEE wiring regulations. For good EMC engineering practice, the power supply output cable and any sensor cables should not be placed within 50mm of other cables.
  • Smoke/Carbon Monoxide Alarm Automatic Shut Down: For 3S units, this is a mandatory requirement. Alarms with separate relay bases (e.g., from Dicon Safety products or Aico Ltd) are available to switch off the unit in the event of smoke/CO detection.

Usage Features:

  • Automatic Operation: The unit operates automatically, adjusting its airflow based on loft temperature to optimize energy use and maintain indoor air quality.
  • Speed Settings: The unit offers 6 Air Volume (speed) settings, adjustable via a setting switch on the side of the unit. LED indicators show the corresponding air volume. The appropriate speed setting depends on the house size (e.g., lowest setting for a one-bedroom bungalow, highest for a five-bedroom detached house).
  • Temperature Control Options: There are 5 temperature control options that dictate how the unit responds to loft temperature changes:
    • Option 1 (Default): Normal operation below 19°C, intelligent heat recovery mode between 18°C and 24°C, and standby mode above 23°C.
    • Option 2: Similar to Option 1 but with intelligent heat recovery mode between 18°C and 31°C, and standby mode above 30°C.
    • Option 3: Removes the temperature sensing function, allowing the unit to operate continuously in 'Normal Operation Mode' based on the selected volume control setting.
    • Option 4: Normal operation below 16°C, heat recovery mode between 15°C and 28°C, and standby mode above 27°C.
    • Option 5: Normal operation below 19°C, heat recovery mode between 18°C and 24°C, and standby mode above 27°C or below 5°C. Speed Setting 1 is not available for Option 5; if selected, the unit operates at Speed Setting 2. This option should not be used if an integral optional heater has been fitted.
  • Setting Selection: Speed and temperature control options are selected by pressing and holding a setting button. LEDs flash to indicate selection, and the chosen option is stored in the unit's memory by switching the isolator off and then on again.
  • Loft Ventilation Check: Installers must ensure adequate loft ventilation. If the loft is too well sealed, additional ventilation may be required to assist Drimaster operation and prevent structural damage.
  • Water Tank/Pipe Check: All water tanks must be covered and sealed, and water pipes lagged.
  • Extract Fan Check: All extract fans must discharge to the outside, not into the loft.
  • Ceiling Sealing: Loft hatches must be tightly sealed, and all holes in ceilings (e.g., around light fittings) must be sealed.
  • Flue/Chimney Inspection: A visual inspection for leakage in flues or chimneys in the loft is required. Any leakage points must be addressed before proceeding with installation.

Maintenance Features:

  • Filter Maintenance: The filters require replacement every 5 years. New filters can be purchased directly from Nuaire (code 775631). Filters can also be vacuum cleaned periodically if necessary. Reduced performance or black dust around the diffuser indicates that the filter may need cleaning or replacement.
  • Electrical Safety: All electrical connections must be carried out by a qualified electrician. The unit must always be isolated before any inspection or dismantling. Dismantling the unit will invalidate the warranty.
  • General Maintenance: Access panels must be in place and secured during operation. If equipment failure is suspected, it should be taken out of service until repaired or examined by a competent person.
  • Access Panel Removal: If access panels need to be removed, the electrical supply to the unit must be isolated, and a minimum of two minutes allowed for the impeller to come to rest. Care should be taken as airflow from other parts of the system can cause the impeller to 'windmill' even without power.
  • User Tips: To maximize benefits, users are advised to avoid drying clothes indoors, ensure tumble dryers vent outside, and avoid portable unflued gas heaters and paraffin heaters.

Nuaire Group DRIMASTER Specifications

General IconGeneral
BrandNuaire Group
ModelDRIMASTER
CategoryFan
LanguageEnglish

Related product manuals