MODEL: SFL618
L Cleat
Figure 18
Staple
CHANGE THE FOOT PLATE
The tool is equipped with a factoty pre—installed
3/4" foot plate(D), and an additional uninstalled 5/8"
&9/16" foot plate.
To change the plate:
Disconnect the tool from the air source.
2. Empty the magazine completely.
3. Fire the tool into a piece of scrap wood to
ensure there is no compressed air or fasteners
left in the tool.
4. Set the tool on its Side to expose the four
screws(E).
5. Remove the four screws(E), then, remove the
foot plate.
6. Align the four screw holes in the replacement
foot plate with the four threaded mounting
holes.
7. Using the four screws you removed just now,
secure the replacement foot plate to the tool.
8. Ensure the correct foot plate is installed by
firing into a scrap piece of flooring and
checking for proper fastener placement.
NL.ounÄ
A WARNING:
Disconnect the tool from the air source
whenever changing the foot plate. Make
sure there is no fastener in the magazine
before changing the foot plate.
Screws(E)
Foot plate(D)
SETTING THE AIR PRESSURE
MODEL: SFL618
3.
Press down firmly so that the foot plate (D) is
firmly contacting the work surface. Then, using
the mallet packed with the tool, strike the
hammer cap (K) firmly to drive the fastener into
work surface. Lift the tool off the work surface.
Repeat this process until the job is completed.
4. When finished, make sure to store the tool in a
clean, dry, safe location out of reach of children
and other unauthorized people.
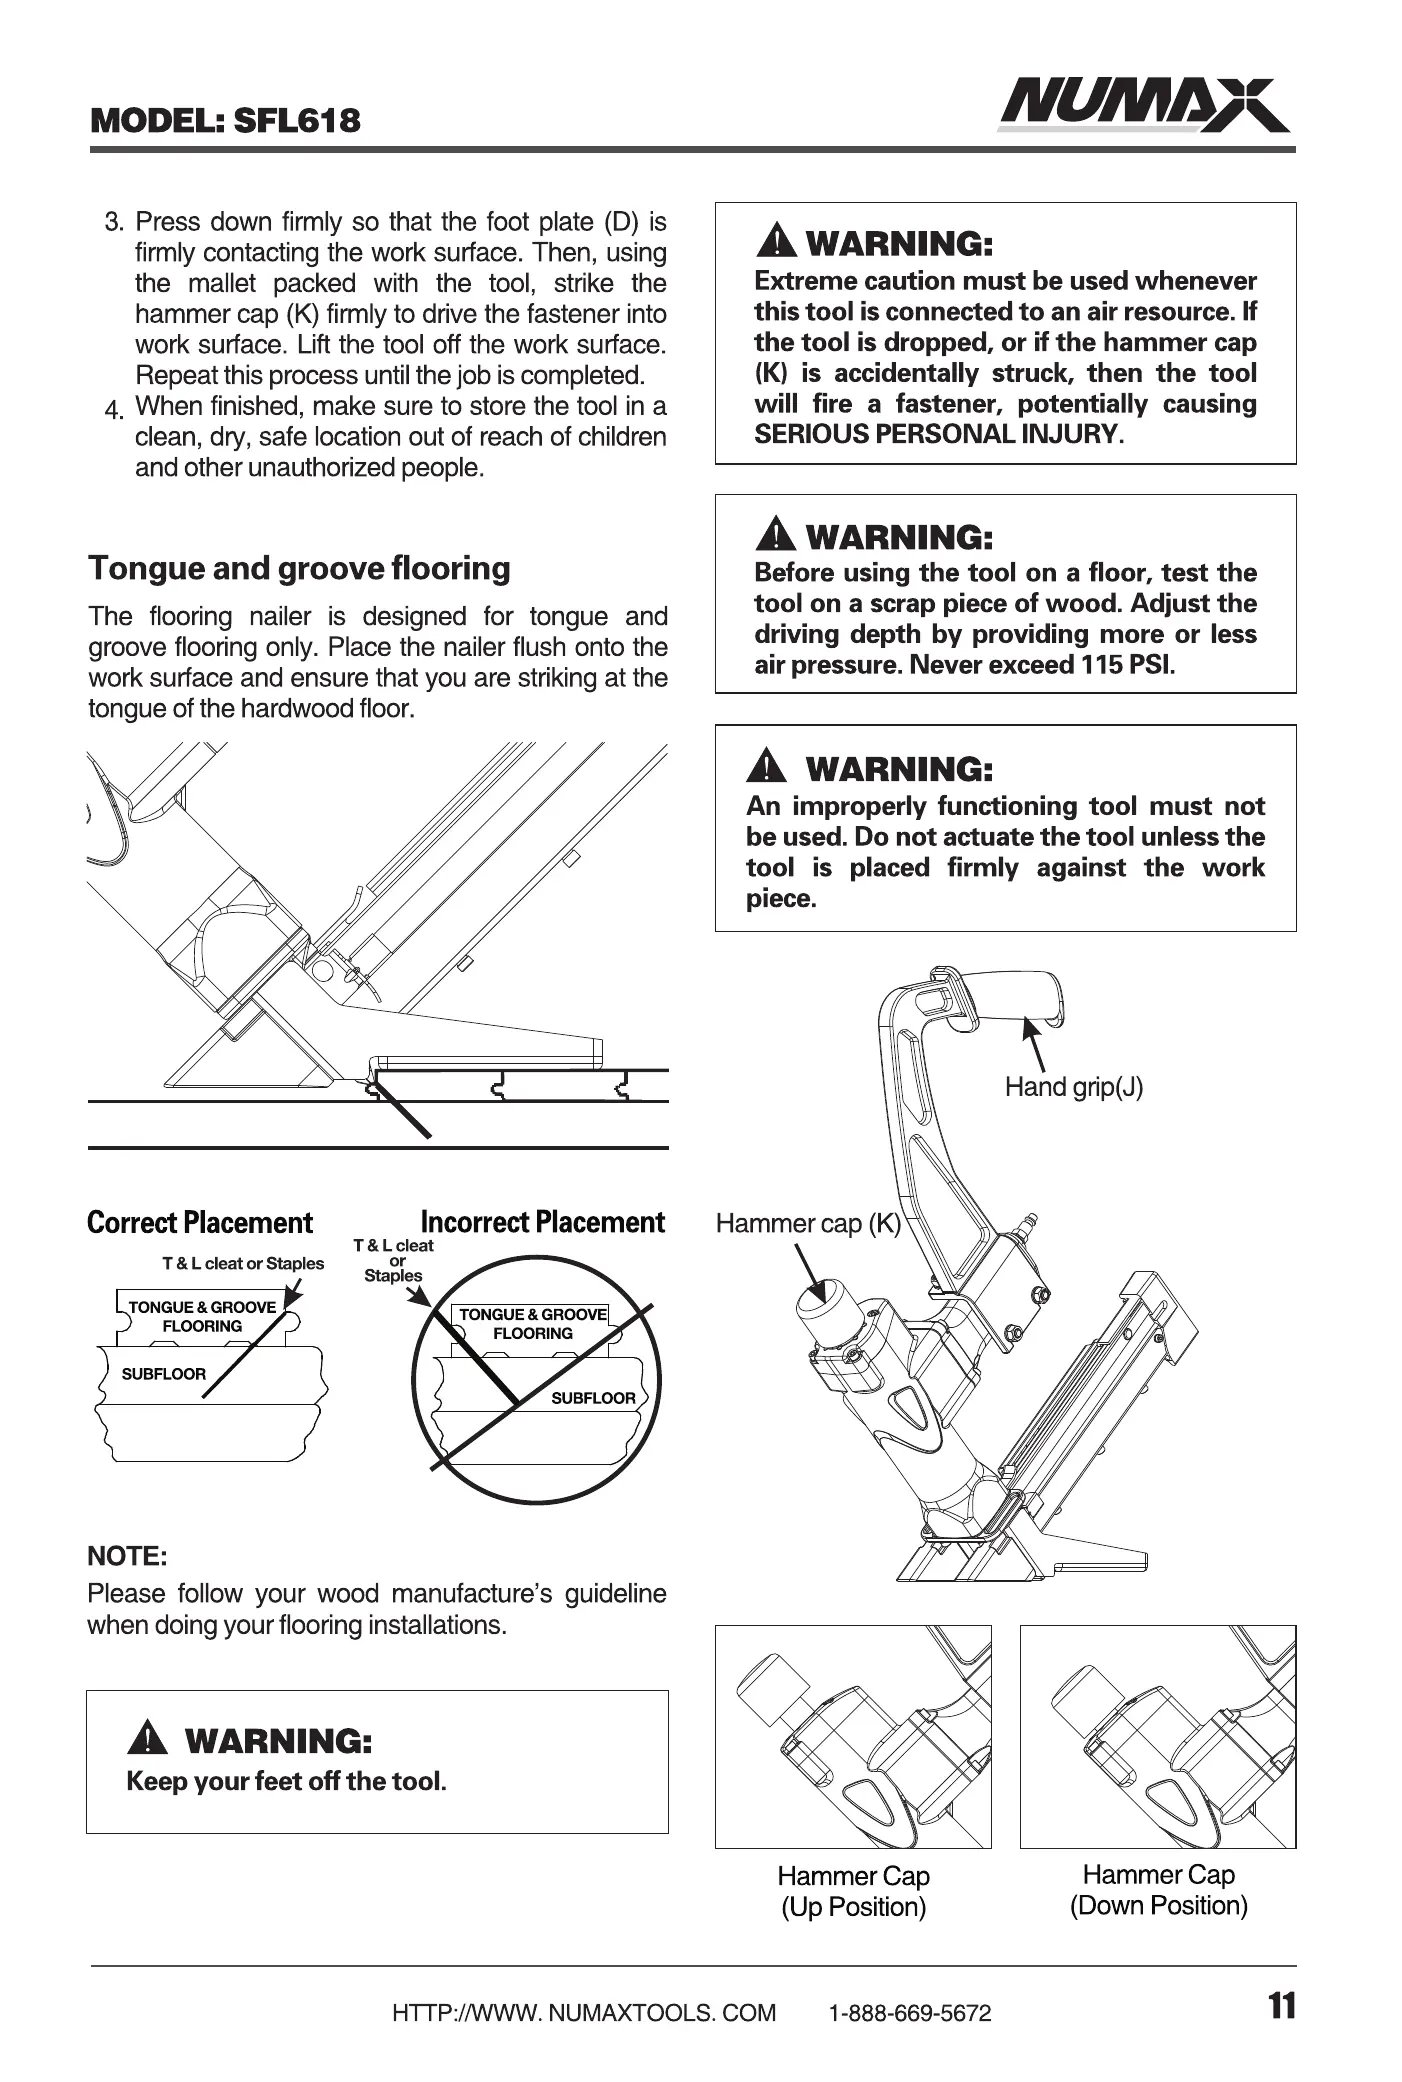
Tongue and groove flooring
The flooring nailer is designed for tongue and
groove flooring only. Place the nailer flush onto the
work surface and ensure that you are striking at the
tongue of the hardwood floor.
Correct Placement Incorrect Placement
T & L cleat
A WARNING:
Extreme caution must be used whenever
this tool is connected to an air resource. If
the tool is dropped, or if the hammer cap
(K) is accidentally struck, then the tool
will fire a fastener, potentially causing
SERIOUS PERSONAL INJURY.
A WARNING:
Before using the tool on a floor, test the
tool on a scrap piece of wood. Adjust the
driving depth by providing more or less
air pressure. Never exceed 115 PS'.
A WARNING:
An improperly functioning tool must not
be used. Do not actuate the tool unless the
tool is placed firmly against the work
2.
3.
4.
The amount of air pressure required depends
on the size of the fasteners and the workpiece
material.
Begin testing the depth of drive by driving a test
nail into the same type of workpiece material
used for the actual job.
Drive a test fastener with the air pressure set at
90-95psi.
Raise or lower the air pressure to find the
lowest setting that will perform the job with
consistent results.
T & L Cleat or Staples
TONGUE & GROOVE
FLOORING
SUBFLOOR
NOTE:
TONGUE & GROOVE
FLOORING
SUBFLOOR
OPERATING THE TOOL
Please follow your wood manufacture's guideline
when doing your flooring installations.
A WARNING:
Keep your feet off the tool.
2.
Attach the tool to the air source. Start your
compressor and check the pressure, making
sure it is set between 70—115 psi. Do not
exceed the maximum 115 psi.
Hold the hand grip (J) securely and press the
Foot Plate (D) to the work surface. Make sure
the plate is over the fastener target position.
piece.
Hammer cap (K)
Hammer Cap
(Up Position)
Hand grip(J)
Hammer Cap
(Down Position)
10
HTTP://WWW. NUMAXTOOLS. COM
1-888-669-5672
HTTP://WWW. NUMAXTOOLS. COM
1-888-669-5672
11
 Loading...