MODEL: SFL618
NOTE:
Make sure the Hammer Cap on the flooring nailer is
in the up position before adding the air hose, if not,
the nailer may cycle (See above figure):
CLEARING JAMS
Occasionally, fasteners may become jammed in
the firing mechanism of the tool, making the tool
inoperable. To remove a jammed fastener, follow
these steps below:
1. Disconnect the tool from air source.
2. Empty the magazine. Make sure all fasteners
are removed.
3. Try to fire the tool into a piece of scrap wood or
flooring to make sure that it's incapable of firing
any fasteners.
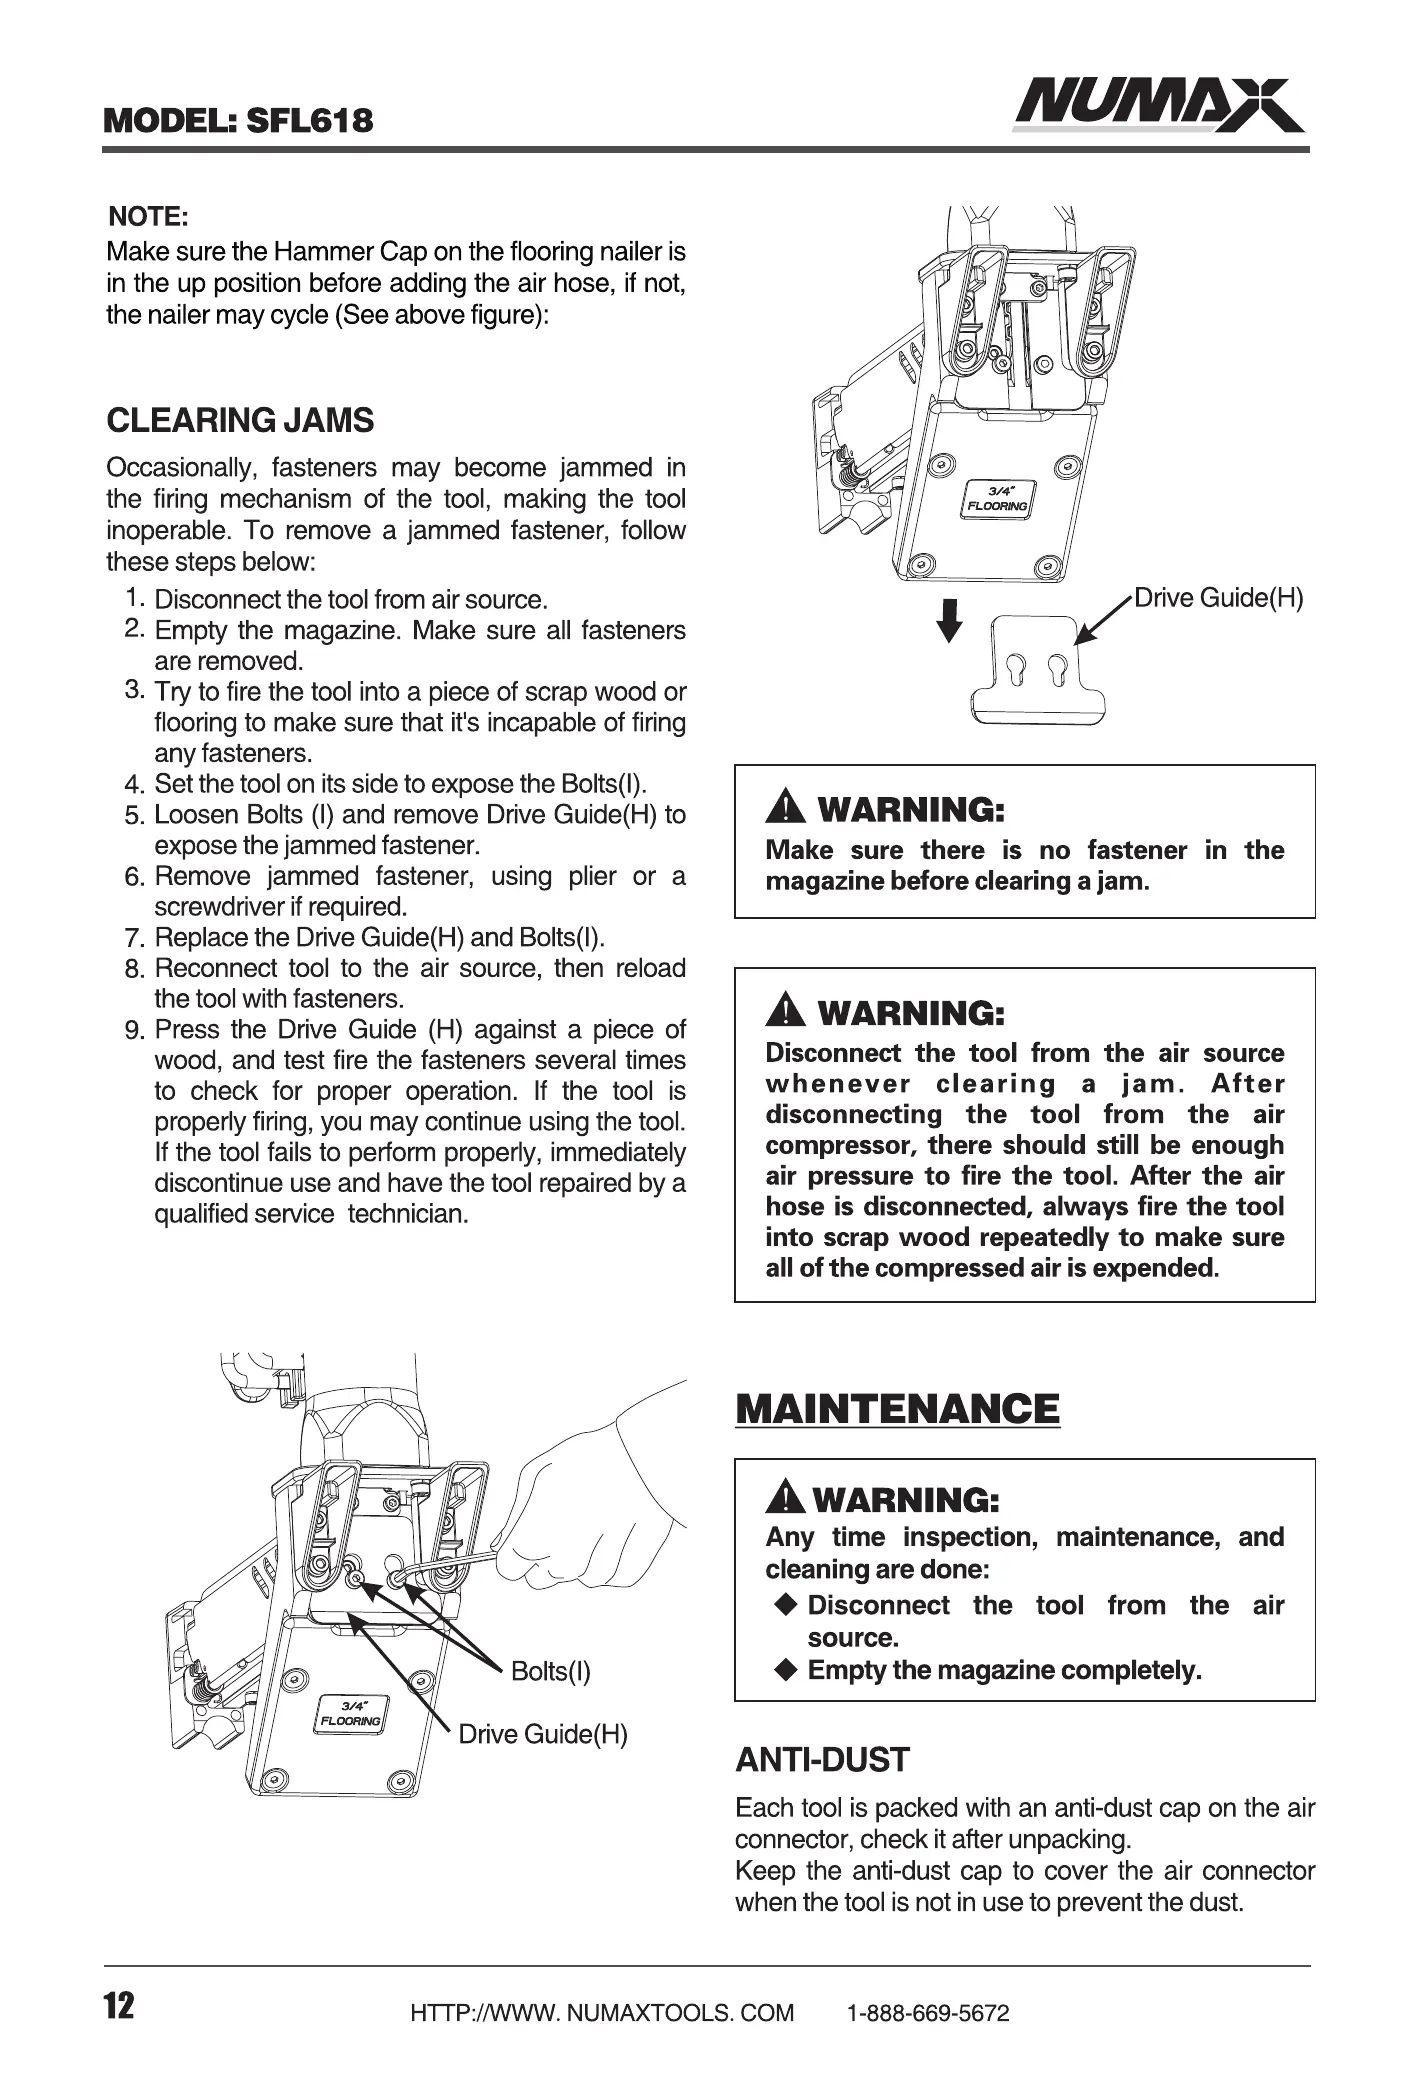
4. Set the tool on its side to expose the Bolts(l).
5. Loosen Bolts (l) and remove Drive Guide(H) to
expose the jammed fastener.
6. Remove jammed fastener, using plier or a
screwdriver if required.
7. Replace the Drive Guide(H) and Bolts(l).
8. Reconnect tool to the air source, then reload
the tool With fasteners.
9. Press the Drive Guide (H) against a piece of
wood, and test fire the fasteners several times
to check for proper operation. If the tool is
properly firing, you may continue using the tool.
If the tool fails to perform properly, immediately
discontinue use and have the tool repaired by a
qualified service technician.
Bolts(l)
Drive Guide(H)
NL.ounÄ
Drive Guide(H)
MODEL: SFL618
LUBRICATION
Frequent, but not excessive, lubrication is required
for best performance. The oil added through the air
line helps to prevent rust and lubricate the intemal
parts of the nailer. Do not use detergent oil or
additives as these lubricants will cause accelerated
wear to the seals and bumpers in the tool, resulting
in poor tool performance and frequent tool
maintenance.
Disconnect the air supply from the tool to add
lubricant.
2. Turn the tool so the air inlet is facing up. Place
2—3drops of pneumatic fastening tool oil into air
inlet. Do not use detergent oils, oil additives, or
air—tool oils as these lubricants will cause
accelerated wear to the seals and bumpers in
the tool, resulting in poor tool performance and
frequent tool maintenance.
3. After adding oil, run tool briefly.
excess oil from the cap exhaust.
A WARNING:
Make sure there is no fastener in the
Wipe off any
specified
CAUTION:
Lubricate tool
lubricants.
CAUTION:
only with
magazine before clearing a jam.
A WARNING:
Disconnect the tool from the air source
whenever clearing a jam.
After
disconnecting the tool from the air
compressor, there should still be enough
air pressure to fire the tool. After the air
hose is disconnected, always fire the tool
into scrap wood repeatedly to make sure
all of the compressed air is expended.
MAINTENANCE
A WARNING:
Any time inspection, maintenance, and
cleaning are done:
Disconnect the tool from the air
source.
Empty the magazine completely.
ANTI-DUST
Each tool is packed with an anti-dust cap on the air
connector, check it after unpacking.
Keep the anti-dust cap to cover the air connector
when the tool is not in use to prevent the dust.
The work surface can become damaged by
excessive lubrication. Proper lubrication is
the owner' s responsibility. Failure to
lubricate the tool properly will
dramatically shorten the life of the tool
and void your warranty.
CLEANING
Avoid using solvents when cleaning plastic pans.
Most plastics are susceptible to damage from
various types of commercial solvents and maybe
damaged by their use. Use clean cloths to remove
dirt, dust, oil, grease, etc.
A WARNING:
Do not at any time let brake fluids,
gasoline, petroleum-based products,
penetration oils, etc. come in contact with
plastic parts. Chemicals can damage,
weaken or destroy plastic which may
result in serious personal injury.
12
HTTP://WWW. NUMAXTOOLS. COM
1-888-669-5672
HTTP://WWW. NUMAXTOOLS. COM
1-888-669-5672
13
 Loading...