MODEL LA226WH
Page 1
SELECT-A-TONE WIRELESS CHIME
Installation & Operating Instructions
IMPORTANT: This wireless pushbutton and chime set is for
residential use, only. It will operate at an unobstructed distance of
300 feet. Building materials may reduce operating distance. Certain
building materials; such as, but not limited to metal, concrete, brick,
stucco and foil-lined insulation; cause greater interference than
others; for example, wood or vinyl siding.
INSTALL PUSHBUTTON BATTERY
Refer to Figures 1 and 2.
1. Remove pushbutton and 3V lithium coin-battery from packaging.
2. Insert small, flat-blade screwdriver into bottom of pushbutton and twist
to separate its base.
3. Orient battery with “+” side viewable.
4. Insert battery into holder and press to seat.
5. Insert top of mounting base onto pushbutton and press bottom
together until mounting base snaps securely onto pushbutton.
Use only 3V (volt) lithium CR2032 style coin-battery for
replacement.
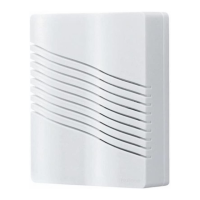
INSTALL CHIME BATTERIES
Refer to Figures 3 and 4.
1. Remove chime from packaging.
2. Orient chime face-up.
3. Insert small, flat-blade screwdriver into bottom of locking-tabs, push
and tilt screwdriver to unlock tabs.
4. Lift bottom of cover to separate and remove it from base; set cover
aside.
5. Insert four (4) 1.5V “D” alkaline batteries (not supplied) oriented as
shown on back of battery compartment.
Figure 1
“PUSH”
TO OPEN COVER
Figure 3
3V LITHIUM
CR2032-STYLE
COIN
BATTERY
Figure 2
SLOT
Figure 4
“PUSH”
TO OPEN
4 - “D” SIZE BATTERIES
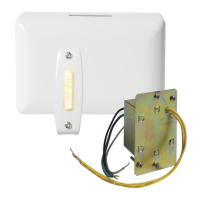
Figure 5
VOLUME BUTTON
LEARN BUTTON
LED
“LEARN” PROCEDURE
Refer to Figure 5.
1. Set pushbutton and chime next to each other.
2. Press and release “Learn” button.
3. LED lights to indicate “Learn” mode was entered.
4. Press and release wireless pushbutton.
5. Confirm chime-tone is heard.
6. Repeat Step 4 to cycle through available chime-tones.
7. When desired chime-tone is heard, press and release “Learn” button
(Note: Chime may not respond to this button being pressed if it is too
soon after chime-tone sounds).
8. LED should turn off to confirm “Learn” mode exited.
9. Press and release wireless pushbutton and confirm chime-tone
doesn’t change.
• Up to four (4) wireless pushbuttons can be used with a single chime
by selecting different chime-tones for each pushbutton.
• Chime can erase all “Learned” pushbuttons and tones by pressing
and holding “Learn” button; LED will light; after approximately 18
seconds, LED will turn off; release “Learn” button.
DETERMINE USABLE LOCATIONS
Do not plan to mount pushbutton directly on metal or concrete
surfaces; install a 1/8 to 1/4” wood spacer between pushbutton and
metal or concrete mounting surface.
Some stucco houses have metal mesh in the wall structure, which
will affect the wireless chime performance.
Experiment with various pushbutton and chime locations to
determine location that gives best performance before mounting
permanently.
Chime must not be located within 1-foot of any metal.
Pushbutton and chime should be located within 300-feet of each
other.
1. Place chime near its desired mounting location.
2. Select a level location and hold pushbutton in its desired mounting
location.
3. Press and release pushbutton.
4. Confirm chime-tone sounded.
5. If chime-tone does not sound, temporarily affix pushbutton to
mounting surface with double-stick or folded-over tape; repeat Steps 3
and 4.
6. If chime-tone still does not sound, move location of chime closer to
pushbutton; repeat Steps 3 and 4.