EasyManuals Logo

NuTone VX550 Installation Instructions

NuTone VX550
40 pages
To Next Page IconTo Next Page
To Previous Page IconTo Previous Page
Page #25 background imageLoading...
Page #25 background image
25
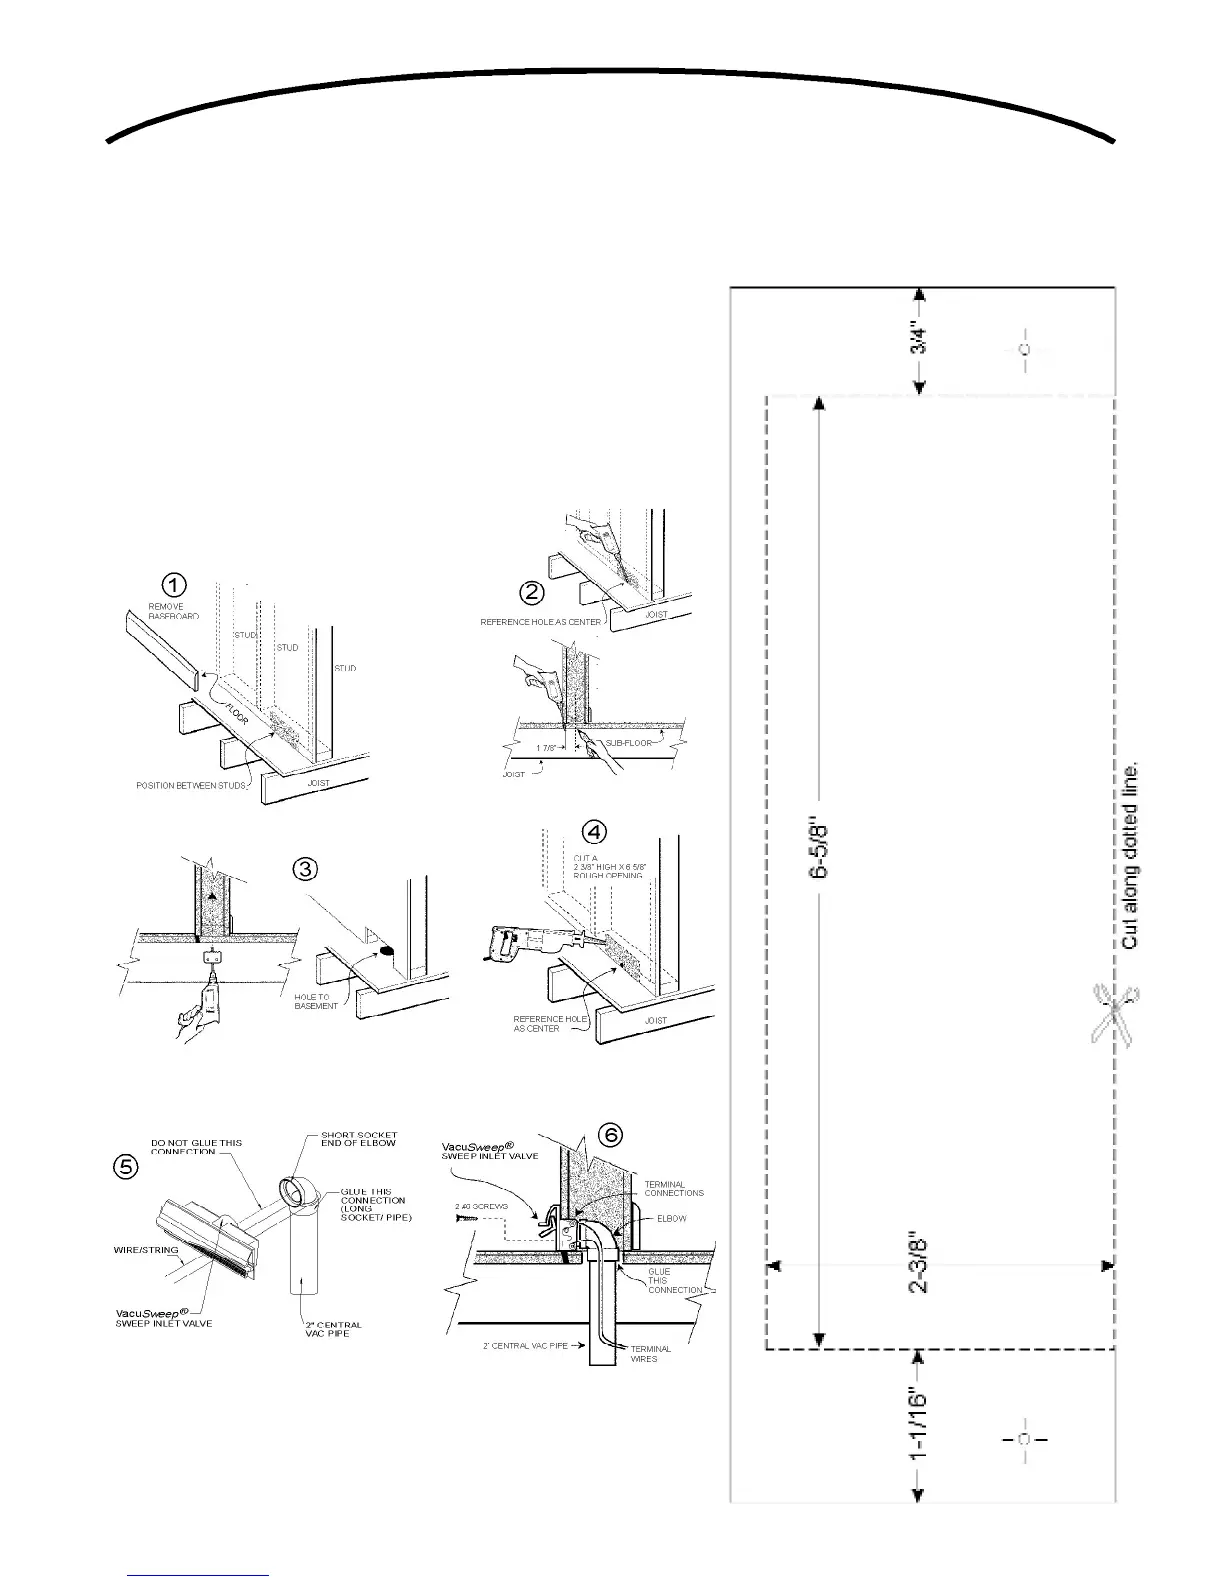
wire/string around the pipe. Using the wire/string to
temporarily hold the pipe and elbow in place, insert the
VacuSweep
®
Sweep Inlet Valve into the opening at the base
of the wall and elbow. DO NOT glue this connection
(Designed for friction fit). See Figure 50-5.
6. Remove the wire/string. With the door in an open position,
secure the VacuSweep
®
Sweep Inlet Valve to the wall using
#6 screws. See Figure 50-6. Ensure that the spring on
the electrical connector has 1/8” clearance to rough
o p e n i n g. Continue with remainder of central vacuum
connections. When the vacuum system is complete, turn
the power to the vacuum unit on.
FIGURE 50
VacuSweep® Sweep Inlet
Valve Rough-in Template

Other manuals for NuTone VX550

Questions and Answers:

Question and Answer IconNeed help?

Do you have a question about the NuTone VX550 and is the answer not in the manual?

NuTone VX550 Specifications

General IconGeneral
AC input voltage120 V
Maximum input power- W
Cord length1.8 m
MaterialThermoplastic
TypeDrum vacuum
CordlessNo
Cleaning typeDry
Dust capacity35.23 L
Product colorBlack, Grey, Red
Tube materialPlastic
Dust container typeDust bag
Proper useHome
Vacuum air filtering-
Weight and Dimensions IconWeight and Dimensions
Depth444.5 mm
Width292.1 mm
Height990.6 mm
Weight- g

Related product manuals