2
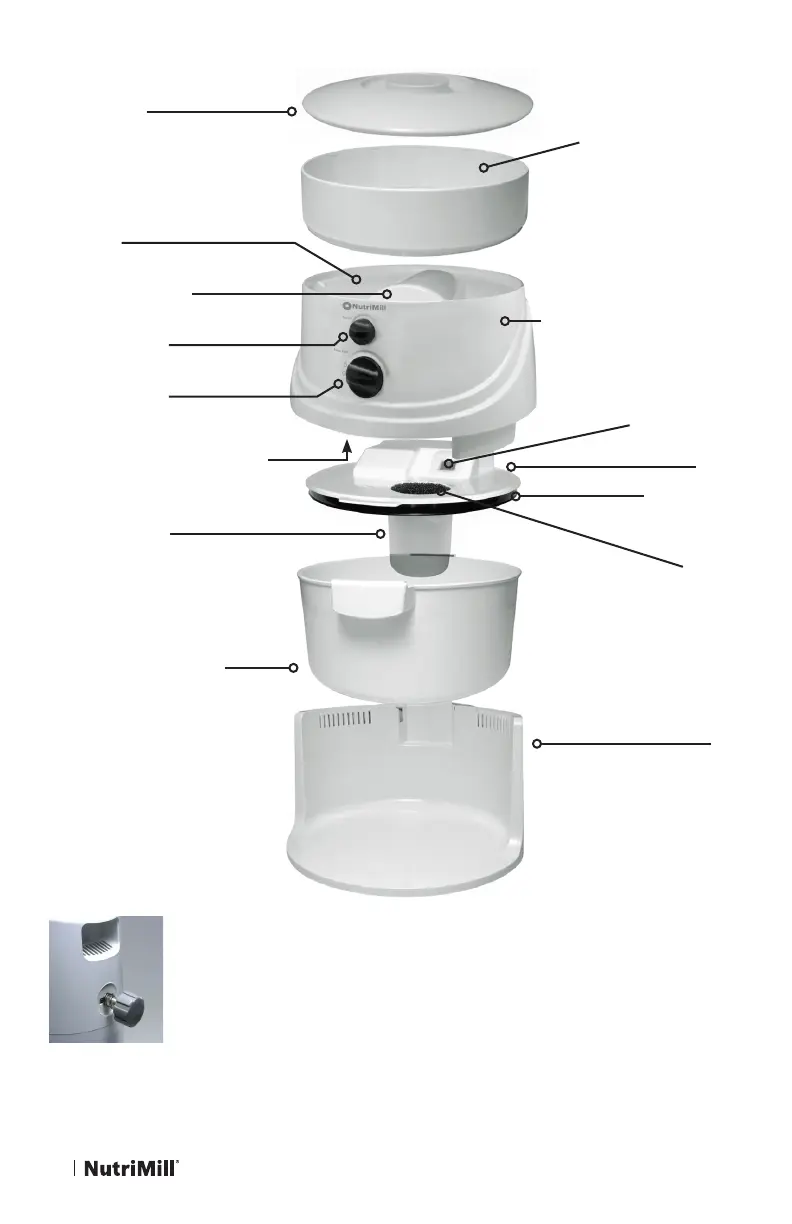
Locking Pin
This knob at the back of the mill rmly holds
the mill unit to the base. It can be removed
with a twist to separate sections for storage,
cleaning, or for use with the NutriMill Classic
optional Flour Bagger accessory.
Hopper Lid
Use during milling
for quiet operation
Hopper Extension Ring
Comes packed inside the
our bowl. Should always be
removed from bowl before
milling. Increases grain
capacity. Not necessary to use
when milling small amounts
of grain
Grain Inlet Cover
Hopper
Circuit Reset Button (Red)
Located at the bottom of the
Milling Module Unit
Separator Cup
Must be attached when
milling. For air ltration.
Prevents Flour Leakage.
Flour Bowl (Canister)
Large 20 cup capacity.
Large easy grip handles.
Air Filter*
Must be dry and in place
when milling. Helps air
ow. Prevents our leakage
during milling.
Base
Yes/No bowl position
indicator on front of base
helps position bowl into
place. Bowl must be pushed
in far enough to reveal
“YES” line on the base.
Milling Module Unit
Variable Motor Speed
Control Knob
Variable Texture
Control Knob
Bowl Lid
*Inlet grommet and lter should be replaced every 2 years or as needed.
Rubber Gasket
Inlet Grommet*
 Loading...