09
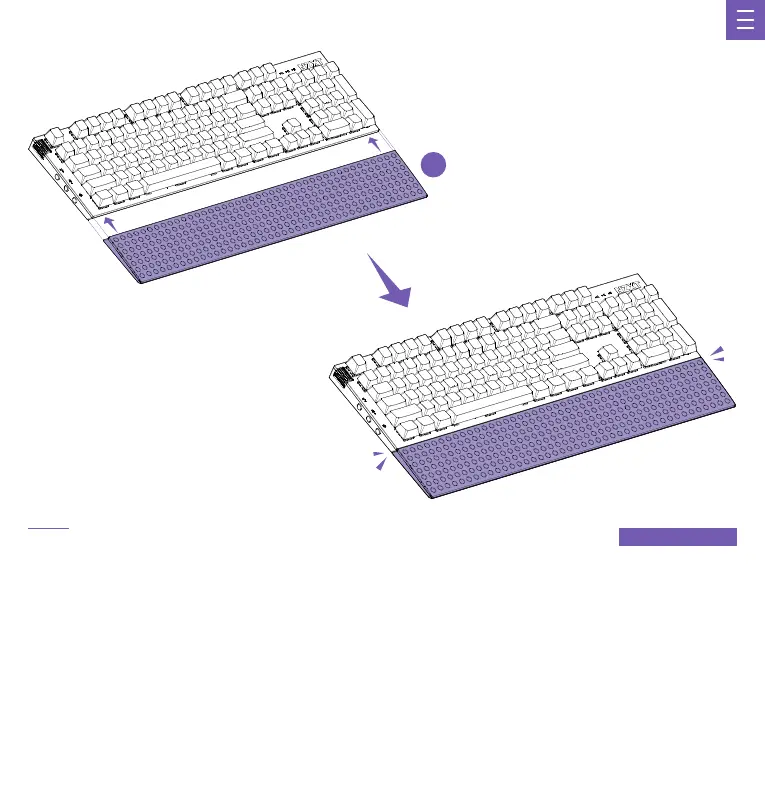
STEP 2
Attach the wrist rest to the front of the keyboard. The wrist rest is magnetic—it will connect and center itself automatically.
Coloca el reposamuñecas en la parte delantera del teclado. El reposamuñecas es magnético: se acopla y se centra automáticamente.
Fixez le repose-poignets à l’avant du clavier. Le repose-poignets est aimanté, ce qui lui permet de se connecter et de se centrer
automatiquement.
Befestige die Handballenauflage an der Vorderseite der Tastatur. Die Handballenauflage ist magnetisch – sie lässt sich automatisch
befestigen und zentriert ausrichten.
Fissare il poggiapolsi alla parte anteriore della tastiera. Il poggiapolsi è magnetico: si collegherà e si centrerà automaticamente.
Fixe o apoio de pulso na parte frontal do teclado. O apoio para o pulso é magnético — liga-se e centra-se automaticamente.
손목
받침대를 키보드 전면에 부착합니다. 손목 받침대는 자성이 있어 자동으로 연결되고 중앙에 배치됩니다.
リストレストをキーボードの前面に取り付けます。リストレストはマグネット式で、自動的に接続され、中央に配置されます。
将腕垫连接到键盘前方。腕垫是磁性的——它会自动连接并居中。
將手腕墊接在鍵盤前方。手腕墊帶有磁性,能夠與鍵盤吸住,並自動對準中心。
Function 2 only
C