Do you have a question about the OBaby Astrid and is the answer not in the manual?
Connect base support rails using parts P7, P8, and P9.
Form the base frame by connecting components with parts P6 and P8.
Attach side panels to the base frame using part P6.
Attach bed ends to the base frame using part P1.
Attach side panels to the bed ends using parts P5, P12, P2, and P6.
Attach side rails to the bed ends using parts P13 and P6.
Connect side rails to side panels using part P13.
Attach the base support to the cot frame using part P1.
Insert the mattress base into the cot frame using parts P3 and P4.
Final assembled cot bed.
Remove bed base supports from the cot using part P1.
Disassemble the side panels from the cot structure.
Attach side panels to the bed ends using parts P12 and P14.
Attach the base and bed end to the side panel using P8, P11, P6.
Attach the support piece to the side panel using part P8.
Attach the rear panel to the structure using part P13.
Attach the front panel to the structure using parts P8 and P13.
Re-attach the bed base supports using part P1.
Insert the mattress base into the day bed structure using parts P3 and P4.
Final assembled day bed.
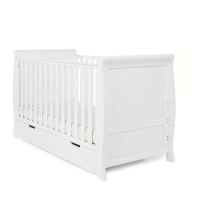
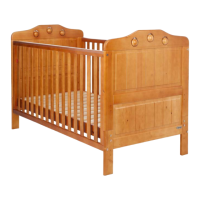
The Obaby Astrid Mini Cot Bed is a versatile and essential piece of nursery furniture designed to provide a safe and comfortable sleeping environment for your child from birth up to approximately four years old. This product is engineered to meet stringent safety standards, specifically BS EN 716-1:2017 and BS 8509:2008 + A1:2011, ensuring peace of mind for parents. Its thoughtful design allows for conversion from a cot to a day bed, adapting to your child's growth and developmental stages.
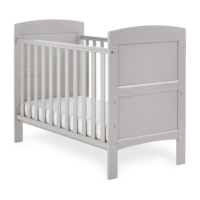
The primary function of the Astrid Mini Cot Bed is to serve as a secure sleeping space for infants and toddlers. In its cot configuration, it features high sides to prevent infants from falling out, providing a contained and safe area for sleep. The cot base is adjustable, offering multiple height positions. Initially, the base can be set at a higher position, making it easier for parents to lift and place newborns without excessive bending. As the baby grows and becomes more mobile, particularly when they can sit unaided, the base should be lowered to the lowest position to prevent them from climbing out. This lowest position is the safest and should be used as soon as the child reaches this developmental milestone.
The cot bed is designed to accommodate a mattress of specific dimensions, typically 120 x 60 cm, ensuring a snug fit that minimizes gaps where a child could become trapped. The internal height from the mattress surface to the top edge of the cot frame is critical for safety; it must be at least 500mm when the base is in the lowest position and a minimum of 200mm when the cot base is in the highest position. This ensures that even an active child cannot easily climb out.
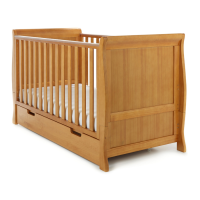
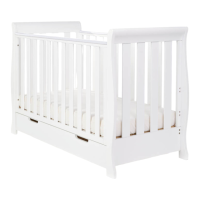
A key feature of the Astrid Mini Cot Bed is its convertibility. Once your child is able to climb out of the cot, typically around 18 months to two years of age, the cot can be transformed into a day bed. This conversion involves removing one of the side rails and adjusting other components, creating an open-sided bed that allows the child to get in and out independently. This transition helps foster a sense of independence and prepares the child for a standard bed, extending the product's usability up to approximately four years of age. The day bed mode maintains a safe sleeping environment while adapting to the child's growing autonomy.
The cot bed is also designed with portability and storage in mind. It can be dismantled for easier transportation or storage when not in use, making it a practical choice for families who may need to move or store the furniture.
The Astrid Mini Cot Bed offers several user-friendly features that enhance its practicality and safety:
Proper maintenance is essential to ensure the longevity and continued safety of the Astrid Mini Cot Bed:
By adhering to these usage and maintenance guidelines, the Obaby Astrid Mini Cot Bed will continue to provide a safe, comfortable, and adaptable sleeping solution for your child for years to come.
| Type | Cot Bed |
|---|---|
| Adjustable Base | Yes |
| Teething Rails | Yes |
| Converts to Junior Bed | Yes |
| Color | White |
| Convertible | Yes |
| Wheels | No |
| Storage | No |
| Mattress Size | 140cm x 70cm |
| Product Type | Cot Bed |
| Material | Wood |
| Adjustable Mattress Height | Yes |