REGULATORS
ALPHA 8 SECOND STAGE
© 2002 Design, 2005
OCEANIC
®
Product Service Guide
Doc. 12-2805-r02 (8/19/10)
PG-6
REASSEMBLY PROCEDURE
NOTE: Prior to Reassembly, it is necessary to inspect all
parts, both new and those that are being reused. Check to
ensure that O-rings are clean and supple, and that every part
and component has been thoroughly cleaned and dried.
WARNING: Use only genuine Oceanic parts, subassem-
blies, and components whenever assembling Oceanic prod-
ucts. DO NOT attempt to substitute an Oceanic part with
another manufacturer’s, regardless of any similarity in shape,
size, or appearance. Doing so may render the product
unsafe, and could result in serious injury or death of the user.
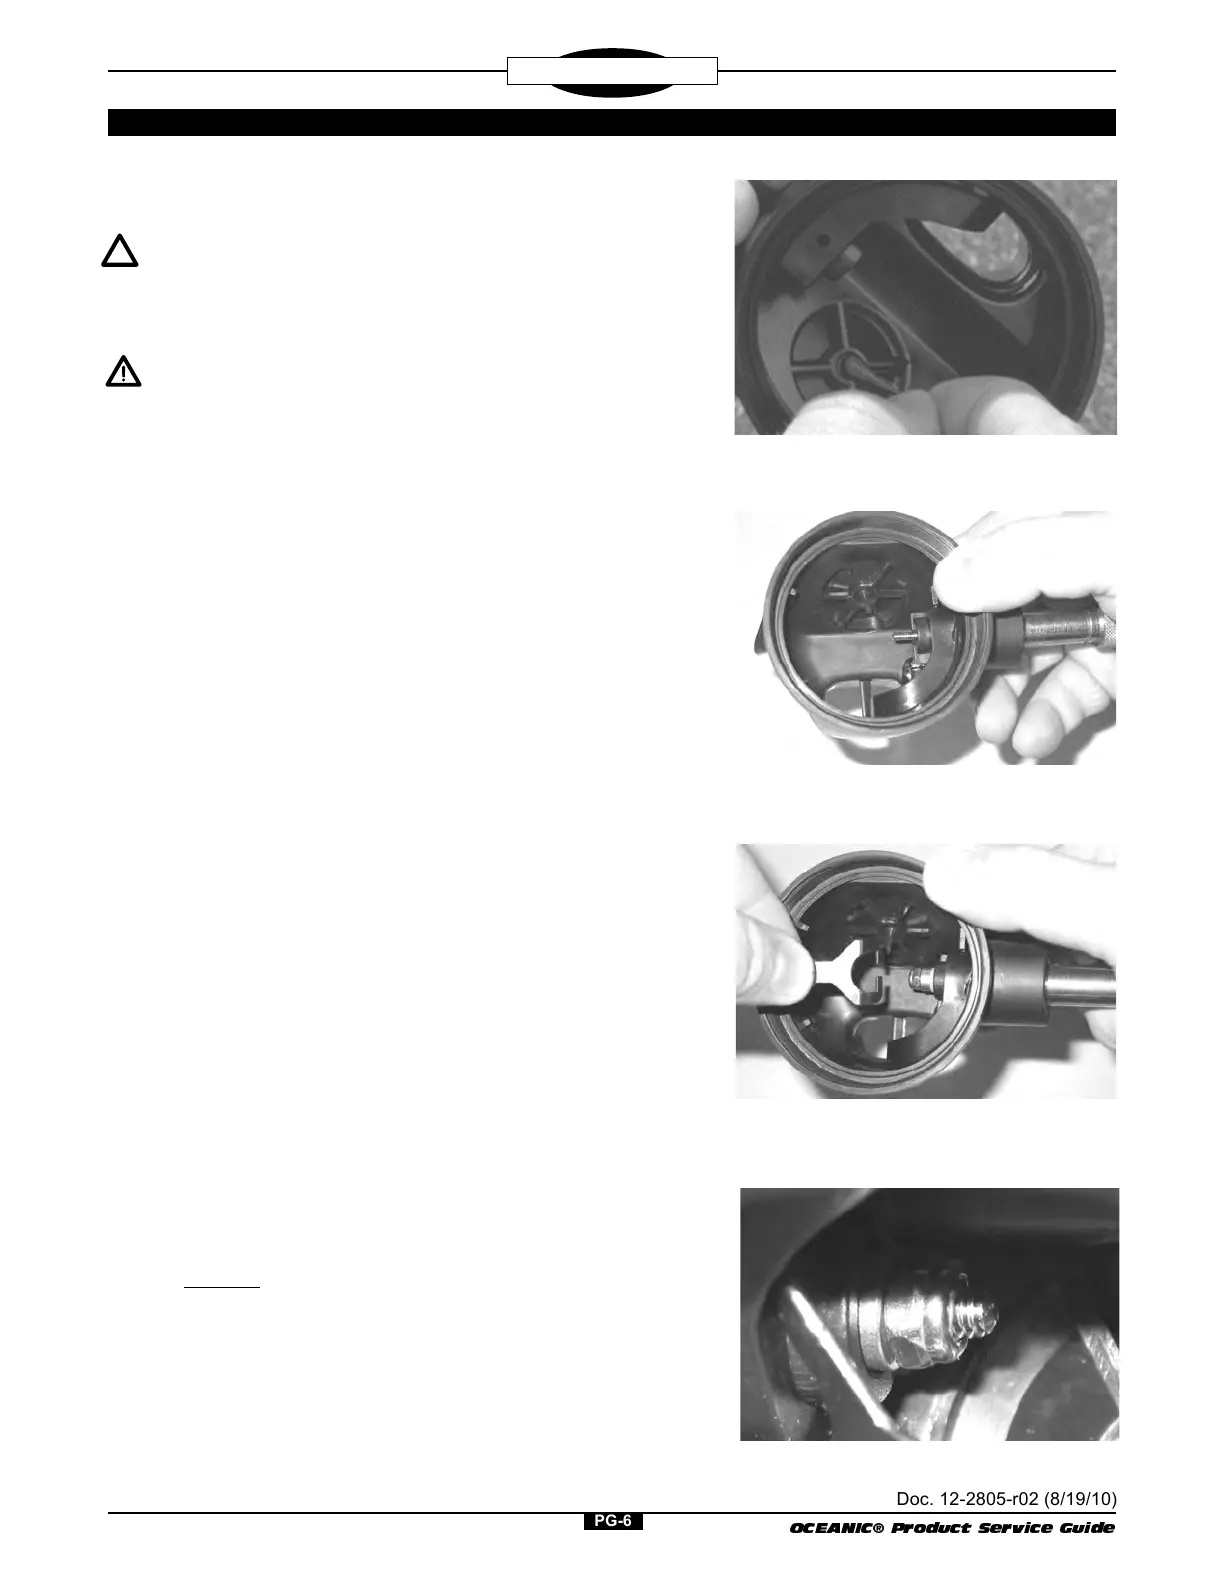
1. If removed, replace the EXHAUST VALVE (14) by gently pulling
the Retainer Stem through the HOUSING (8) until the Retaining
Flange is completely inside the HOUSING and properly seated
(Fig. 6).
2. If removed, replace the EXHAUST COVER (13) onto the Ex-
haust Tee portion of the HOUSING (8).
3. Replace the POPPET SEAT (5) into the POPPET (6) with the
side that is perfectly smooth facing out. Ensure that it is
completely seated, flush with the Inner Rim of the POPPET. DO
NOT use adhesive.
4. Apply a light film of Lubricant to each End of the POPPET
SPRING (7) and place it onto the POPPET (6). Fit the POPPET
into the Pronged End of the Poppet Tool and insert the shaft of
the POPPET completely through the Inlet Tube of the HOUSING
(8) compressing the POPPET SPRING until the Threaded por-
tion of the Shaft is completely visible inside the HOUSING. Hold
in this position by grasping the Tool with your fingers and the
Outer Rim of the HOUSING with your thumb (Fig. 7).
5. Examine both sides of the WASHER (10) to note that one surface
is slightly rounded at the edge and smooth, while the other has
a slightly upturned lip around its outer circumference. Place the
WASHER over the Threads of the POPPET (6) and onto the
Shaft, with the Smooth Side facing up. Place the SPACER (11)
onto the POPPET Shaft. Start the LOCK NUT (12) clockwise
onto the the first two POPPET Threads with your fingertips.
6. Place the Forks of the LEVER ARM (9) over the POPPET Shaft
(6), between the WASHER (10) and SPACER (11) (Fig. 8).
Relax the POPPET and watch to ensure that the LEVER ARM
stands upright, above the Outer Rim of the HOUSING (8).
7. Using a 1/4" open end wrench, hold the LOCK NUT (12) secure,
and turn the POPPET (6) clockwise with the Poppet Tool until 3
Threads are showing beyond the outer surface of the LOCK NUT
(Fig. 9). Remove the tools, and depress the LEVER ARM (9)
repeatedly to ensure smooth movement.
Fig. 8
Fig. 7
Fig. 6
Fig. 9
 Loading...