Q-Boat 1800 Page 8 8/26/2011
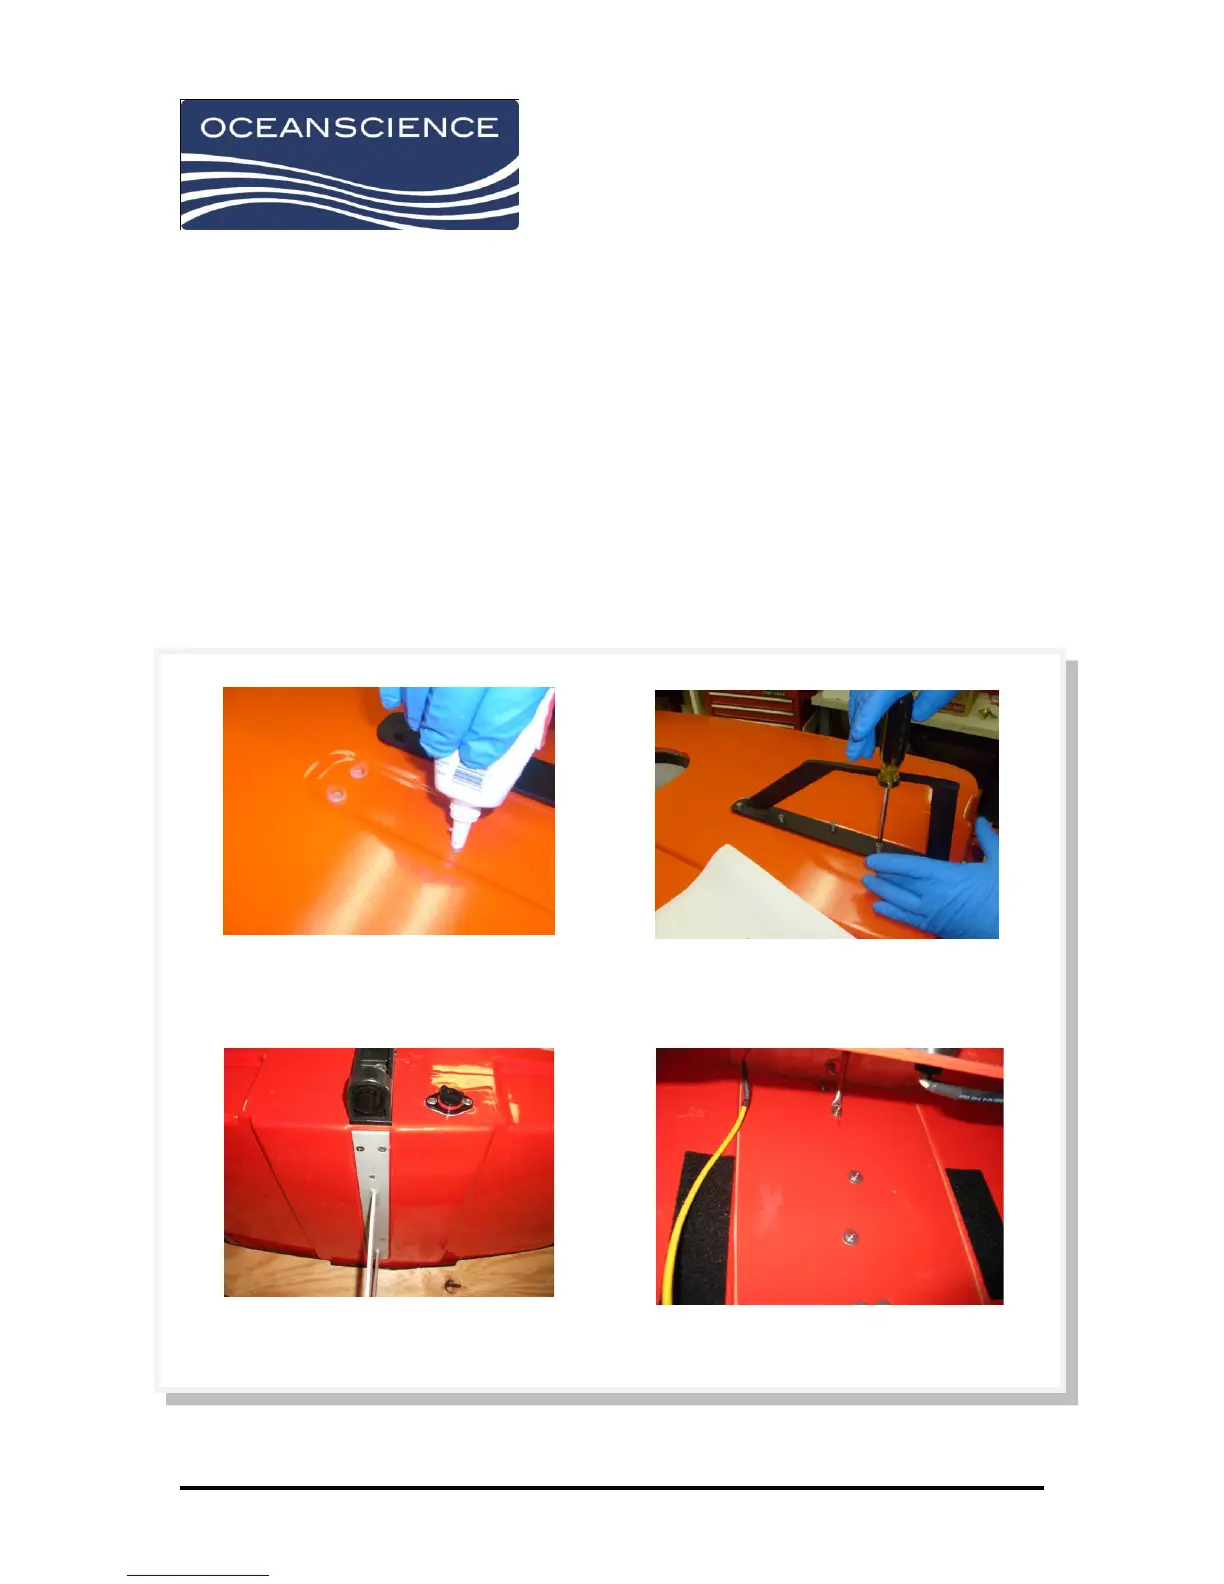
1. Turn the Q-Boat 1800D over and support it at the forward and aft deck areas. Apply RTV
sealant to the skeg screw holes as shown. (See figure 4.5)
2. Apply RTV sealant to the threads of the #10-24 flathead screws by inserting the screws into
the end of the sealant tube.
3. Set the skeg in position on the hull and thread in the #10-24 flathead screws to hold it in
place. Start all of the screws before tightening them down as shown. (See figure 4.6) Wipe
away excess sealant. Skeg designs may vary from boat to boat. See figure 4.7 for a properly
installed skeg.
4. Turn the hull over and install (1) flat washer and (1) #10-24 locking nut on each of the skeg
mounting screws protruding through the hull. The aft-most screw (closest to the back) ties
into the transom gusset for added rigidity. (See figure 4.8)
(Fig. 4) Standard crossbar with wire rope
bridle and instrument safety cable
(Fig. 5) Safety cable, wire rope bridle, and
carabiner ready for tow line
(Fig. 4.5) Apply RTV sealant to skeg
screw holes
(Fig. 4.6) Set skeg and thread flathead screws
to hold in place
(Fig. 4.7) Properly installed skeg
(Fig. 4.8) Install washer and lock nut on
each protruding mounting screw
 Loading...