EasyManua.ls Logo

OCTOMINER X12 ULTRA User Manual

OCTOMINER X12 ULTRA
3 pages
To Next Page IconTo Next Page
Page #1 background imageLoading...
Page #1 background image
X12 ULTRA
OCTOMINER™
System Quick Start Guide
Welcome
Thank you for purchasing the OCTOMINER™ X12 ULTRA™ mining system.
This guide will help you set up the system and troubleshoot the most common
issues you might encounter.
Initial testing and set up
The system has been pre assembled and tested to be in working condition. There are
a few simple steps to inserting your graphics cards, connecting IO and power.
1.
Open the lid by unscrewing 6 screws. 2 on the back, 2 on the front and 2 on the top of the lid.
2.
Inspect visually that there are no obstructions in the front panel fans, e.g. cables.
3.
Connect the rear panel VGA to a monitor, a LAN cable to the ethernet port and
optionally a usb device like a keyboard to the rear or front panel USB port. Lastly connect the
provided power cable to the C14 port of the power supply to boot the system. Turn on the power
from the PDU (Power Delivery Unit in order to make sure that the power supplies power up at the
same time.
4.
Wait for the system to initialize, until you see the OCTOMINER™ boot logo.
Make sure the OLED display works, test the usb port by typing on the keyboard
(for example hit DEL key to enter the system BIOS), see that the wired ethernet lights turn
on and there is video out on your monitor. Try resetting the system from the middle button,
then try rebooting the system from the top button and the bottom button to CLEAR CMOS.
Question and Answer IconNeed help?

Do you have a question about the OCTOMINER X12 ULTRA and is the answer not in the manual?

OCTOMINER X12 ULTRA Specifications

General IconGeneral
BrandOCTOMINER
ModelX12 ULTRA
CategoryMedia Converter
LanguageEnglish

Summary

Welcome and Introduction

Getting Started with Setup

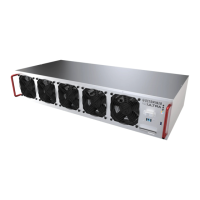
Guide to setting up the OCTOMINER™ X12 ULTRA™ mining system and troubleshooting common issues.

Initial System Setup and Testing

Opening the Chassis

Instructions for opening the mining system's lid by unscrewing six screws.

Visual Inspection

Checking the front panel fans for obstructions like cables before proceeding.

Connecting Peripherals and Power

Connecting monitor, LAN, USB devices, and the power cable to the PDU.

System Initialization and Verification

Waiting for boot logo, checking OLED, keyboard input, network lights, and video output.

Running Test Mode

Executing the test mode by pressing the middle button until 'OK' is displayed.

Installing Graphics Cards

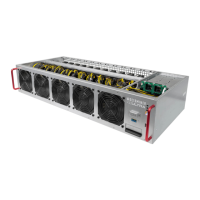
Ensuring PCIE connectors are firm and fastening graphics cards with M3 screws.

Connecting PCIE Cables

Connecting the black tip PCIE cables by length, from longest to shortest, from port 1.

Finalizing Connections and Booting

Managing cables, closing lid, connecting peripherals, and booting via the power button.

HiveOS Software Information

Referencing the HiveOS quick start guide for questions on using the pre-installed OS.

Congratulations

Related product manuals