2
Oculus Rift Development Kit
TM & © 2013 Oculus VR, Inc. All Rights Reserved.
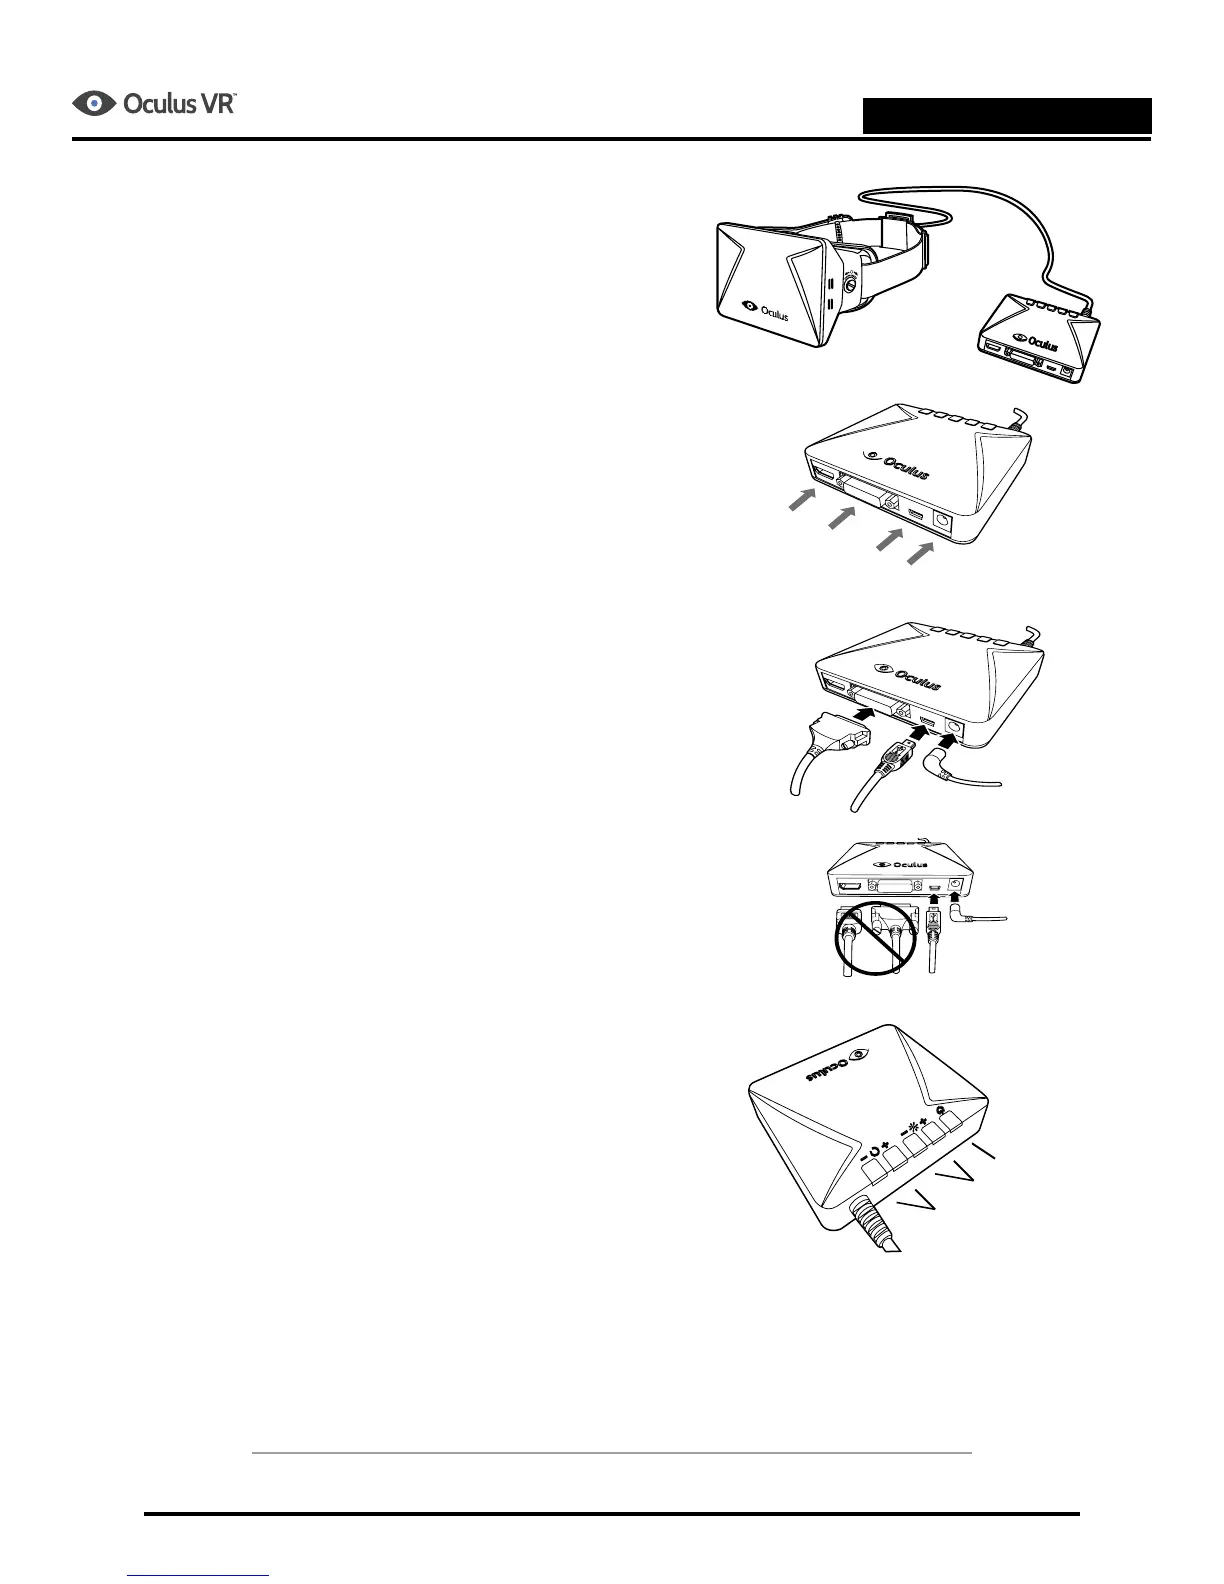
Seng Up the Oculus Ri Control Box
1. There are four connectors on the back of the control
box. The connectors are:
- HDMI
- DVI
- USB
- Power
2. Connect one end of the video cable (DVI or HDMI) to
your computer and the other end to the control box.
Only one video input should be connected to the control
box at a me. You can use the DVI Adapter with the
HDMI cable.
3. Connect one end of the USB cable to your computer and
the other to the control box.
4. Plug the power cord into an outlet and connect the
other end to the control box.
5. The buons on the top of the control box are used to
adjust brightness and contrast of the headset's display.
The le most two buons adjust the display's contrast.
The next two adjust the display's brightness.
The right most buon turns the power on and o.
6. Press the power buon to power on the control box and
the headset. A blue LED on the top of the control box
indicates whether the device is on or o.
The Oculus Software Development Kit (SDK) is available at
developer.oculusvr.com.