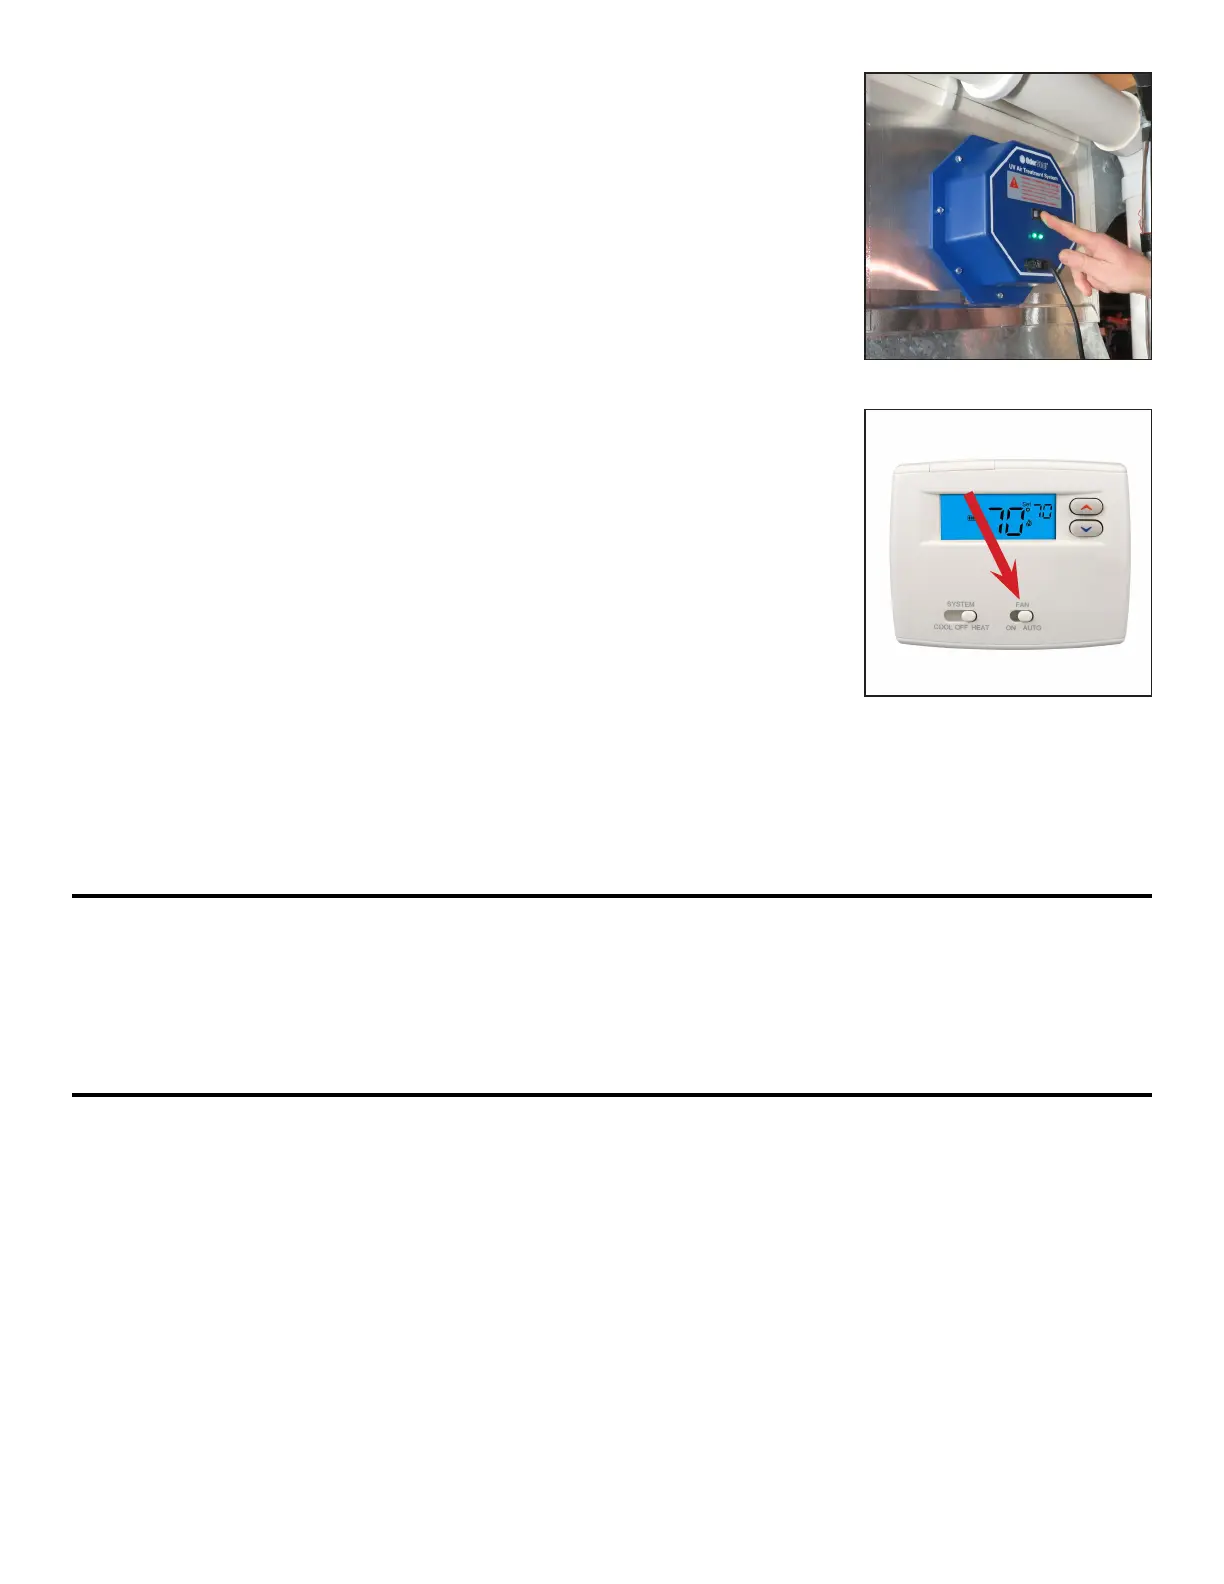
13. Turn the system on (solid line on the switch pressed down) and verify
that the LED indicator light(s) are illuminated.
NOTE: The system will not turn on unless air is moving in the duct.
If green LED light(s) are not illuminated, see troubleshooting section.
UV air treatment system is now operational and does not need to be
powered o unless it needs to be serviced.
14. After 24 hours, set the fan switch on the thermostatm into “AUTO”
mode. The system is now operational and will only turn on when air
ow is detected.
NEVER LOOK DIRECTLY AT OR TOUCH A UV BULB WHILE ILLUMINATED.
Maintaining Your UV Air Treatment System
In order to keep your system operating at maximum eectiveness, it is recommended that you clean the
UV bulb(s) every 3 months and replace every year.
Bulb Cleaning and Replacement
1. Turn the power to HVAC system o, unplug UV system, and allow UV bulb(s) to cool for at least 15
minutes before attempting to remove UV system.
2. Remove 8 sheet metal screws and slide UV system out of duct work.
3a. To Clean: Hold the UV system securely and wipe the UV bulb(s) with a soft cloth dampened with glass
cleaner. If you touch the glass with your hand, be sure to wipe away any ngerprints or dirt with cloth.
Make sure bulb is clean and dry before installing system back into duct.
3b. To Replace: Visit www.OdorStop.com to purchase new UV bulbs if needed. Use of any bulb not
approved for system by OdorStop will void the warranty and could cause damage to system or
serious injury. Hold the UV system securely and push the bulb release button(s) to remove the UV
bulb(s). Install new bulb(s) in system by sliding the bulb(s) in from the inside until bulb snaps into
place. If you touch the glass with your hand, be sure to wipe away any ngerprints or dirt with a soft
damp cloth. Make sure bulb(s) is clean and dry before installing system back into duct.
6
 Loading...