1. Using proper procedures as recommended by the vehicle manufacturer, carefully
disconnect the cables from your old battery and remove it from the vehicle. Return the spent
battery to the battery dealer for proper recycling.
2. Inspect existing battery cables for corrosion, acid damage or insulation deterioration.
Replace if deterioration is present.
3. Position your ODYSSEY in the battery holder and fasten firmly to the vehicle.
4. Connect the positive cable from your ignition to the Positive (+) terminal.
5. Connect the negative cable from your engine or chassis to the Negative (-) terminal.
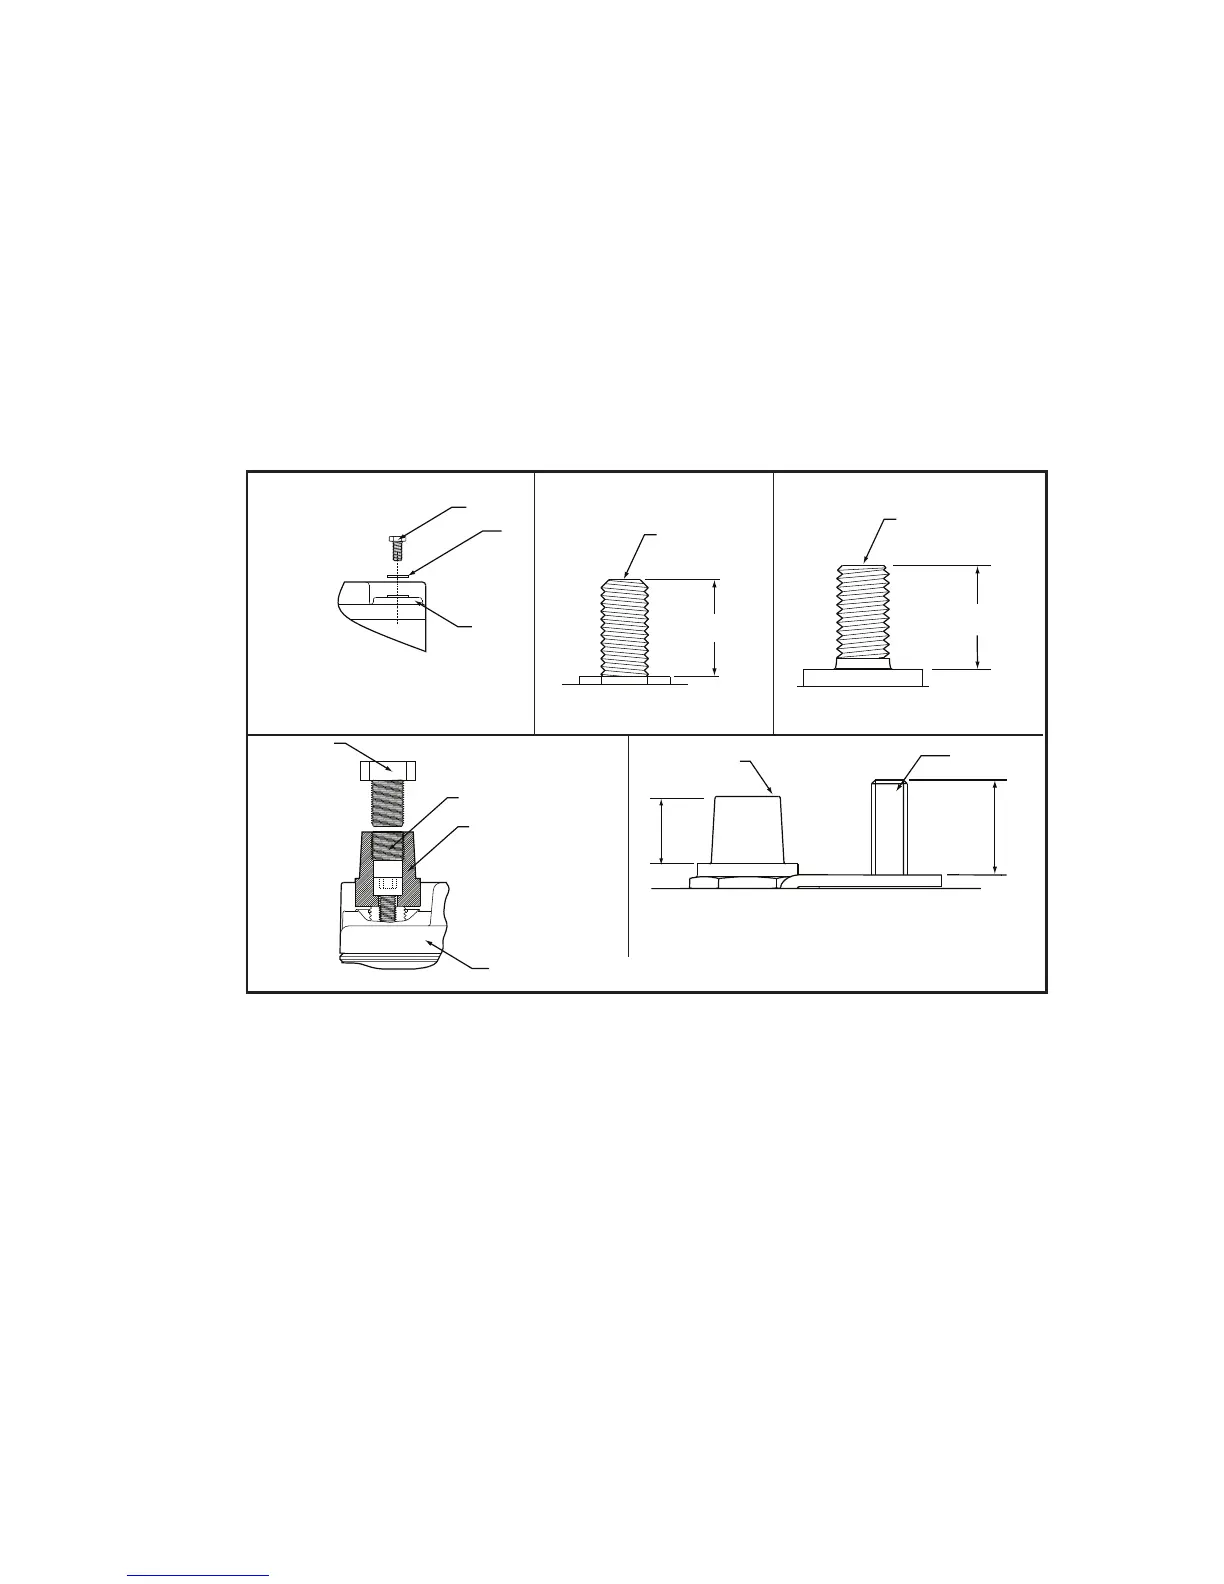
6. T
orque the bolt, screw or nut per the specification noted in table. If you’re using the
Accessory Bolt (C), hold the Brass Post (A) with vise grips and counter torque. Do the same
with General Motors automotive battery cable installation.
NOTE: This is a valve regulated sealed battery and never needs to have water or electrolyte
(acid) added.
W
arranty will be void if opened!
Publication No. 2602-0232, Rev. 2 - September 2005www.odysseyfactory.com
3
INSTALLATION
Your ODYSSEY is normally ready to install right out of the box! Measure the battery voltage;
if it is 12.65 volts or greater, install; if less, then refer to the charging section.
A
NY OF THE FOLLOWING WILL VOID YOUR WARRANTY:
•
EXPOSING BATTERY TO GASOLINE OR DIESEL FUEL
•
REMOVING THE LABELED COVER
• REMOVING OR DESTROYING THE BATTERY’S DATE CODE
DO NOT SHORT CIRCUIT YOUR ODYSSEY’S TERMINALS!
R
emove any metallic items such as watches, bracelets and other personal jewelry to ensure
safe installation.
 Loading...