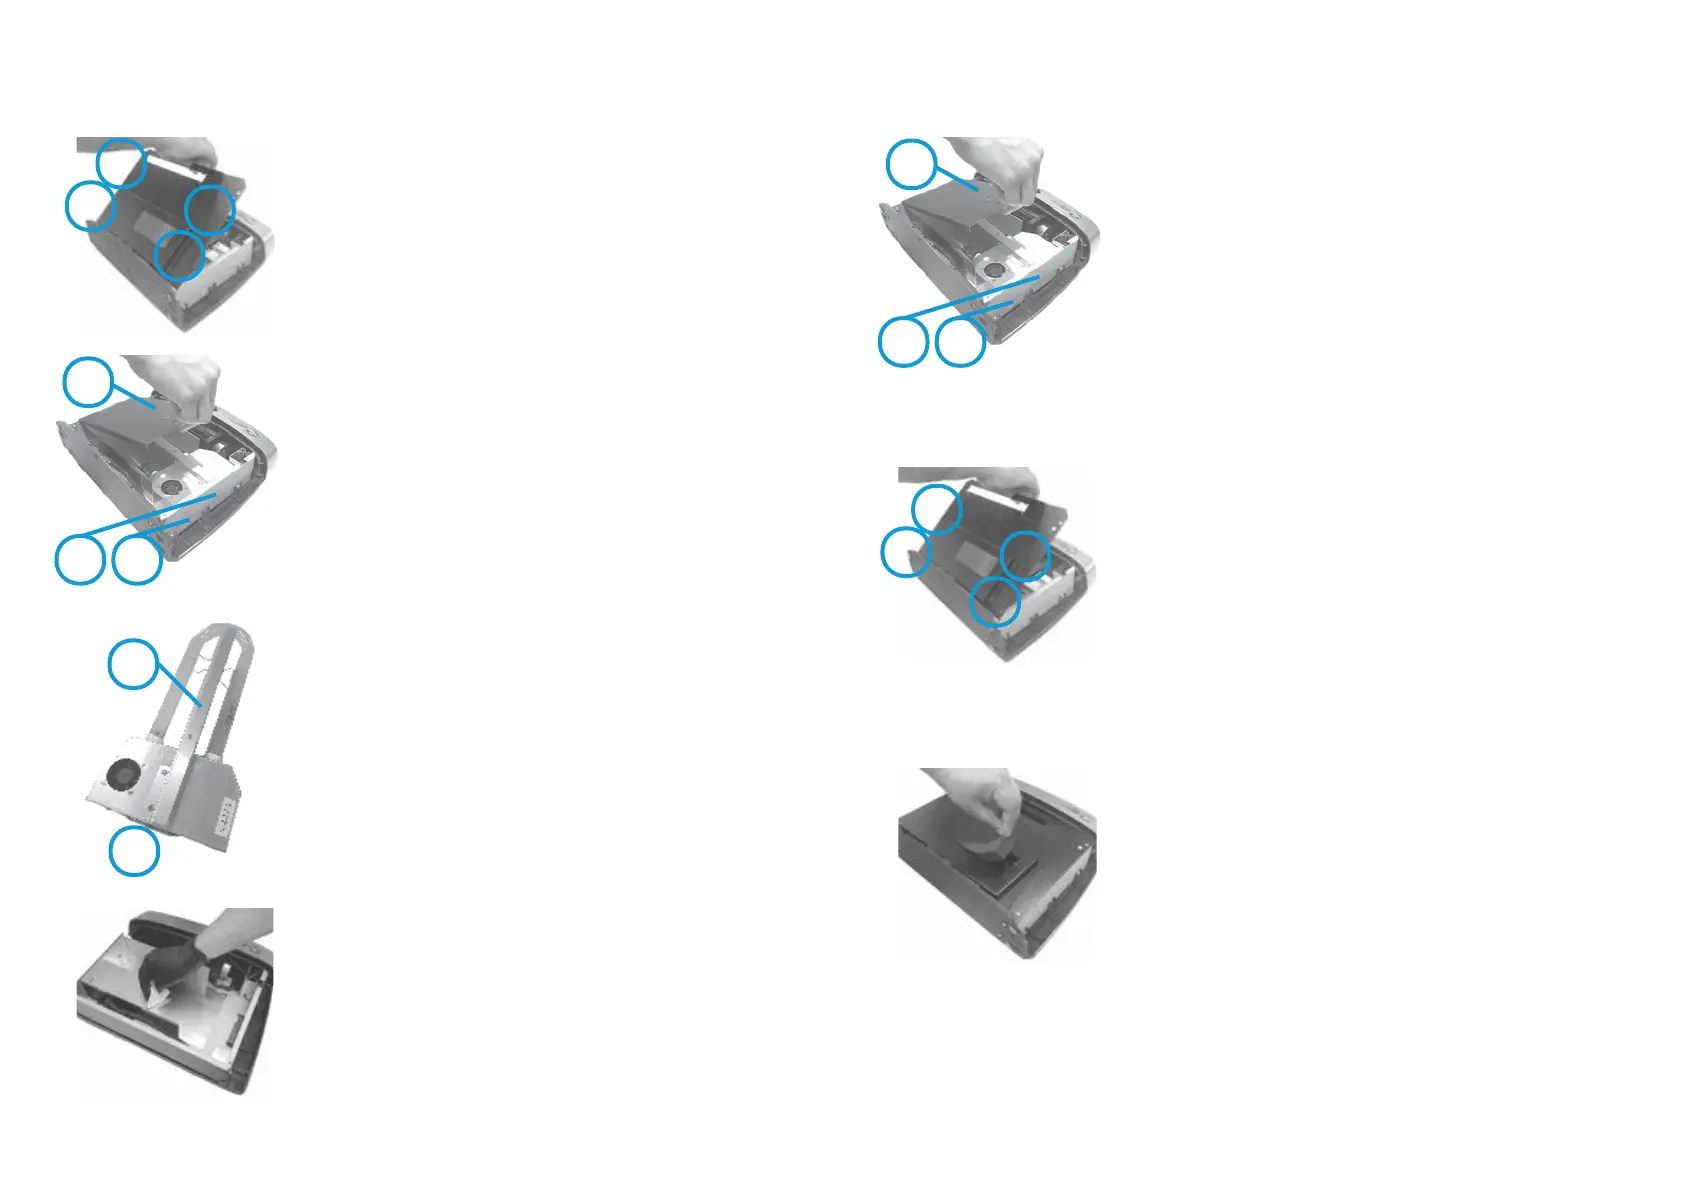
Step 7 - Carefully locate wafer connection “I” into black
socket, then rmly push and manipulate until fully
inserted.
Step 8 - Re-t HGU
TM
screws “F” and ”G” conrming HGU
TM
is correctly seated.
Step 10 - Replace metal cover plate and re-t screws in
the following sequence, loosely rst, tighten once all in
place:
1. A (press cover down to locate screw correctly)
2. B
3. C
4. D
Step 11 - Replace the air lter and front cover of the
device as per previous instructions.
A
B
C
D
Step 9 - Replace the chamber cover and insert screw “E”.
HGU
TM
Cleaning and Replacement
NOTE: HGU
TM
is an acronym for Hydroxyl Generator Unit and it is referred to as either
Optic Assembly or HGU
TM
in this user manual.
E
F
G
Page 7
Step 1 - Refer to previous section ‘Removing Cover for
Cleaning and Replacement’ to remove the front cover.
Step 3 - To remove the chamber cover, remove screw “E”
using PH1 Philips screw driver. Lift up the chamber cover
to expose the optic assembly (HGU
TM
).
Step 5 - Gently clean the optic with a glass cleaner and a
lint free cloth. Ensure optic is completely dry before
re-insertion.
HGU
TM
Cleaning and Replacement
A
B
C
D
E
F
G
H
I
Instructions continued on the next page...
Step 6 - While the HGU
TM
is out, remove dust and clean
with dry cloth.
Step 4 - To remove the HGU
TM
, remove two HGU
TM
mounting screws “F” and “G”. Grasp the centre bae “H”
and manipulate side to side whilst rmly pulling it away
from the connector and lifting out.
Step 2 - To remove the metal cover plate, remove screws
“A-D” using PH1 Philips head screw driver. Lift up the
plate to remove it.
Page 6