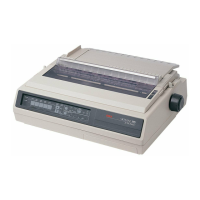
Do you have a question about the OKIDATA ML590 and is the answer not in the manual?
Unpack your printer and check to be sure you have the following items: printer, diskette, power cord, ribbon cartridge.
Peel the plastic film from the carriage cover and access cover.
Open the access cover and remove the shipping retainer for the printhead.
Slide the printhead to the center, fit the grooves in the cartridge over the posts, and lower the cartridge until it snaps into place.
Turn off printer and computer. Plug interface cable into the printer's port and secure. Plug power cord into printer and outlet.
Turn on the printer. The POWER light comes on. The ALARM light also comes on, indicating no paper.
Use for letterhead, memos, envelopes. Recommended for graphs and charts for accurate paper control.
Move paper lever to TOP. Unsnap and upright paper separator. Adjust paper guides. Place sheet in separator.
Deselect printer. Use front panel buttons to set Top of Form position. Press SEL when done.
Deselect printer. Press LF button until desired Top of Form position is reached. Setting is retained for one page.
Load continuous-form paper on rear-feed path for spreadsheets, reports. Use single-sheet path for graphics/charts.
Move paper lever to REAR. Lift paper separator. Release lock levers. Open tractor covers. Adjust right-hand tractor.
Deselect printer. Press LF button for single page. Press SHIFT+QUIET/TOF for multiple pages.
Provides details on paper handling functions like Tear and Form Tear-Off.
Press TEAR button to advance continuous forms to tear position for easy tear-off. Press again to return to print position.
Automatically moves paper to tear position after a set time. Can be activated via Menu Mode. Caution: do not use on labels.
Press PARK button to move continuous-form paper out of path. Press FF/LOAD to return it to print position.
Tear off pages. Press PARK to remove continuous paper. Lift separator, move lever to TOP. Load single-sheet paper.
Press FF/LOAD to remove single-sheet. Lower separator to continuous position. Move lever to REAR. Press FF/LOAD to advance continuous paper.
Prints samples of each available typeface. Load paper, turn printer off, press and hold LF button while turning on.
Prints all 96 ASCII characters continuously. Load paper, turn printer off, press and hold QUIET button while turning on.
Your printer emulates Epson LQ, IBM Proprinter, IBM AGM. Learn about emulations.
Hold SHIFT and press SEL to enter Menu Mode. Press TEAR to select emulation. Hold SHIFT and press SEL to exit.
Table lists compatible printer drivers by decreasing compatibility. Check software documentation for installation.
Details the functions of buttons like SEL, SHIFT, LF, FF/LOAD, TEAR, PARK, QUIET, PRINT, ITEM, SET, GROUP, EXIT, POWER, ALARM.
Covers operational modes and indicators for the printer's status.
Explains the POWER, SEL, ALARM, and QUIET lights and their status meanings.
Details how to access, navigate, and exit the printer's menu system.
Hold SHIFT and press SEL to enter Menu Mode. MENU light comes on, SEL light goes out.
Hold SHIFT and press SEL to exit Menu Mode. MENU light goes out, SEL light comes on.
Menu is organized into groups of items with various settings. Shows factory settings printout.
Explains GROUP, ITEM, SET, and PRINT buttons for navigating and outputting menu settings.
Troubleshooting for common printer issues like no power, no printing, smeared print, light/dark printing.
Turn off printer. Open access cover. Use platen knob to back out paper. Reload paper and press FF/LOAD.
Turn off printer. Rotate platen knob to back paper out. Open access cover, remove roller assembly if needed. Reload paper.
Clean printer every six months or 300 hours. Turn off, open cover, remove roller assembly, clean carriage and platen with dry cloth.
Lists optional accessories like Color Ribbon Kit, Cut Sheet Feeder, Bottom-Feed Push Tractor, Top-Mount Pull Tractor, Roll Paper Stand, Serial Interface.
Lists part numbers for items like Access cover, AC cord, Pull-up Roller Assembly, Platen knob, Printhead, Ribbon.
Lists printer menu entries and factory default settings for Emulation Mode, Font, Symbol Sets, Rear Feed, Bottom Feed, Top Feed, and Set-Up.
Microline Reference Manual provides command lists. View document on CD. Manual is English only.
Instructions on how to order parts, including part numbers and contact information for Okidata and resellers.
Details print method, printhead, print speed, characters per line, emulations, interface, graphics resolution, resident fonts, bar codes, buffer size.
MTBF, MTTR, printhead life, ribbon life for black and color ribbons.
Details paper width, weight, thickness, and paper types accepted, with width ranges.
Operating and storage temperature and humidity requirements.
Details voltage and frequency requirements for AC power.
Provides first aid, hazardous ingredients, physical data, fire/explosion hazards, health hazards, reactivity, cleanup, and handling for black ribbon.
Handling/storage precautions for ribbon: store dark, cold. Do not pull ribbon from cassette unless mounting.