Do you have a question about the oklahoma joes Longhorn 12201747 and is the answer not in the manual?
| Material | Steel |
|---|---|
| Fuel Type | Charcoal |
| Firebox | Yes |
| Wheels | Yes |
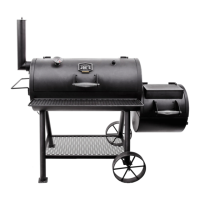
| Type | Smoker |
| Cooking Area | 1060 sq in |
| Warranty | 2 years |
Lists the necessary tools for assembling the Longhorn Offset Smoker, including pliers and adjustable wrenches.
Highlights critical safety warnings for outdoor use, assembly, carbon monoxide hazards, and sharp edges.
Defines the meaning of DANGER, WARNING, and CAUTION symbols used throughout the manual.
Covers warnings about hot surfaces, keeping children away, and California Proposition 65.
Details the initial steps to cure the smoker's finish and season the interior steel before first use.
Provides guidance on using charcoal or wood for grilling, including fire size and placement.
Explains how to use the smoker for low-and-slow cooking with charcoal or wood.
Step-by-step instructions for building a charcoal fire using lighter fluid or a starter.
Guides on identifying when coals are properly prepared for grilling based on ash coverage.
Details how to gauge coal heat by hand distance and visual cues for temperature control.
Instructions for cleaning the smoker's interior and cooking surfaces.
Tips for managing smoke, preventing flare-ups, and warming side dishes.
Outlines the 1-year limited warranty for perforation, manufacturing, and material defects.
Lists exclusions from the warranty, including shipping costs, misuse, and improper installation.
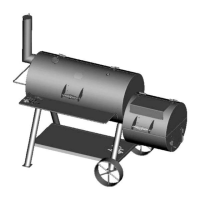
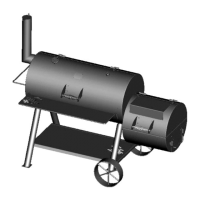
Details and illustrates all hardware components included for assembly.
Lists all smoker parts with corresponding keys and quantities, referencing an exploded diagram.
Initial steps: get a helper, choose a location, and prepare the workspace.
Guides on assembling the wheels onto the short legs using washers and hitch pins.
Instructions for attaching short and long legs to the smoker chamber using bolts.
Steps for securing the bottom shelf to the smoker legs with bolts.
Ensuring leg bolts are tight and standing the unit upright with assistance.
How to attach the warming plate to the firebox lid using screws and flange nuts.
Connecting the firebox lid and bottom using hex bolts and flange nuts.
Joining the firebox assembly to the smoke chamber using hex bolts, washers, and nuts.
Securing the handles to the smoke chamber lid and firebox lid.
Mounting the smokestack and side handle onto the smoke chamber.
Installing the front shelf and temperature gauge onto the smoker.
Placing the fire grates and cooking grates into the smoker and firebox.
Information on registering products, website features, and available accessories.
Guidance on how to register the product online for offers and warranty.
Instructions and fields for completing the physical product registration card.