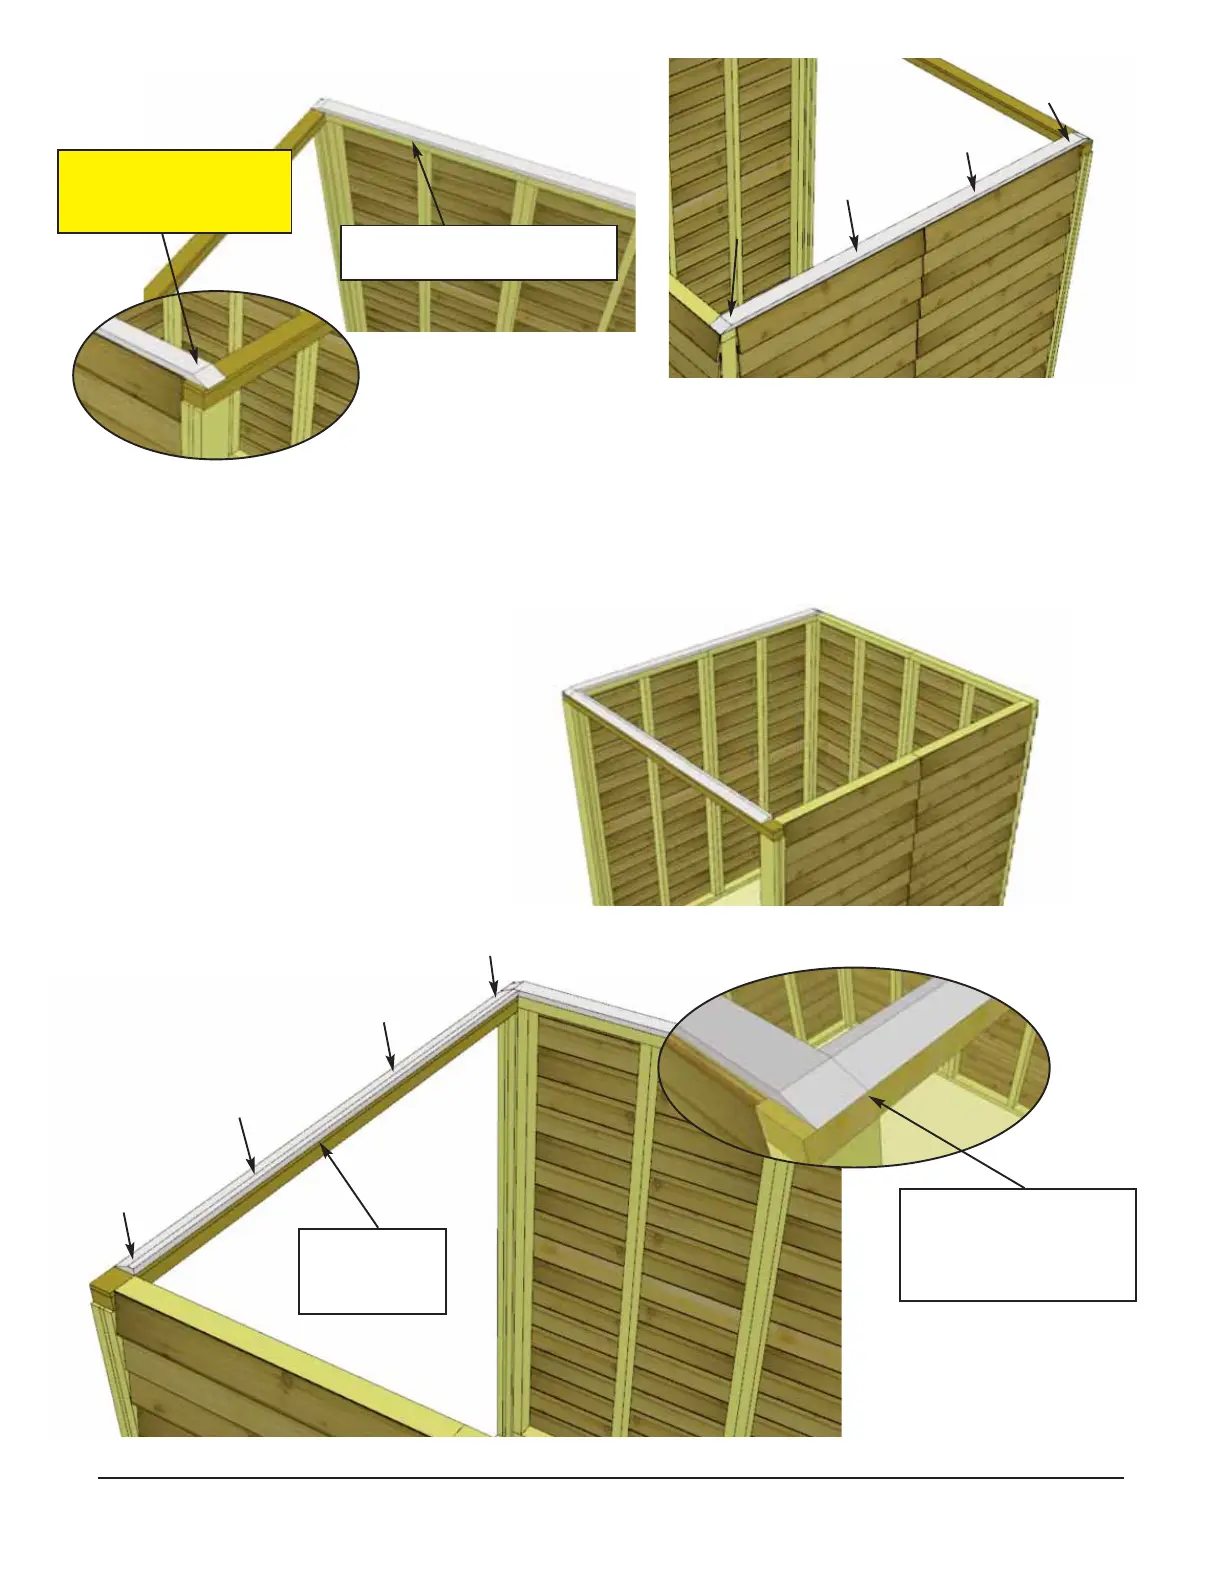
25. Position a Front Top Plate (angle
cut on edge) - 3/4” x 2 1/4” x 65”
(Part 2F) on to top of wall framing. Butt
the straight cut end up to side top plate
and align flush with the inside of door
header. See illustrations below. When
correctly aligned, attach into header
with 4 - 2” screws (Part E).
24. Position one Side Top Plate (angle cut on both ends)
- 3/4” x 2 1/2” x 75” (Part 2E) on top wall framing. Top
plate should be evenly spaced from front to back and
aligned flush with the inside of top wall framing. Attach to
framing with 4 - 2” screws (Part E).
Top Plate aligned flush
with inside of wall framing
On ends, screwing on
slight angle provides
more strength.
Front Top Plate butted
up against Side Top
Plate with angled
edge to outside
Aligned flush
with inside of
Door Header
Toll Free 1-888-658-1658 www.outdoorlivingtoday.com sales@outdoorlivingtoday.com
Page 15