26. Complete remaining Side and Rear Top Plate
attachments as per Steps 24-25.
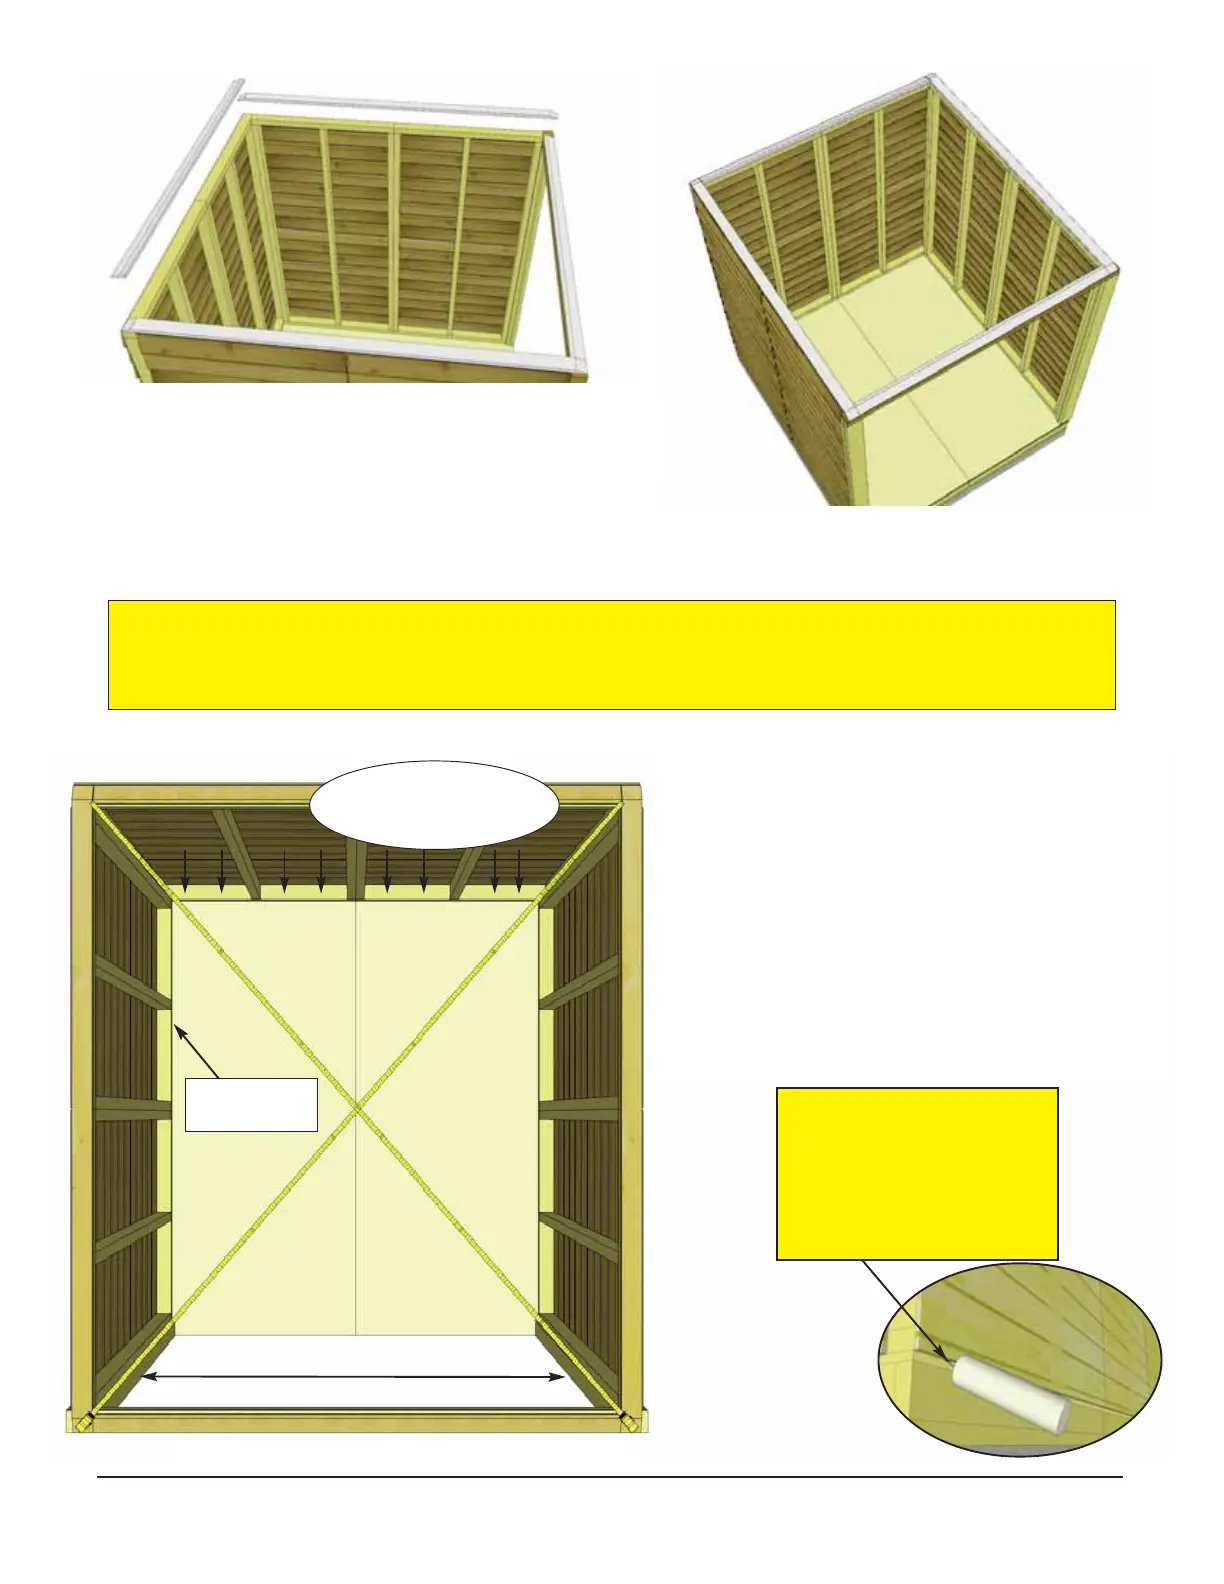
27. When all Walls and Top Plates are attached
together, check wall and floor alignment. Bottom
wall framing should sit flush with outside of floor
joists. See Steps 15-20 for correct alignment.
Confirm Door Jambs are 64” apart at top and
bottom of door opening.
When positioned correctly, fasten bottom wall
plates to floor using 4 - 2 1/2” screws per wall
panel.
Bottom Wall
Framing
Confirm 64” Wide between Door Jambs
Caulking
Optional - Caulking
seams will help prevent
moisture from entering at
seam.
Caulking not included in
kit.
Angle
screws into perimeter
Floor Joists.
Important: Prior to fastening walls and installing rafters, take time to confirm your walls are level,
square and plumb. Measure diagonal at top and bottom of walls corner-to-corner. This should be
approximately 95 1/2”. More importantly, if measurements are not within 1/4”, your walls are not
square. Adjusting now will make it easier to install the roof section later.
Toll Free 1-888-658-1658 www.outdoorlivingtoday.com sales@outdoorlivingtoday.com
Page 16