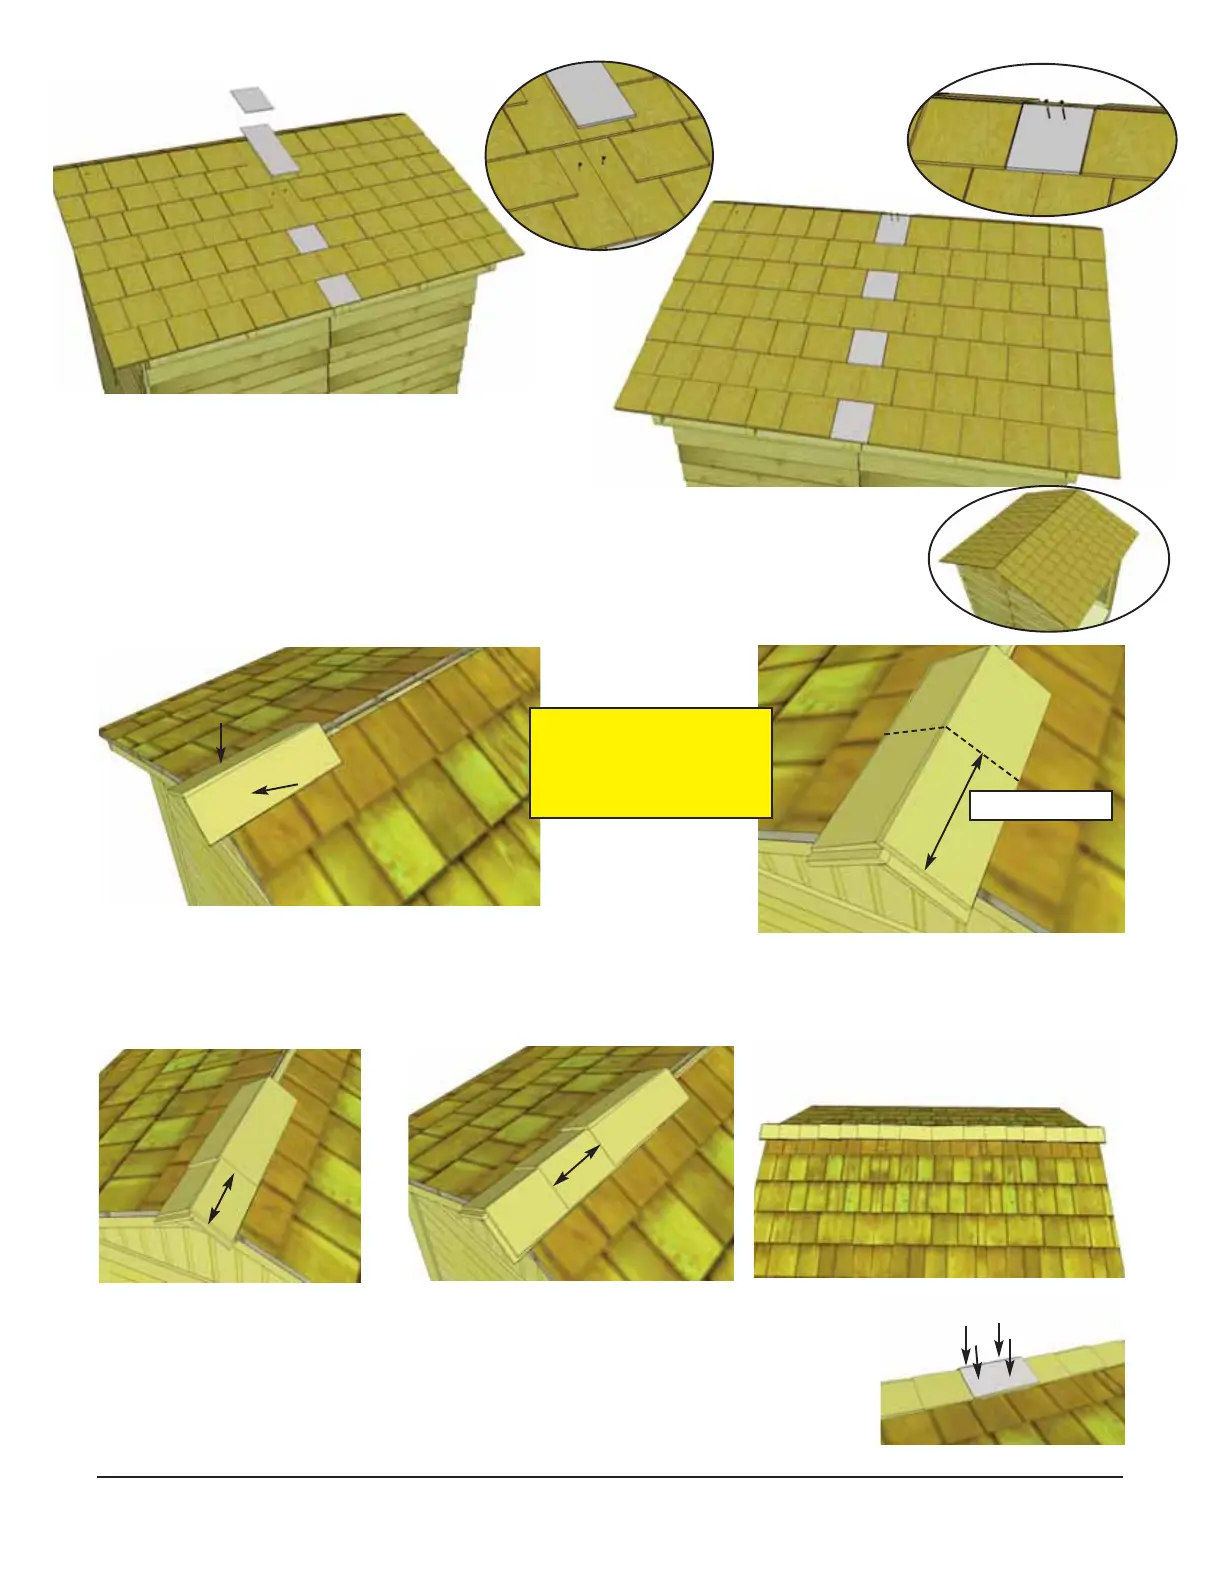
50. Place first Roof Ridge Cap (Part 3J) on roof peak overhanging shingles by approximately 2”.
Attach with 2 - 7/8” Shingle Nails (Part N) 9” from end. Place 2nd Ridge Cap 1” back from 1st
cap. Attach with 2 - 7/8” Shingle Nails (Part N) 9” from end.
51. Place 3rd Ridge Cap 8” back from 2nd (enough to cover shingle
nails). Attach 3rd ridge cap down as per Step 50. Continue to position and
attach ridge caps until half roof is complete. From opposite side, position
and attach ridge caps as described above. Score/cut 1 ridge cap to 12” or
to fit in the center of roof. Attach center cap with 4 - 7/8” Shingle Nails
(Part N).
9” from end
8”
8”
Important: Butt (thick)
end of Ridge Cap will
be facing towards the
outside of shed.
49. Slide in next long filler shingle and attach with 2 - 2 1/2” screws (Part B) as
per Step 48. Slide in remaining Filler Shingles (Part 3H & 3I) and attach in order.
The top Filler Shingle (Part 3I) is shorter.
Toll Free 1-888-658-1658 www.outdoorlivingtoday.com sales@outdoorlivingtoday.com
Page 24