Toll Free 1-888-658-1658 www.outdoorlivingtoday.com sales@outdoorlivingtoday.com
Page 15
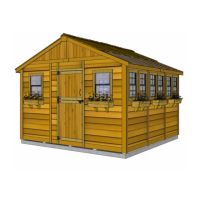
26. When properly positioned, attach by screwing down into wall framing with 4 - 2” screws.
Top Plates should be flush
with inside of wall framing.
22 1/2 degree angle cut
end follows angle of wall.
27. Next, attach the Side Top Plate (1 1/2” x 2 1/2” x 86” 33 3/4 degree cut down outside edge)
to high wall side. Position so that angled edge lines up with angle of rear top plate. Secure with
4 - 2 1/2” screws.
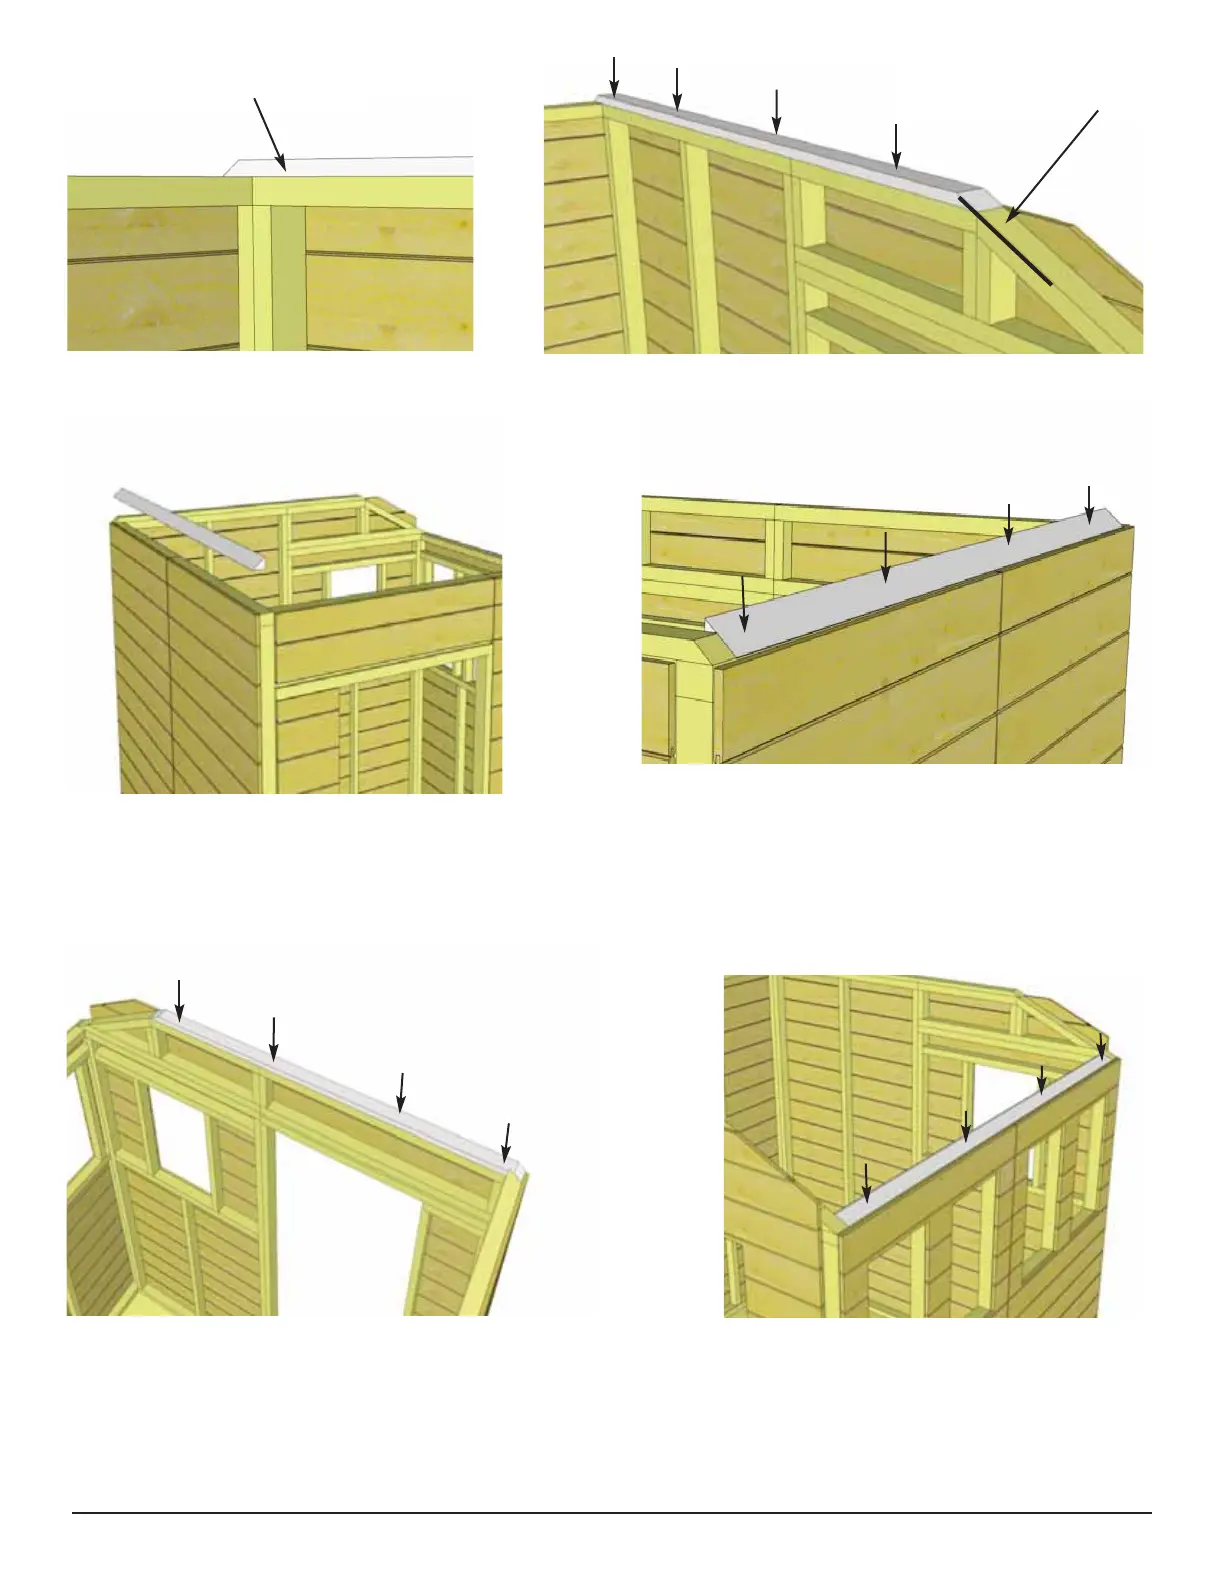
28. Position remaining Front Top Plate (3/4” x 2 1/2” x 73 3/4”) and Window Wall Side Top Plate
(3/4” x 2 1/2” x 86”) into position on wall framing and secure with 4 - 2” screws per piece. Side Top
Plate has a 22 1/2 degree cut down 1 edge.
Front
 Loading...