35. Attach end of a 45 1/2” long Soffit Board flush to ends of outside rafter with 2 - 1 1/4” screws per rafter
end. Drill pilot hole in Soffit to prevent splitting. Attach Ridge Board to opposite rafter end, aligning to
bottom of rafter, with 2 - 1 1/4” screws. Center Soffit on Middle Rafter and secure with
2 - 1 1/4” screws. Measure 45 1/2” from outside rafter and secure Ridge Board to rafter with 2 - 1 1/4” screws.
Important: Ridge Board
must be aligned to bottom of
rafter end in this position.
C. Rafter Section
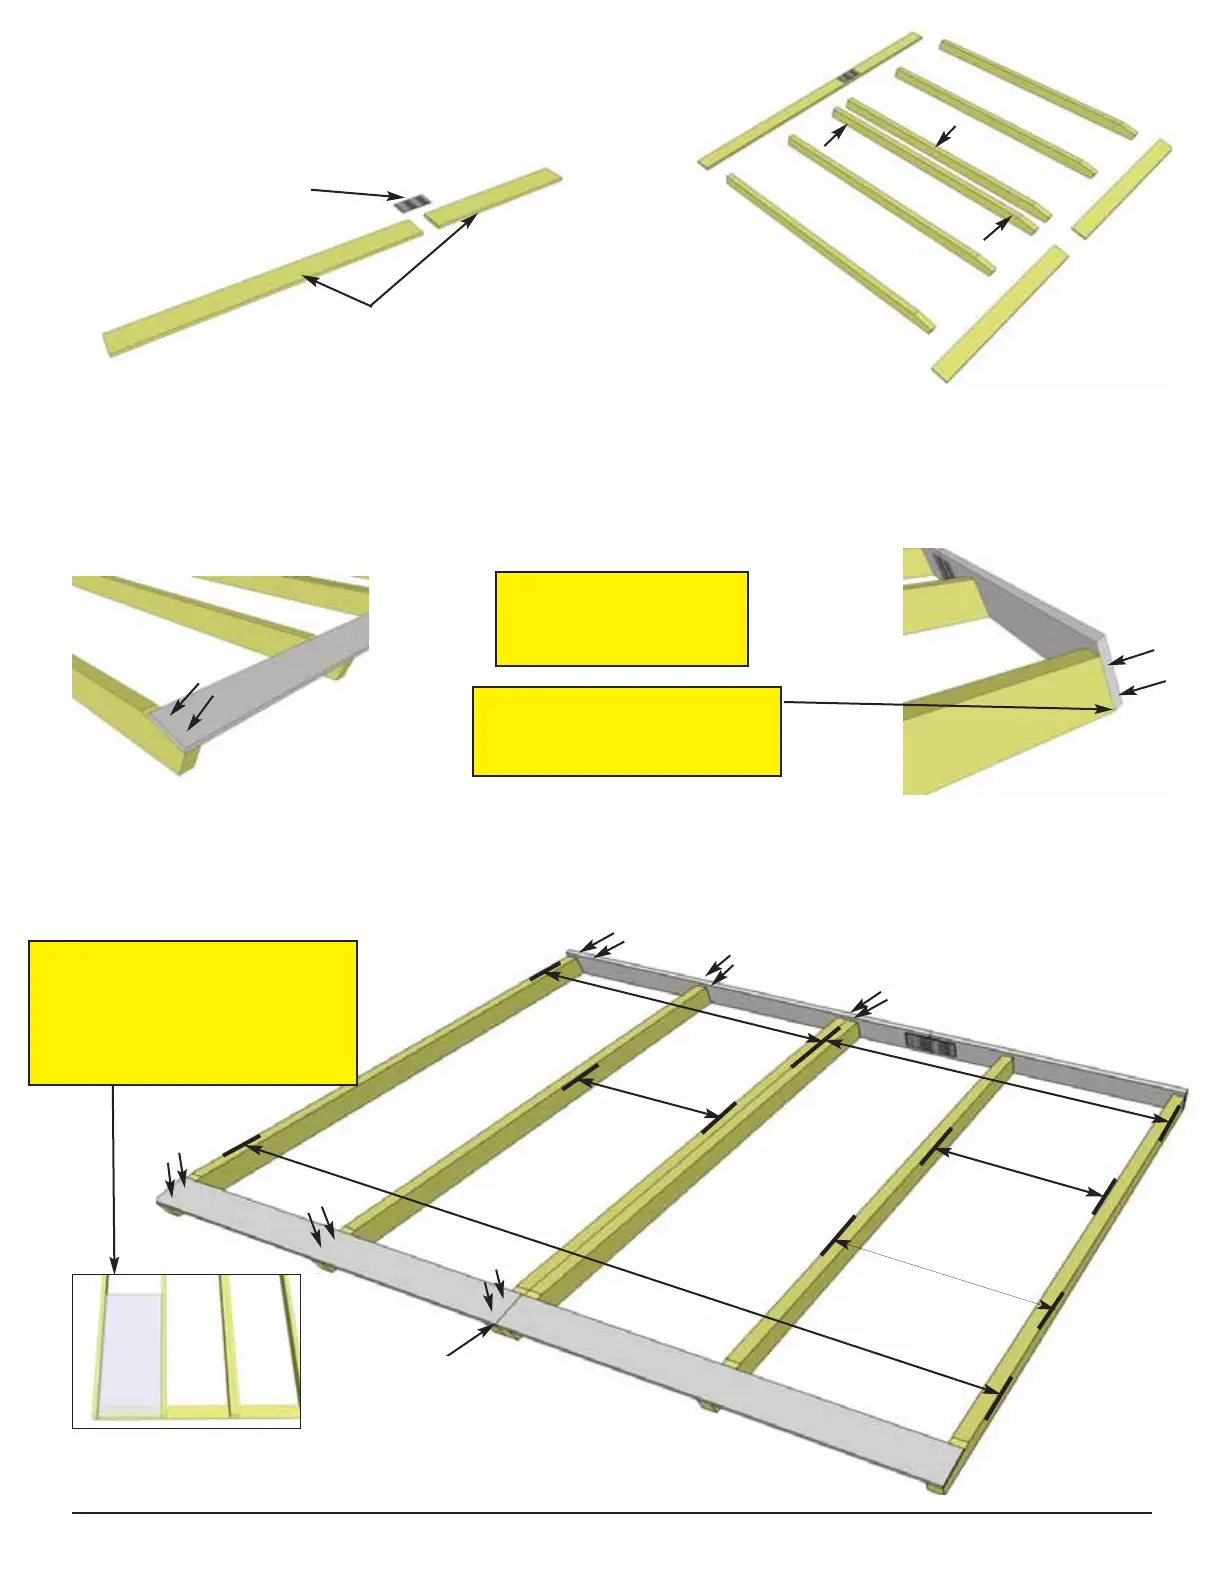
34. Starting with LONG ROOF SIDE, locate 2 Ridge Boards (3/4” x 4 5/8” x 33 1/2” and
3/4” x 4 5/8” x 57 1/2”). Attach together with Metal Ridge Board Connector using 8 - 3/4” screws.
Locate 6 - 1 1/2” x 3 1/2” x 77 3/4” Rafters and 2 - 1/2” x 4 1/2” x 45 1/2” Soffits and lay out on a
flat level surface as pictured. Screw doubled up rafters together with 3 - 2 1/2” screws. Note: Soffits
for long roof side are 4 1/2” wide, short roof side are 3 1/2”.
4 5/8” Ridge Board
Metal Ridge Board
Connector
Centered on
Rafter
Soffit
Long Roof Side
36. Measure, position and attach all Rafters as illustrated above.
Important:Measure 20 1/2”
spacing accuratley. You can
use one piece of polygal to
ensure they fit between each
pair of rafters.
Important: Pilot Hole
Ridge Board and Soffit
to prevent splitting!
77 3/4” Rafters
Ridge Roard
Soffit
4 1/2” wide Soffits
Ridge Boards
Double up Rafters
91”
23 1/2”
20 1/2”
45 1/2”
45 1/2”
20 1/2”
Toll Free 1-888-658-1658 www.outdoorlivingtoday.com sales@outdoorlivingtoday.com
Page 18
 Loading...