81. To complete trimming of your shed,
attach both the Horizontal Door Trim (32”)
and Horizontal Narrow Wall Trim (8 3/4”)
with 4 and 2 - 1 1/2” finishing nails.
82. Attach Horizontal Gable Trim
(1/2” x 4 1/2” x 85 1/2”) to both front and rear
of shed. Position equally over gable and
wall seam to cover Gable Flashing. Use
8 - 1 1/2” finishing nails per piece to secure.
Angle cut
on end
Toll Free 1-888-658-1658 www.outdoorlivingtoday.com sales@outdoorlivingtoday.com
Page 32
Caulk
gap.
Window
frame.
Screw insert into
thick part of
siding.
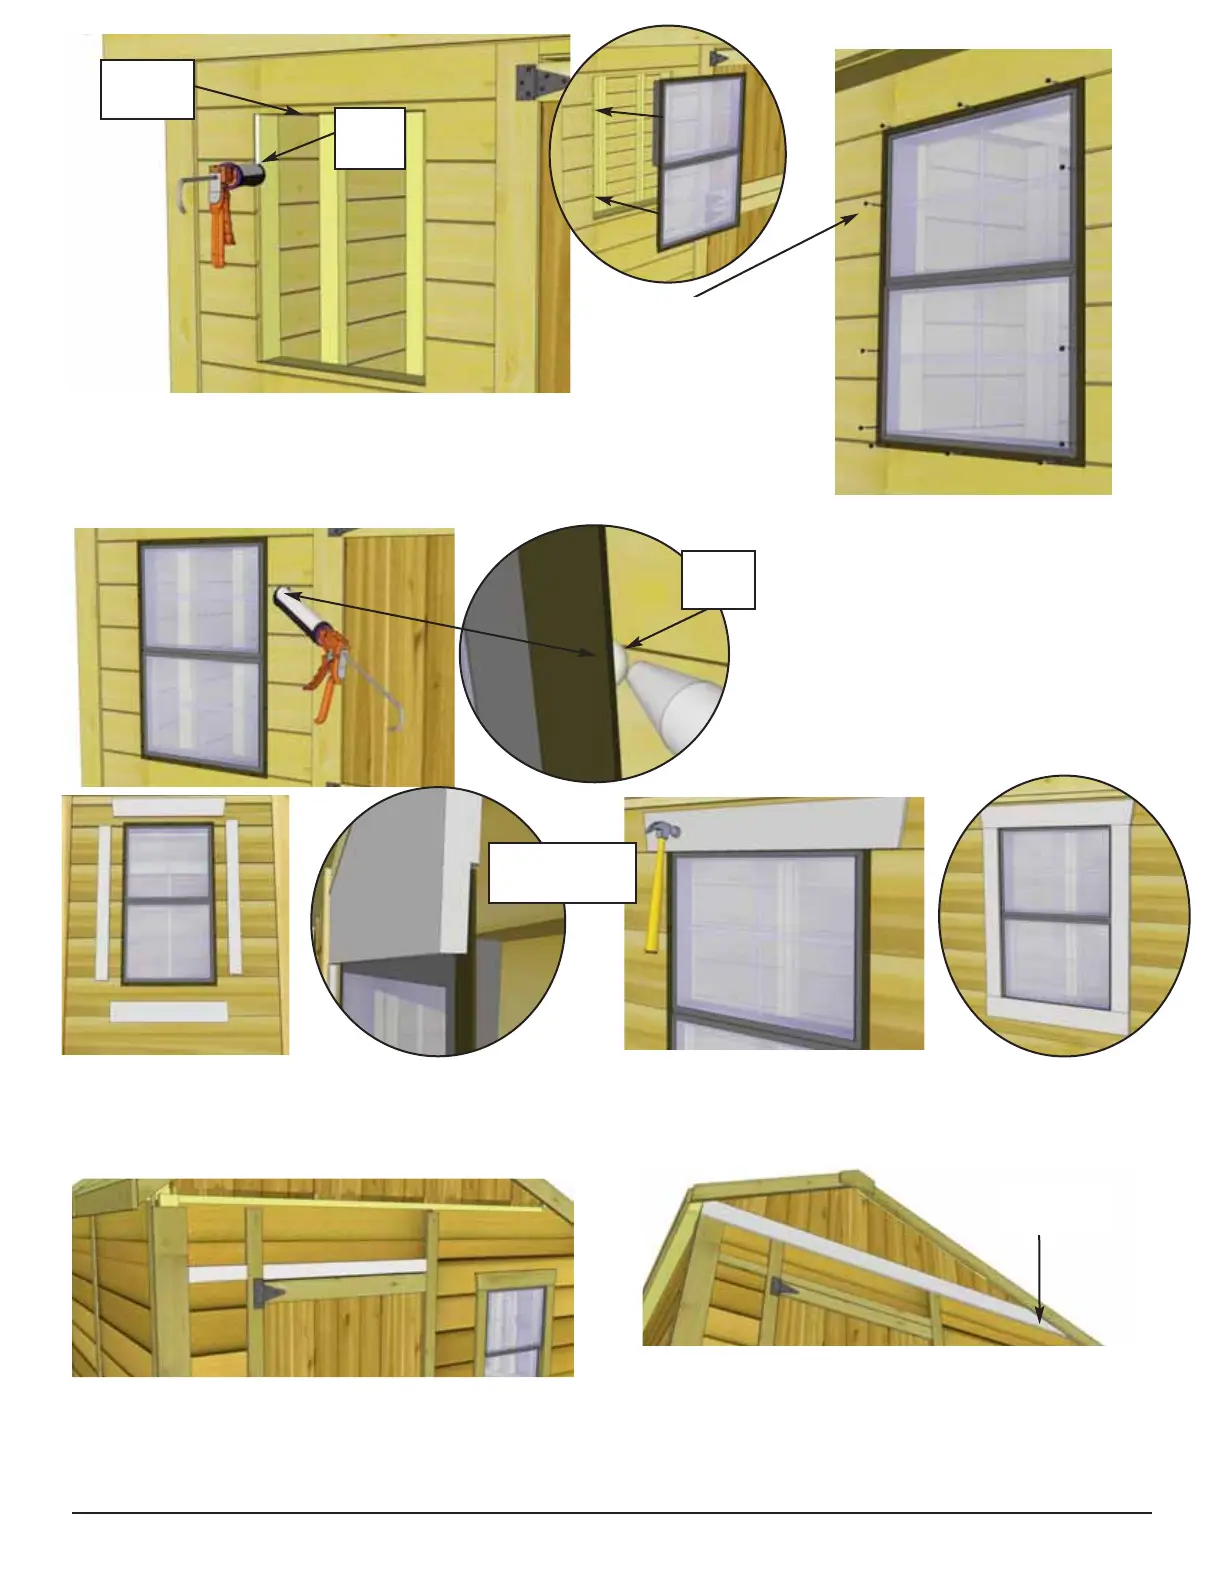
80a. To reduce possible water from penetrating into the win-
dow cavity, caulk gap on both sides of window opening prior to
installing Window Insert. Position insert in cavity and screw with
8 - 1 1/4” Screws.
80b. Once Insert is attached,
caulk the “channel gap” between
the Insert’s outside flange and the
siding. Also put a bead of caulking
horizontally at top of window
where the flange and siding meet.
This additional caulking will also
will reduce the chances of mois-
ture entering into your shed.
80c. Position Window Trim around window doing a dry run first and attach with 4 - 1 1/2”
Finishing Nails per piece. Window trim has a small dado on reverse face. Outside flange of window
will roughly sit in the dado to give a better fit.
Caulk
gap.
Trim dado
sits in flange.
 Loading...