EasyManua.ls Logo

Omcan Imbera VRD37 User Manual

Default Icon
100 pages
To Next Page IconTo Next Page
Page #1 background imageLoading...
Page #1 background image
Revised - 12/08/2020
Toll Free: 1-800-465-0234
Fax: 905-607-0234
Email: service@omcan.com
www.omcan.com
Imbera Refrigeration and Freezers
Models VR08, VR06, VR12, VR10, G319 HC, G319, G326, VRD37,
VRD43, G372, VR1.5, VR04, G372 BLACK, VFS24
Items 41215, 41214, 41217, 41216, 45445, 41161, 41219, 42862,
41218, 41220, 45800, 45801, 45250, 41221
Instruction Manual
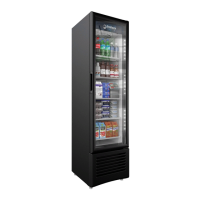
41215
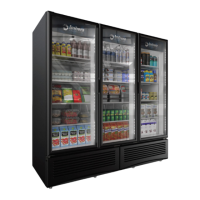
41219 41220

Questions and Answers:

Omcan Imbera VRD37 Specifications

General IconGeneral
BrandOmcan
ModelImbera VRD37
CategoryRefrigerator
Capacity37 cu. ft.
RefrigerantR290
Voltage115V
Hertz60 Hz
Phase1
Door TypeGlass
LightingLED
TypeMerchandising Refrigerator
Exterior MaterialSteel
Interior MaterialAluminum

Summary

Disclaimer

General Information

CHECK PACKAGE UPON ARRIVAL

Inspect for external damage upon receipt and report issues promptly.

Safety and Warranty

WARNING!

Use cooler only for its intended purpose; proper installation and maintenance are essential.

IMPORTANT

Seek assistance from technical support for any failures or malfunctions.

SAFETY PRECAUTIONS

Follow installation instructions, avoid climbing, do not touch wet surfaces, etc.

AVOID RISKS

Damaged power cords or components should only be repaired by authorized technicians.

PRECAUTION

Cooler uses flammable HC refrigerant; do not perforate tubing or store explosives.

WARNING

Do not obstruct vents, use mechanical devices for deicing, or damage the cooling circuit.

DANGER

Fire or explosion risk due to flammable HC refrigerant; repairs must be by qualified personnel.

IMPORTANT

Omcan reserves the right to improve products; design/specs subject to change without notice.

OMCAN IS NOT RESPONSIBLE FOR ANY DAMAGES DUE TO WATER LEAKS.

Warranty for water leaks is void if room temp/humidity is exceeded or drain is not connected.

Technical Specifications

Installation

Install this cooler avoiding direct sunlight.

Install the cooler away from direct sunlight to ensure optimal performance.

Do not install this cooler outdoors.

This cooler is designed for indoor use only.

Never install equipment close to heat sources; otherwise, cooler may consume more energy or function incorrectly.

Avoid placing the cooler near heat sources to maintain efficiency and correct function.

Do not introduce hot objects or warmer than ambient temperature inside cooler.

Do not place hot items inside the cooler to prevent temperature fluctuations.

Never place objects over the cooler.

Avoid placing objects on top of the cooler to prevent deformation or damage.

IMPORTANT: do not to use a cutter knife or blade for cooler handling.

Do not use sharp tools like knives or blades when handling the cooler to avoid damage.

ACCESSORY INSTALLATION

Information on installing optional accessories like leveling skids, wheels, and separators.

leveling skid

Used to provide support and adequate inclination for door closure.

wheel

Optional wheels for easy mobility; remove transport pods.

wall separator

Provides adequate separation between cooler back and wall.

LEVELING SKID / LEVELING SCREW

Instructions for installing leveling skids and screws.

WHEEL

Visual guide for wheel installation.

WALL SEPARATOR

Visual guide for wall separator installation.

SHELVES

Information on different types of shelves and their proper installation.

FLOOR SHELVES

Shelves designed for cooler's floor, with supports for product load.

LEVEL SHELVES

Shelves that need adequate orientation and position.

All shelves must be firmly supported on all four corners with provided accessories

Ensure shelves are properly supported on all four corners using accessories.

Make sure the shelf and the product allow the door to close completely.

Ensure shelves and products do not obstruct door closure.

VISISLIDE (OPTIONAL)

System allowing shelves and product placement at an angle for easy access.

BASKETS (OPTIONAL)

Optional plastic or metal baskets for product display.

ELECTRICAL CONNECTION

Critical safety information for connecting the cooler to power.

WARNING: ELECTRIC SHOCK RISK

Connect to a three-pin outlet; do not remove ground pin or use adapters/extension cords.

Omcan coolers with HC refrigerants (R290 / R600) are designed to operate under a specific electric voltage.

Coolers with HC refrigerants require specific electric voltage; check serial label.

IMPORTANT: ground connection is a protection system for equipment connected to electrical network.

Ground connection protects against electrical shock from isolation failures.

This cooler must be connected to physical ground.

Connect the cooler to physical ground to reduce the risk of electrical shock.

Cooler is equipped with a power cord with a ground cable...

Ensure the power cord's ground plug is connected to a properly installed and grounded outlet.

Never use extension cords...

Do not use extension cords as it voids the warranty and can cause electrical shock.

POWER CORD

The power cord has a ground connection; do not remove it or use adapters.

Operation

TURNING ON THE COOLER

Let the cooler stand for 12 hours after installation before turning it on.

STORING PRODUCT INSIDE COOLER

Proper placement of shelves and products to ensure airflow and prevent damage.

Airflow inside cabinet is priority for the cooler, thus make sure that:

Ensure products do not obstruct internal walls, limits, or fan outlets.

IMPORTANT

Some models cool below 0°C; do not use for products affected by low temperatures.

TEMPERATURE CONTROL

Temperature controls are electronic and preconfigured; no adjustments are necessary.

Intelligent Control Function (CIF)

Follow attached instructions for CIF; it may include energy saving modes and supplier transmission.

If the cooler includes an EMS controller, it will also be preconfigured.

EMS controller is preconfigured, analyzes temperatures for better cooling.

The ERC controller is preconfigurated and allows the user to set the right temperature for the product.

ERC controller allows setting correct temperature, includes sensors for performance.

The LAE control is preconfigured, allowing user to select an adequate temperature for different products.

LAE control is preconfigured for temperature selection, includes deicing and lighting control.

The ETC1H control in some models is also preconfigured by the manufacturer to maintain product temperature.

ETC1H control maintains product temperature, lacks a display, notify service if malfunctioning.

CIF NOVO display

Shows internal temperature and alarm screen; includes night mode button.

CIF EVO display

Shows internal temperature and alarm screen; includes night mode button.

EMS

Displays controls for movement, deicing, programming, and display.

LAE

Displays navigation, deicing, parameter selection, and mode indicator.

LIGHTING

Information on LED lighting for product display during sale hours.

Your cooler may include a switch that allows you to turn off lighting manually.

A switch may be present to manually turn off lighting when the business is closed.

If the cooler includes a Intelligent Control Function (CIF), lighting will be tuned off automatically in savings mode.

CIF automatically turns off lighting in savings mode based on cooler characteristics.

IMPORTANT: if you notice any lighting malfunction, please contact the Customer Service Center.

Contact Customer Service if any lighting malfunctions are observed.

HINGED DOOR

Door designed for thermal isolation; clean glass surfaces weekly and seals quarterly.

SELF-CLOSING SYSTEM FOR HINGED DOORS

System ensures doors close automatically; contact service if force is insufficient or excessive.

The cooler may include a self-closing system with lock, with two user modes:

Describes automatic closure and reloading modes for the self-closing system.

SLIDING DOOR

Sliding doors provide thermal isolation; clean rails monthly.

SELF-CLOSING SYSTEM FOR SLIDING DOORS

System prevents doors from staying open; contact service if force is insufficient or excessive.

Maintenance

IMPORTANT: disconnect the cooler from wall outlet before you perform any maintenance or cleaning task.

Always disconnect the cooler from the power outlet before performing maintenance or cleaning.

It is preferable to perform cleaning and maintenance tasks using safety work gloves.

Use safety work gloves when performing cleaning and maintenance tasks.

GENERAL CLEANING

Clean regularly with mild soap and water; avoid abrasive products and sharp points.

CONDENSER CLEANING

Clean the condenser monthly or as needed by removing the front grill.

Condenser must be cleaned once per month or when required to prevent dirt from reducing cooling system efficiency.

Clean the condenser monthly or when necessary to maintain cooling efficiency.

To clean condenser, it is necessary to remove the cooler's front grill.

Removal of the front grill is required for condenser cleaning.

Remove dust, lint and trash with soft bristle brush or broom.

Use a soft brush or broom to remove dust, lint, and trash from the condenser.

Do not use sharp pointed objects to remove excessive grime, use brush if required.

Avoid sharp objects for grime removal; use a brush instead.

IMPORTANT: do not use solvent or abrasive products for cleaning as they may damage surface finishing.

Do not use solvents or abrasive products for cleaning to avoid surface damage.

EVAPORATOR DEICING

Cooler has an automatic evaporator deicing system; report ice formation or poor cooling.

TECHNICAL MAINTENANCE

Procedures for major maintenance and repairs by authorized technicians.

If your cooler requires major maintenance due to refrigeration, electric or lighting system failure, please contact the Customer Service Center.

Contact Customer Service for major maintenance related to refrigeration, electric, or lighting systems.

All repairs must be performed by an authorized technician.

All repairs must be conducted by an authorized technician to avoid damage or voiding warranty.

Request and make sure original spare parts are used with the same characteristics to guarantee the cooler's optimal operation.

Use only original spare parts with matching characteristics for optimal cooler operation.

Before calling the Customer Service Center, check the Troubleshooting Guides included in this manual.

Consult the Troubleshooting Guides before contacting Customer Service.

Troubleshooting

Cooler vibrates and/or makes noises.

Check leveling, remove obstructions, adjust leveling legs, and tighten loose parts.

Lighting turns off.

Lighting may turn off in energy saving mode; operation is normal.

Equipment works continuously for long periods of time.

Equipment working continuously may be due to dirty condenser coil or frost.

Compressor does not start, makes buzzing noises or stops due to thermal protector.

Check voltage, fan rotation, condenser cleanliness, and air flow.

Cooler inside temperature is too high or does not cool product.

Check connection time, condenser cleanliness, evaporator frost, door seals, and product load.

Temperature inside cooler is too low and freezes product.

Ensure product is not too close to the evaporator; arrange for adequate airflow.

Parts Breakdown

General Assembly

Exploded view of the general assembly with numbered parts.

Evaporator Assembly

Exploded view of the evaporator assembly with numbered parts.

Condenser Assembly

Exploded view of the condenser assembly with numbered parts.

Door Assembly

Exploded view of the door assembly with numbered parts.

Electrical Schematics

Notes

Warranty Registration

Related product manuals