MAINTENANCE & TROUBLESHOOTING TIPS
Keep your probes and thermocouples clean.
When the icon appears in the upper left corner of the display, it’s time to replace the
eight “AA” batteries that power the instrument (although measurements will remain valid
for several hours after the low-battery indicator first appears). Replacing the batteries
requires removing the two screws that hold the battery compartment cover in place, as
explained in Step 1 of th
e Setup Instructions on p. 6. After inserting fresh batteries in the
correct orientation, replace the cover and tighten the screws to secure it.
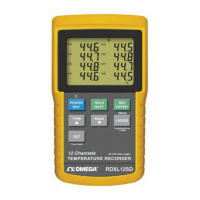
If the meter “freezes” (like a computer) and buttons become unresponsive, try resetting the
instrument by pushing the RESET button on its right side (callout 1-12 of Fig. 1) with the
end of a paper clip.
Remove t
he batteries when storing the instrument for an extended period of time.
Do not drop or disassemb
le the instrument or immerse it in water.
14
 Loading...