Pag.12
PREPARAZIONE-PREPARATION-PREPARATION-VORBEREITUNG
PREPARACION
I
GB
F
D
E
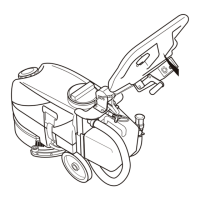
Tergipavimento: il tergi-
pavimento ha il compito
finale di completare
l’asciugatura ed è molto
importante controllarne la
corretta posizione: ab-
bassare il tergipavimento
in posizione di lavoro con
la leva M3.
Wiper blade: The floor
wiper serves to finish the
drying operation and it is
very important to ensure it
is in the correct position:
lower the wiper to its
working position by using
the lever M3.
Dispositif de séchage:
ce dispositif a pour objet
de compléter le séchage
du sol. Le côntrole de sa
position revêt une impor-
tance capitale. Actionnez
le levier M3 pour abais-
ser ce dispositif lors de
l’utilisation de la machine.
Bodenwischer: der
Bodenwischer hat den
abschließenden Zweck
die Trockung zu fördern,
es ist daher von größter
Bedeutung, seine kor-
rekte Einstellung zu
überprüfen: den Boden-
wischer in Position von
Hebel M3 ziehend.
Boquilla de secado:
este componente tiene la
objeto de acabar el seca-
do del piso y es muy im-
portante controlar que
esté correctamente mon-
tado. bajar la boquilla de
secado en posición de
trabajo tirando la palanca
M3.
Carica batterie:
L’allacciamento viene
effettuato con il cavo in
dotazione alla rete,
normalmente 220 V 50 Hz
; accertarsi che la
tensione corrisponda a
quella indicata sul carica
batterie stesso. Per
caricare le batterie
collegare il connettore
M10 proveniente
direttamente dalle batte-
rie della macchina, con il
connettore del carica
batterie M11;
successivamente,
collegare il carica batterie
alla presa di corrente. Il
carica batterie regolerà
automa-ticamente
l’amperaggio alle batterie
e si spegnerà a fine
carica.
Recharging the
batteries: Use the cable
supplied to con-nect to
the mains supply,
normally 220 V 50 Hz;
make sure that the supply
voltage is the same as
indicated on the battery
charger itself. To charge
the batteries connect the
connector M10, which
comes directly from the
battery compartment, to
the battery charger con-
nector M11; then connect
the battery charger to the
power net. The charger
will automatically regulate
the charging cur-rent and
will turn itself off when the
batteries are recharged.
Chargeur de batteries :
Utilisez le câble de
branchement sur le
secteur (220 V 50 Hz
généralement). Con-
trôlez le voltage qui doit
correspondre aux indica-
tions qui figurent sur le
chargeur de batteries.
Pour charger les bat-
teries, branchez le con-
necteur M10 qui sort des
batteries de la machine,
sur le connecteur du
chargeur de batteries
M11. puis branchez le
chargeur de batterie à la
prise de courant..Le
chargeur de batteries se
chargera du réglage
automatique de
l’ampérage pour les
batteries et s’éteindra une
fois que celles-ci seront
chargées.
Aufladung der
Batterien: Der anschluß
an das Netzwerk,
normalerweise 220 V 50
Hz, hat mit dem eigens
mitgelieferten Kabel zu
geschehen; sich
vergewissern, daß die
Spannung dem auf dem
Batterielader selbst ver-
zeichneten Wert ent-
spricht. Um die Batterien
aufzuladen den direkt von
den Maschinebatterien
her stammenden
Anschlußstecker M10 mit
dem Stecker des
Batterieladers verbinden;
anschließend über den
eigens aud dem
Batterielader
vorgesehenen Druck-
knopf Strom geben M11.
verbinden Sie dann das
Ladegerät an der
Steckdose.automatisch
regeln und sich am Ende
der Aufladung selbsstätig
abstellen.
Cargar baterías: La
conexión se logra
mediante el cable de red
que suele ser de 220 V
50 Hz: verificar que la
tensión corresponda a la
que estáindicada sobre el
cargador. Para efectuar la
carga conectar el
empalme M10 que
proviene directamente de
las baterías de la
máquina, con el empalme
del cargador M11.
a continuación, conecte el
cargador a la toma de
corriente.automáticamen
te regulará el amperaje de
las baterías hasta apa-
garse al final de la carga.
Serbatoio di recupero: Il
serbatoio di recupero vie-
ne vuotato (preferibilmen-
te ad ogni fine lavoro) in
modo da non lasciare de-
cantare lo sporco; a tale
scopo togliere il tappo del
tubo di scarico M2, che è
semplicemente mantenu-
to in posizione di lavoro da
una molletta di fermo, ed
immetterlo in un pozzetto
perdente che rispetti i
canoni di protezione
ambientali dettati dalla
legge nel paese di utilizzo.
Oppure svuotare il
serbatoio e pulirlo con
l’aiuto del tappo M0.
Waste tank: The waste
tank should be emptied
(preferably after each
use) so as not to let the dirt
settle; to do this, remove
the cap covering the drain
tube M2 which is held in
place by a retaining
spring, and put in a posi-
tion so that it drains.
Always abide by the
environmental regula-
tions of the country where
the machine is used.
Or empty the tank and
clean it with the help of the
cap M0.
Réservoir de récupéra-
tion: il doit etrê vidé (de
préférence à la fin du tra-
vail) pour éviter la décan-
tation des salissures.
Pour ce faire, enlevez le
bouchon du tuyau d’éva-
cuation M2 qu’un petit
ressort bloque en cours
d’utilisation. Introduisez
le tuyau dans un puisard
tout en respectant les
normes sur l’environ-
nement et les lois du pays
où la machine est utilisée.
Ou vider le réservoir et
nettoyer avec l'aide du
bouchon M0.
Rückgewinnungs-
speicher: der Rück-
gewinnungsspeicher wird
(vorzugsweise am Ende
jeder Arbeit) so geleert,
daß er keine Schmutzteile
absetzen läß; zu diesem
Zweck den durch eine
einfache Befestigungs-
spange in der Arbeits-
stellung festgehaltenen
Stopfen des Ablassrohrs
M2 abheben und ihn in
einen Ablassschacht
einführen, der den von
den Gesetzen des
Gebrauchslandes vorge-
schriebenen Umwelt-
schutzricht-linien ent-
spricht.Oder den Behälter
leeren und ihn mit der
Hilfe des Pfropfens M0.
Depósito de recupera-
ción: vaciar el depósito
del agua sucia siempre al
final del trabajo,de forma
tal que no se deposite la
suciedad sobre el fondo.
Para efectuar el vaciado:
quitar el tapón del tubo de
descarga M2, que sólo
está sujetado en la
posición de trabajo por
una pinza y orientarlo a
sumidero de desagüe
conforme a las normas vi-
gentes en el país.
O bien vaciar el tanque y
limpiarlo con la ayuda del
tapón M0.
 Loading...