Excelitas Canada Inc.
2260 Argentia Road, Mississauga ON L5N 6H7
Tel: 1-905-821-2600
Toll Free: 1-800-668-8752
www.excelitas.com/omnicure
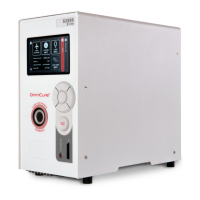
Installing the Light Guide
1. Remove the protective end caps from the light guide.
2. Insert the light guide into the light guide port on the front panel until
it sets with a positive click.
Note: When power to the unit is turned on and system is
initialized, the light ring will change colors indicating the following states:
Red: Light Guide not detected
Blue: Light Guide inserted – System warming up
Magenta: Light Guide inserted – Closed-Loop Feedback Inactive
Yellow: Light Guide inserted – Closed-Loop Feedback Active, Calibration close to expiration
Green: Light Guide inserted – Closed-Loop Feedback Active
Start up
1. With the OmniCure
®
S2000 Elite system not connected to power, install the lamp module (See Page 3).
2. Install the Optical band pass filter (See Page 4).
3. Plug the unit into a properly grounded AC outlet.
4. Turn on the Power switch at the back of the unit.
5. The light ring will light up when power is turned on to the system, followed by the screen initializing a few
seconds later. The lamp will not strike at startup on Demo systems by default (this can be changed in
the Settings – Default Lamp state).
Note: If the Default Lamp state setting has been modified to ON, the lamp will strike at start-up. Allow
the lamp to warm-up uninterrupted, DO NOT TURN SYSTEM OFF while the lamp is warming up!
Using the OmniCure S2000 Elite
1. Following the initialization period, the OmniCure S2000 Elite will display
3 main options on the Home screen: Information, Run and Settings.
2. Information and Settings can be accessed while the lamp is turned off.
3. To start running exposures, press the Lamp icon to strike the
lamp. Allow the lamp to warm-up (Excelitas recommends 20 minutes of
proper warm-up to ensure stable optical output). During the warm-up
period, the screen will indicate the minimum warm-up count-down.
Warning: UV light and elevated levels of visible light will be emitted from the end of the light guide.
S2000 Elite – Quick Start Guide
Warning – Refer to Safety Precautions Booklet 035-00636R prior to use
User Guide 035-00707R: https://www.excelitas.com/product/omnicure-s2000-Elite-spot-uv-curing-system