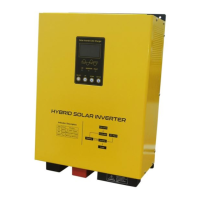
This document is a user manual for the ONE-SOLAR Hybrid Solar Inverter, models HSI-2KVA to HSI-6KVA, manufactured by FOSHAN TOP ONE POWER TECHNOLOGY CO., LTD.
Function Description
The ONE-SOLAR Hybrid Solar Inverter is designed to convert DC power from solar panels and batteries into AC power for various loads. It supports both MPPT (Maximum Power Point Tracking) and PWM (Pulse Width Modulation) charging modes, offering flexibility in solar panel configuration. The inverter can operate in different modes, including:
- Normal Mode: AC input prioritizes supplying the load and charging batteries; batteries supply loads without AC input.
- Saving Mode: AC input is advanced to supply the load and battery, with batteries supplying loads without AC input. This mode requires the load to be greater than 5% of the inverter capacity; otherwise, the machine will continuously start up and shut down.
- Battery Mode: Battery prioritizes supplying the load. When the battery power or voltage is low, it automatically switches to AC mains supply. Once the battery is fully charged, it transfers back to battery supply.
The inverter features an LCD panel for displaying operational data and settings, and includes various protection mechanisms to ensure safe and reliable operation.
Important Technical Specifications
The inverter models range from HSI-2KVA to HSI-6KVA, with varying battery voltages and capacities.
Input Specifications:
- Standard Battery Voltage: 12V/24V/48V (depending on model).
- DC Input Voltage:
- 10.5-15VDC@12V
- 21-30VDC@24V
- 42-60VDC@48V
- AC Input Voltage: 145-265VAC (for HSI-2KVA/3KVA), 170-265VAC (for HSI-4KVA/5KVA/6KVA).
- AC Input Frequency: 50Hz±5Hz.
- Solar Input Open Circuit Voltage: ≤175V (MPPT), Max. input voltage (V) varies for PWM.
- Solar Input Operating Voltage: ≤150V (MPPT).
Output Specifications:
- Effectiveness: ≥90%.
- Output Voltage (DC Battery Mode): 220VAC±3%.
- Output Frequency (DC Battery Mode): 50Hz±0.5Hz.
- Output Waveform: Pure sine wave.
- AVR Output Regulator: Output 220VAC±10%.
- AVR Output Frequency: Tracking the mains.
Charging Specifications:
- Charging Mode: MPPT/PWM (Optional).
- MPPT Charging Efficiency: ≥97.6%.
- Solar Panels Max Tracking Efficiency: ≤99%.
- Maximum Charging Current: 30A/40A/50A/60A (Optional for HSI-2KVA/3KVA), 30A/40A/50A/60A/80A (Optional for HSI-4KVA/5KVA/6KVA).
- AC Charging Current: 0-20A (Adjustable) or 0-35A (Adjustable).
- Charging Current (12V/24V/48V) for various battery types:
- GEL U.S.A.: 13.7V
- A.G.M.1: 13.4V
- A.G.M.2: 13.7V
- Sealed Lead Acid: 13.6V
- Gel European: 13.8V
- Open Lead Acid: 13.8V
- Calcium (Open): 13.6V
- De sulphation cycle: 14.5V
Protection Features:
- Battery Low Pressure Warning:
- 10.5-15VDC@12V
- 21-30VDC@24V
- 42-60VDC@48V
- Battery High Voltage Protection:
- 17VDC@12V
- 34VDC@24V
- 68VDC@48V
- Overload Protection: 110%~120% load causes bypass after 30 seconds, 160% load maintained for 300ms then shut down.
- High Temperature, Short Circuit Protection: Yes.
Physical Specifications:
- Product Size (LWH):
- HSI-2KVA: 410x282x150mm
- HSI-3KVA: 460x332x150mm
- HSI-4KVA/5KVA/6KVA: 490x332x170mm
- Net Weight (N.W):
- HSI-2KVA: 10kg
- HSI-3KVA: 14kg
- HSI-4KVA: 17kg
- HSI-5KVA: 18kg
- HSI-6KVA: 19kg
Environmental Conditions:
- Temperature: 0~60°C.
- Humidity: 0~95% (No condensation).
- Cooling System: Forced air cooling, intelligent speed regulation.
Usage Features
LCD Panel Display: The inverter features an LCD panel that serves as a man-machine interface, providing visual operation through an LCD screen. It displays real-time status, fault alarms, parameter settings, and other information. The display includes:
- Status Indicators: AC Normal, Inverter (Battery power supply), Fault/Warning.
- Detailed Display Information: Output voltage, battery capacity, load capacity, output frequency, solar power, solar current, solar voltage.
- Navigation Keys: For selection, opening, obtaining information, modifying system parameters.
- Turn On/Off: Press and hold for 3 seconds to power on/off.
- Up/Down Arrows: Page turning, switching options, setting values.
- Confirm: Press and hold for 5 seconds to enter the setting interface; short press to confirm or save settings.
Function Button (5 seconds press):
- P1 (Working Mode): Allows selection between Normal Mode, Saving Mode, and Battery Mode.
- P2 (Battery Type): Allows selection of various battery types (GEL U.S.A., A.G.M.1, A.G.M.2, Sealed Lead Acid, Gel European, Open Lead Acid, Calcium (Open), De sulphation cycle) with corresponding charging currents.
- P3 (Charging Current Adjust): Increases or reduces the charging current (Max. charging current is 35A, from 0% to 100%).
- P4 (Buzzer): Turns the buzzer on or off (requires inverter restart after setting).
Installation Requirements:
- Installation must be performed by personnel with electrical safety knowledge.
- The mounting wall must be sturdy and able to withstand the inverter's weight.
- The installation location must match the inverter's size.
- Do not install on flammable or heat-resistant materials.
- Install in a head-up orientation for easy LCD display inspection and maintenance.
- Avoid direct strong sunlight.
- Humidity should be between 0 and 95% (non-condensing).
- Ambient temperature should be between 0°C and 60°C.
- The inverter can be mounted on a plane tilted vertically or backwards.
Electrical Safety:
- Ensure proper grounding and correct distribution line/battery polarity before powering up.
- Battery protection device must have an overcurrent protection circuit breaker of the rated specification.
- Before moving or re-wiring, ensure the inverter is completely shut down, and input breaker/battery switch are disconnected to prevent electric shock.
- Install a four-pole overcurrent protection device with a rated value in the power distribution system to disconnect all input lines.
Battery Safety:
- Battery life shortens with increased ambient temperature; regular replacement ensures proper operation and backup time.
- Battery replacement and maintenance should only be performed by authorized personnel with battery expertise, using the same type, model, and quantity of batteries.
- Observe warnings to avoid electric shock and injury during battery replacement (e.g., no metal objects, use insulated tools, wear rubber shoes/gloves, disconnect load before removing battery terminals).
- Do not expose batteries to fire.
- Non-professionals should not open or damage batteries due to dangerous electrolyte.
- Do not short-circuit positive and negative terminals; over-current protection must be installed in the battery box.
Maintenance Features
Unpacking Inspection:
- Verify the package includes one inverter unit and the user manual.
- Check for damage during transportation; if damaged or missing parts, do not turn on and contact the carrier or dealer.
Use and Maintenance:
- Avoid using the inverter in environments with high/low temperature, high humidity, vibration, metallic dust, corrosive substances, salt, or flammable gases.
- For long-term storage (without battery), store in a dry environment at 0-55°C. Before turning on, warm to above 0°C for over 2 hours.
- Keep inlet and exhaust holes open to prevent overheating and extend component life.
- If the battery is not used for three consecutive months, it needs to be charged once.
Troubleshooting: The manual provides a table of common issues, possible reasons, and exclusion methods, such as:
- No AC Input: Check load, press pop-up again, or wait for AC input to return to normal.
- Connection Terminal Temperature Rise Abnormally: Retighten loose connections.
- Load Device Shuts Down Automatically: Check/recharge battery, reduce load, replace battery cables with sufficient cross-sectional area.
- Unable to Start: Check all cables, check battery voltage/specification.
- Power On Alarm: Check/recharge battery, reduce load.
- Buzzer Sounds 2 Times: Check if fan/cooling holes are blocked, reduce overload.
- Fan Stalls or Slows Down: Normal phenomenon (intelligent control), check the fan.
Protection and Cleaning:
- Heat Dissipation Check: Ensure vents are not clogged to improve heat dissipation.
- Cleaning: Turn off AC circuit breaker, DC switch, and wait for inverter to turn off. Wipe with dry, non-conductive items. Do not use water or cleaning agents (solvents/abrasives).
- Connection Check: Regularly inspect cables and switches for damage or abnormal heat; contact a professional for inspection if damage is found.
Disassembly:
- Power off the inverter.
- Remove all connected cables.
- Unscrew all cable connectors.
- Carefully remove the inverter.
Inverter Packaging:
- Whenever possible, use the original box and bag for packaging. If not available, use a box of the same size that can withstand the inverter's weight.
Inverter Processing:
- Do not dispose of obsolete inverters or accessories as domestic waste. Refer to regulations on waste electrical and electronic recycling for disposal methods.