2/16
Mounting with adapter
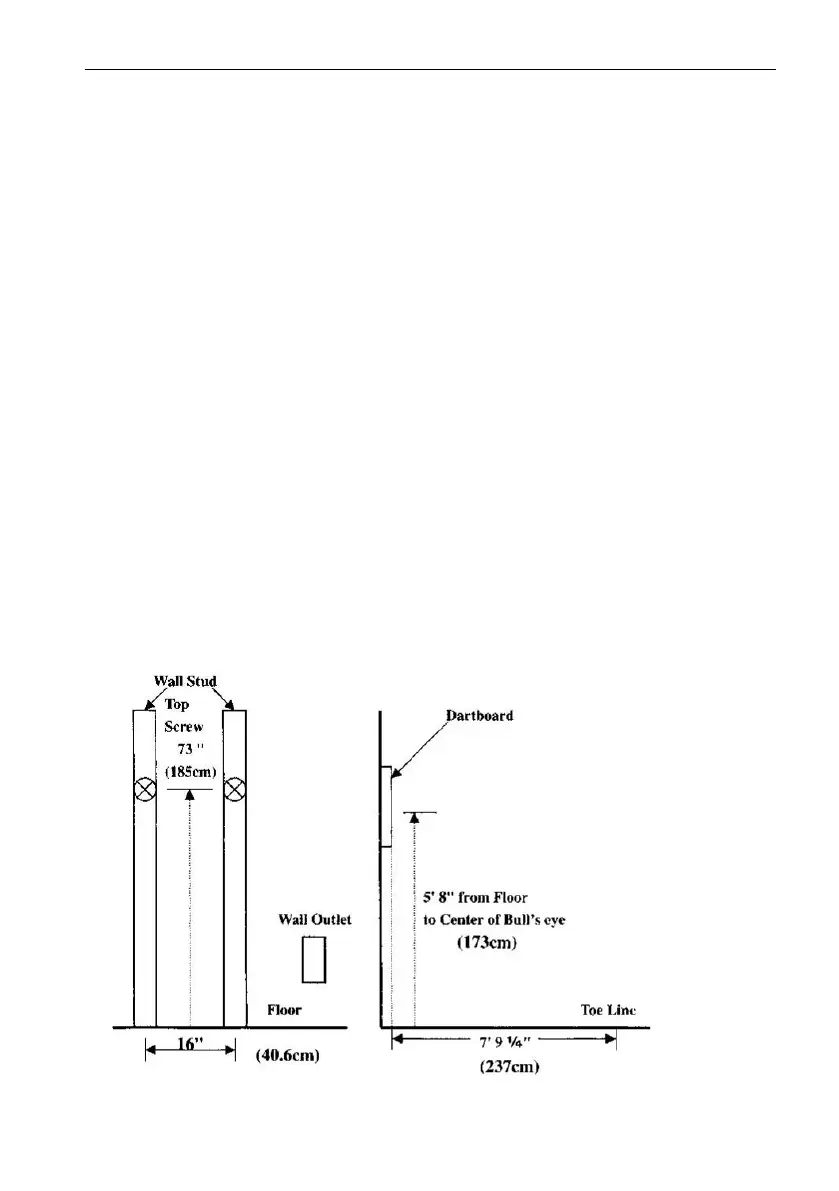
Choose a location to hang the dartboard where is about 10 feet (3.048 m) of open space in
front of the board. The “toe-line” should be 7’9 1/4” (2.37 M) from the face of the dartboard.
Since this dartboard is powered with an AC adapter, you could mount it close to an electronic
outlet for convenience.
There are 2 ways to mount the dartboard.
Option one: The mounting holes on this dartboard set are about 16” (40.5 cm) apart so it can
be mounted securely on wall studs in your home. Locate a wall stud and place a mar 80”
(203 cm) form the floor. Measure 16” from your first mark (staying level with the first mark)
and place the second mark on the wall, which should be over another wall stud (see diagram
below). The center of bullseye should be 5’8” (1.73 m) from the ground.
Insert 2 mounting screws in the center of the studs using the marks you made as guides. Be
sure the screws are level to ensure an accurate playing surface. If not mounting into studs,
be sure to use drywall anchors or other securing hardware appropriate to the wall you are
using.
Mount the dartboard on the wall by lining up the hang holes on the back with the screws (see
diagram below). It may be necessary to adjust the screws until the board fits snugly against
the wall. If you want to mount the dartboard even more securely to the wall, you can
fasten 4 screws through the holes located in the catch ring area (the area outside the
scoring segments).
 Loading...