8User ManUal v1.6
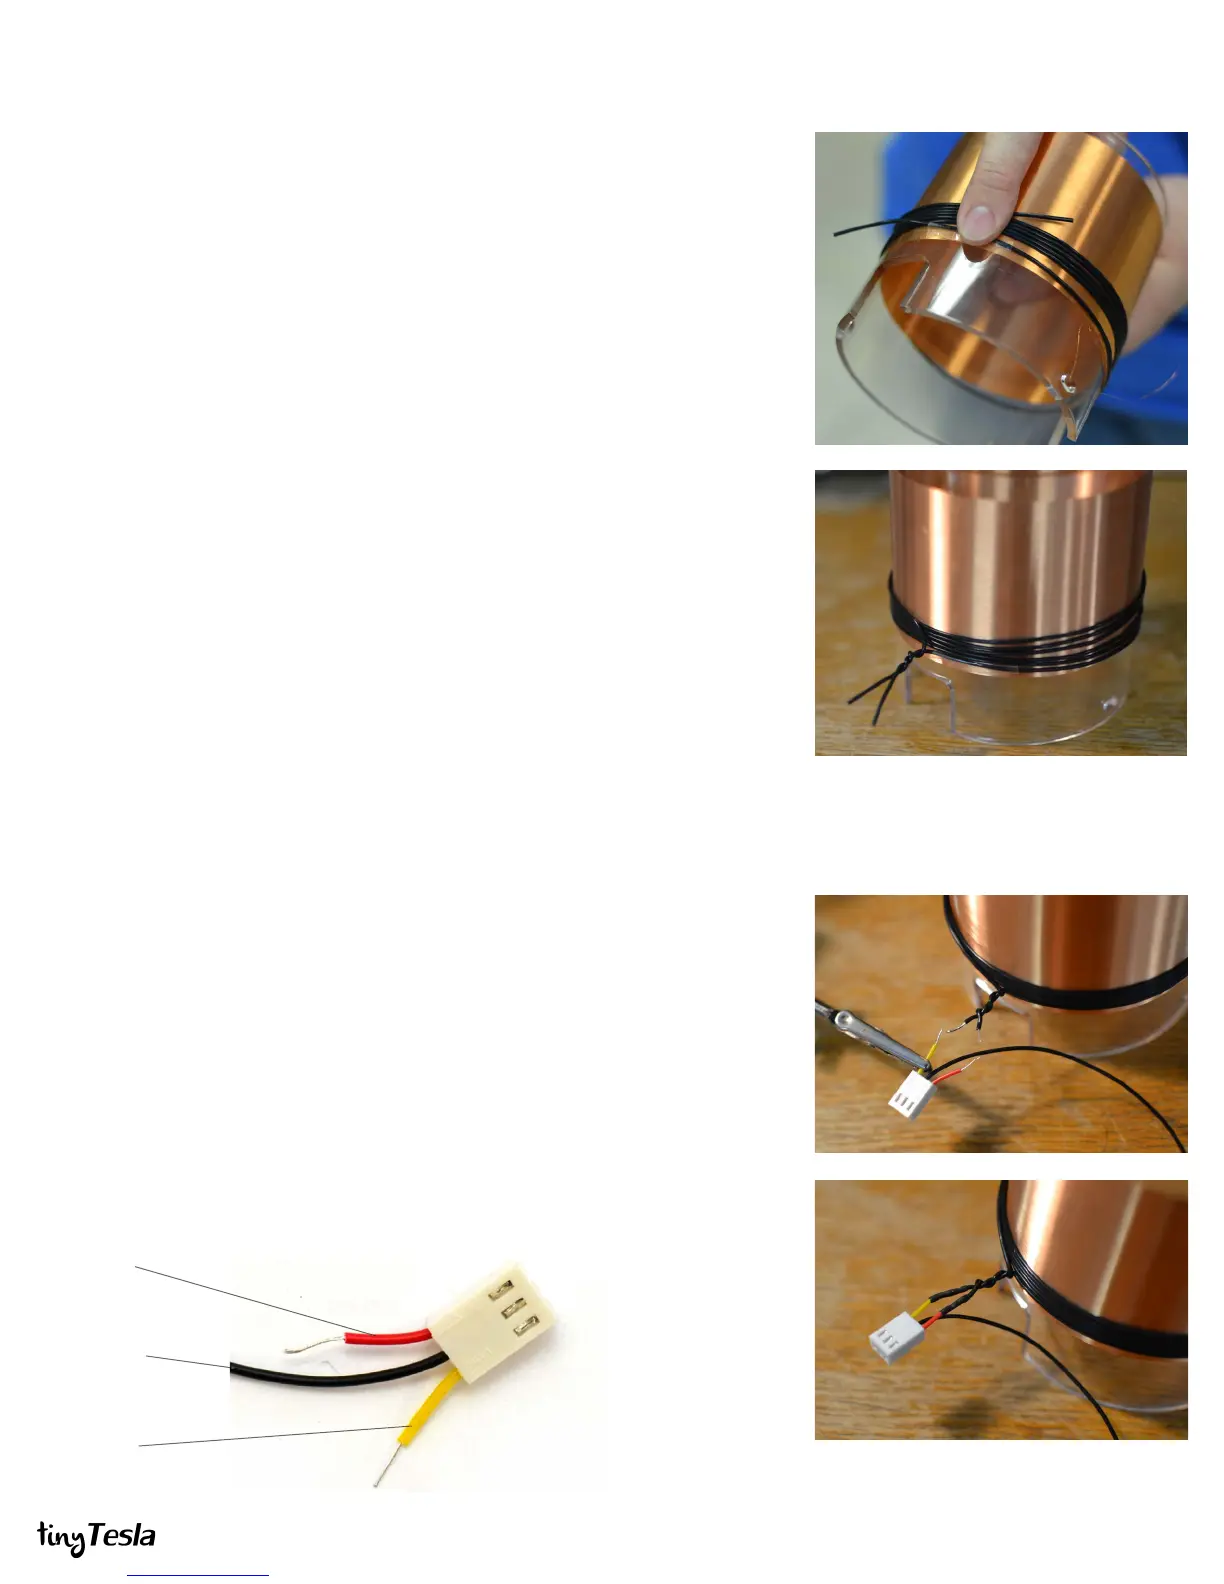
STEP 8: Wind the Primary
If you haven’t already, nish varnishing your secondary before you proceed.
The primary coil is 6 turns of wire that’s wound on top of the secondary turns, slightly
above the bottom of the secondary coil. We strongly recommend putting an additional
layer of electrical tape or kapton tape underneath the primary, on top of the secondary’s
varnish, to add to the resiliency of your coil.
A. Tape down the end of the primary to hold it in place. Wind 6 turns without
overlapping the wire.
B. Twist together the ends of the wire to hold the coil in place.
C. Tighten the twist with a pair of pliers to remove any slack in the windings.
If you coil the wire suciently tightly it will stay in place by itself. If you want it to be
slip-proof, use a small amount of hot glue or tape to hold it in place. Just remember that
if you need to add more varnish to your coil later, you will need to remove the primary!
A. Cut the red and yellow wires of your primary connector so that they are about
half an inch long. Using wire strippers, remove about a quarter inch of
insulation from the end. Leave the middle wire long.
B. Cut about half an inch o the end of the primary wire to shorten it, and strip
about a quarter inch of insulation. When you are nished with mounting the
primary connector, it should reach just into the notch in the secondary tube to
the connector on the main board. Excess wire is more likely to be arced to. Be
careful not to strain the wire, however.
C. Solder the wires together.
D. Insulate the connection with some electrical tape.
Primary
Antenna
Primary
STEP 9: Attach the Primary Connector
 Loading...