System Connections
• Do not plug in the power cord until all connections have been made.
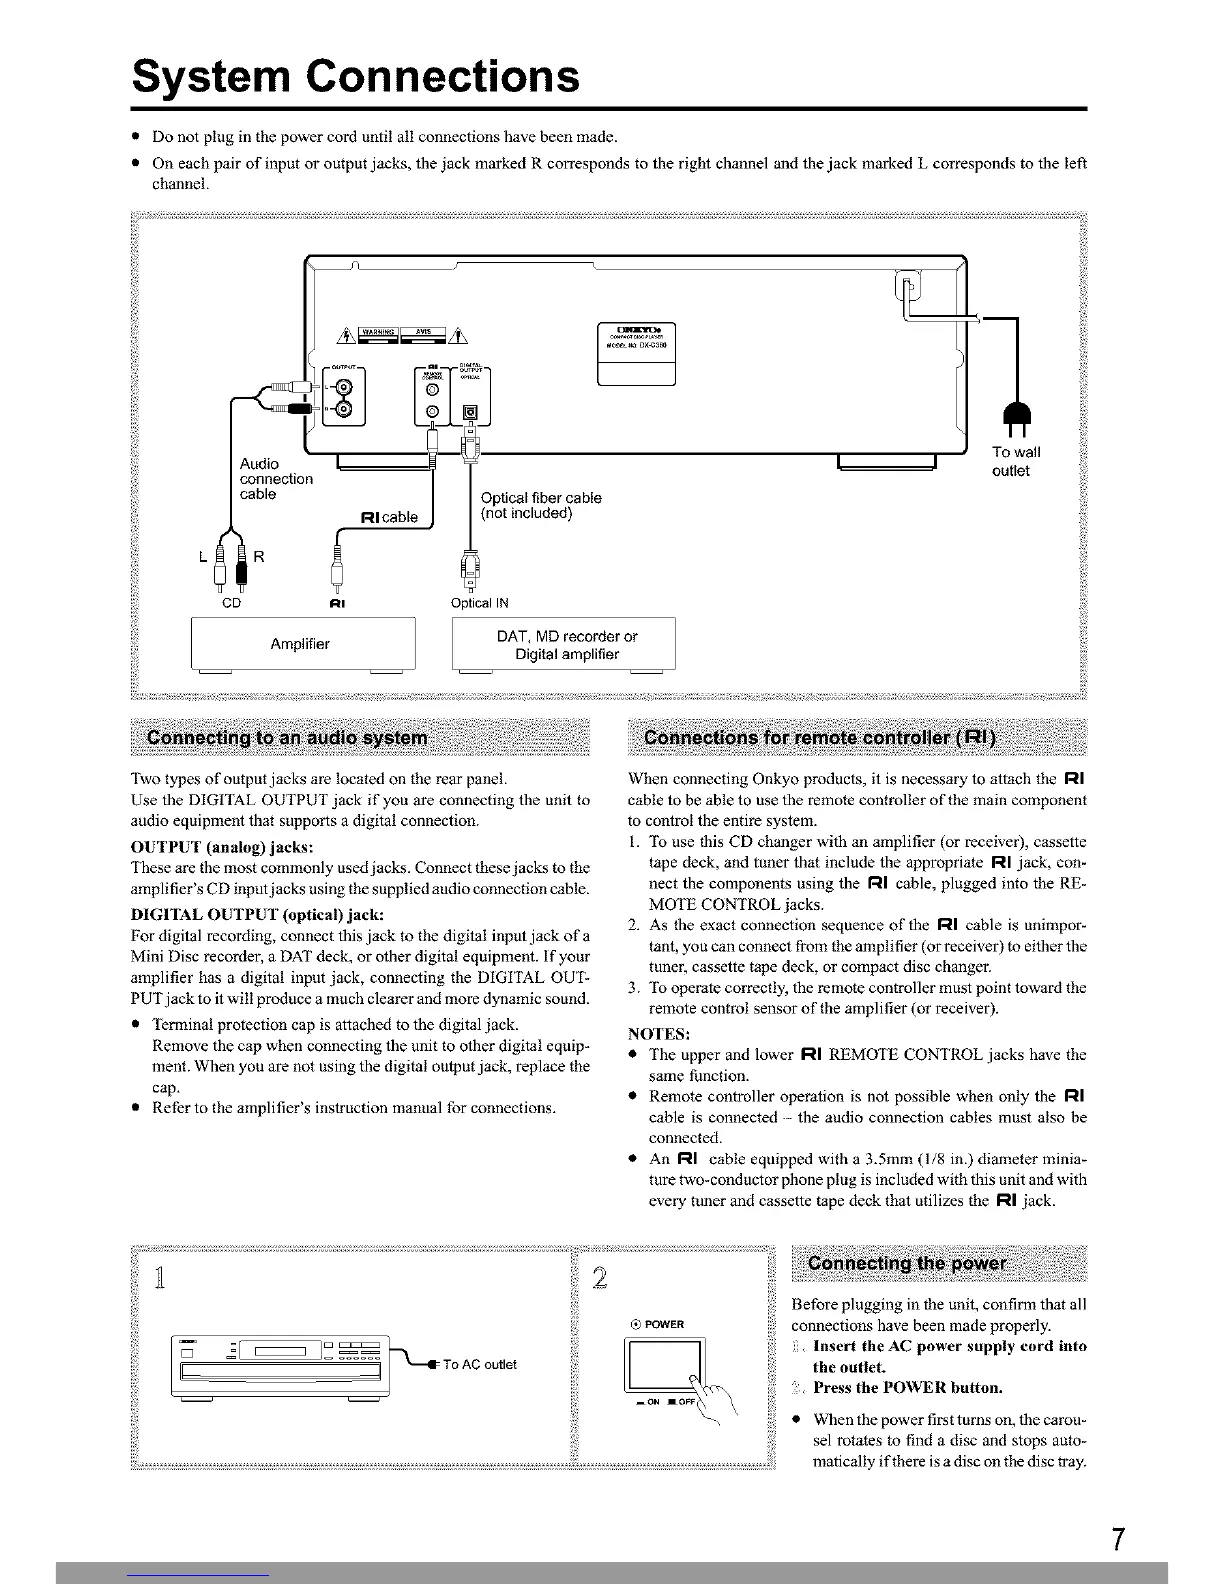
• On each pair of input or output jacks, the jack marked R corresponds to the right channel and the jack marked L corresponds to the left
channel.
ii!;i!x_;i_;_¸¸¸ _i)i!i!i
ii_i!!i
Audio I
connection
cable
Optical fiber cable
not included)
I--'-ilcable
CD RI Optical IN
7
DAT, MD recorder or /
Amplifier
Digital amplifier
/
To wall
I I outlet
iiili
Two types of output jacks are located on the rear panel.
Use the DIGITAL OUTPUT jack if you are connecting the unit to
audio equipment that supports a digital connection.
OUTPUT (analog) jaeks:
These are the most commonly used jacks. Connect these jacks to the
amplifier's CD input jacks using the supplied audio connection cable.
DIGITAL OUTPUT (optical) jack:
For digital recording, connect this jack to the digital thput jack of a
Mini Disc recorder, a DAT deck, or other digital equipment, if your
amplifier has a digital input jack, connecting the DIGITAL OUT-
PUT jack to it will produce a much clearer and more dynamic sound.
• Terminalprotectioncapisattachedtothedigitaljack.
Remove the cap when connecting the unit to other digital equip-
ment. When you are not using the digital ouiput jack, replace the
cap.
• Refer to the amplifier's instruction manual for connections.
When connecting Onkyo products, it is necessary to attach the RI
cable to be able to use the remote controller of the main component
to control the entire system.
I. To use this CD changer with an amplifier (or receiver), cassette
tape deck, and tuner that include the appropriate RI jack, con-
nect the components using the RI cable, plugged into the RE-
MOTE CONTROL jacks.
2. As the exact connection sequence of the R! cable is unimpor-
tam, you can connect from the amplifier (or receiver) to either the
tuner, cassette tape deck, or compact disc changer.
3. To operate correctly, the remote controller must point toward the
remote control sensor of the amplifier (or receiver).
NOTES:
• The upper and lower RI REMOTE CONTROL jacks have the
same function.
• Remote controller operation is not possible when only the RI
cable is connected -- the audio connection cables must also be
connected.
• An RI cable equipped with a 3.5ram (1/8 in.) diameter minia-
ture two-conductor phone plug is included with this unit and with
every tuner and cassette tape deck that utilizes the RI jack.
1 To AC outlet
POWER
Before plugging in the unit, confirm that all
connections have been made properly.
Insert theAC power supply cord into
the outlet.
.... Press the POWER button.
• When the power first turns on, the carou-
sel rotates to find a disc and stops auto-
matically if there is a disc on the disc tray.
7
This Manual: http://www.manuallib.com/onkyo/dx-c380-compact-disc-changer-manual.html
 Loading...