EasyManua.ls Logo

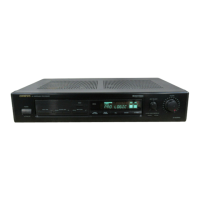
Onkyo ES-600PRO

Onkyo ES-600PRO
12 pages
To Next Page IconTo Next Page
To Previous Page IconTo Previous Page
Loading...
System
connections
ee
ee
General
USA
&
Canadtan
models
Do
not
plug
in
the
power
cord
until
all
connections
have
been
made.
Atso
be
sure
to
perform
left
and
right
channel
connections
properly.
@
Standard
Connection
Procedures
AC
OMTLETS
Worldwide
models
only
ES-600PRO
\
*
AD
pede
UNSWITE
DT
GA
CK
Nita
\
\
:
ONKYO.
I
n
PE
on
rt
*
(4.
SURROUND
BRS
CE
SSOF
|
~
©
7
MODEL
NO
ES-6BO0PRO
-
kK
a
on,
.
RATING
7
Lo
ocon
toon
LO
|
The
|
=
.
;
——
.
_
.
_|
ONEYO
CORPORATION
yg
a
f
C
_f
OM.
MAL
thd
\
oe
_~
C=
=
Na
_
eS
Nee
——
c
,
:
he.
ae
v
Agco
IMSS
iA?
ane
oe
cae
AC
POWER
SUPPLY
CORD
+
CENTER
SPEAKER
REAR
REAR
AMPLIFIER,
RECEIVER
etc
SPEAKER
SPEAKER
LEFT
RIGHT
@
Yo
connect
the
ES-600PRO
to
a
GRAPHIC
EQUALIZER:
AC
Outlet
(U.S.A.
and
Canadian
models)
®
UNSWITCHED:
This
outlet
is
not
switched
on
and
off
by
the
POWER
switch
on
the
front
panel.
Capacity
is
200
watts.
ES-600PRO
Speaker
Connections
(SPEAKERS)
1.
Connect
the
speakers
to
terminals.
2.
When
connecting
speakers,
proper
polarity
is
important.
Always
connect
the
(+)
terminal
(red)
on
this
equipment
to
the
(+)
terminal
on
the
speaker
and
the
(—)
terminal
(black)
on
this
equipment
to
the
(—)
termina!
on
the
speaker.
3.
Do
not
connect
a
single
speaker
in
parallel
to
the
right
and
left
channei
outputs.
4.
Use
speaker
cables
that
have
a
!ow
impedance
and
that
are
as
short
as
possible.
,
+
Attach
speaker
cables
to
the
rear
panel
speaker
terminals
with
care,
being
sure
that
connections
are
made
firmly
and
that
there
is
no
possibility
of
a
short
circuit
occurring,
Speaker
Cable
Connection
Lift
the
lever
and
insert
the
wire
When
the
wire
has
been
inserted
firmly
into
the
hole,
release
the
lever.
GRAPHIC
EQUALIZER
AMPLIFIER,
RECEIVER
etc.

Other manuals for Onkyo ES-600PRO

Related product manuals